Scheduled trigger
In the listing, click on the edit (pencil) icon next to the Scheduled type automation. The complete form will be displayed:
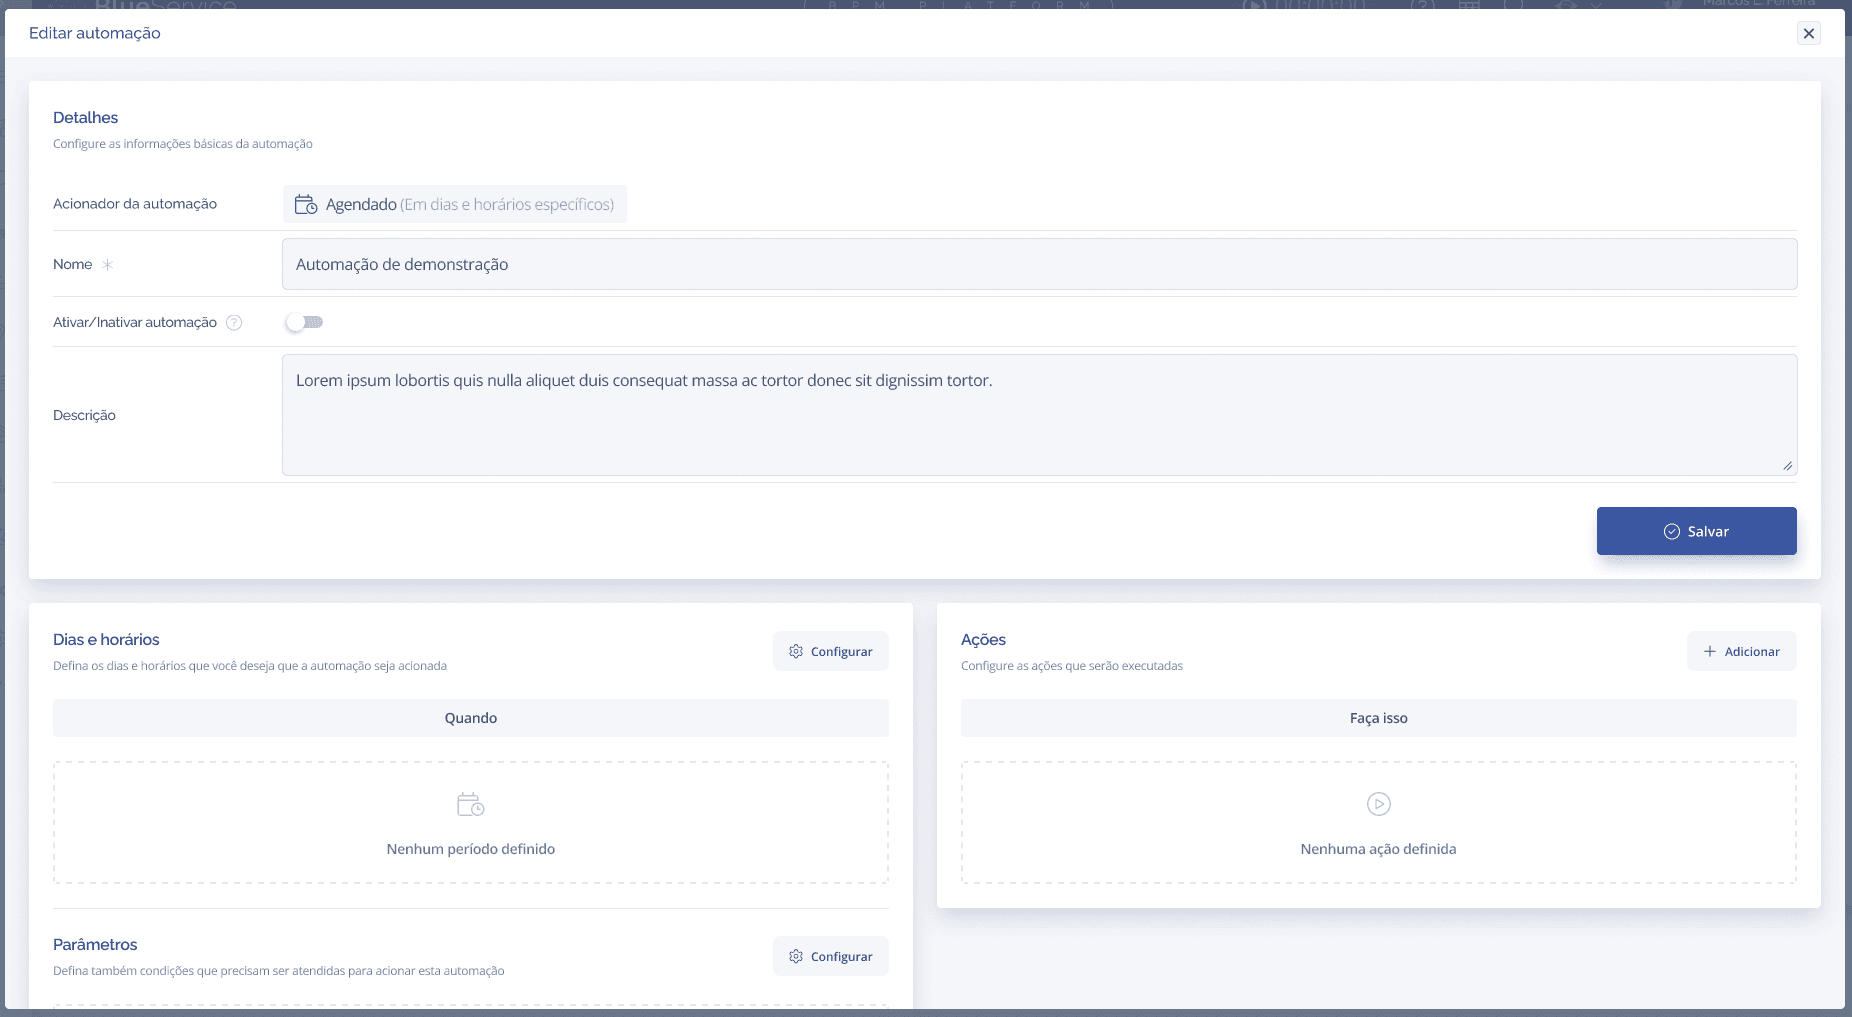
The form is composed of:
Automation Trigger: displays "Scheduled" — informational only.
Name*: required.
Activate/Deactivate automation: switch to active or inactive. Inactive by default.
Description: free text.
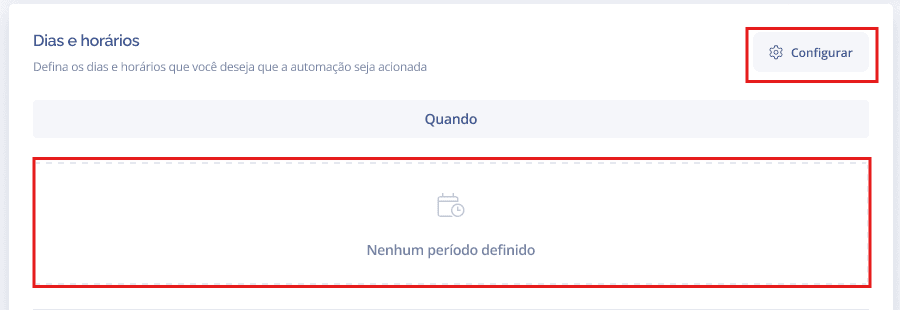
Days and times block: defines when the automation will be triggered.
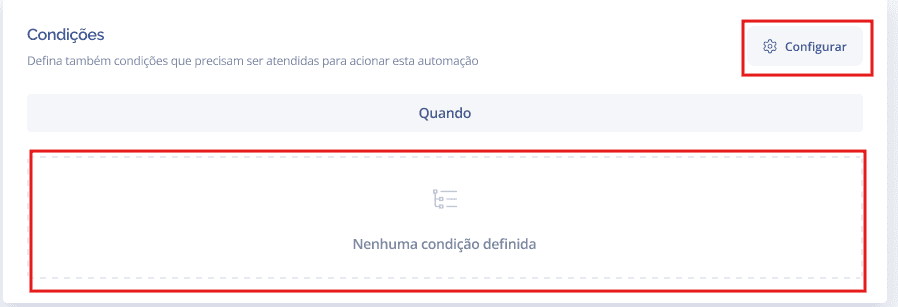
Parameters (Conditions) block: optional additional filters.
Actions block: what will be executed when the automation triggers.
Configuring Days and Times
In the Days and times block, click on the Configure button or click directly on the dashed area:
The configuration modal will be displayed:

Days*: select the days of the week (Monday to Sunday).
Times*: select the trigger times (available from 05:00 to 23:00).
Click on Save. The configured information will appear in the block:

Configuring Conditions (Parameters)
The Parameters block allows you to define additional conditions for the automation to be triggered — for example, only if the stage is X or the situation is Y. Click on Configure:
The conditions modal will be displayed:
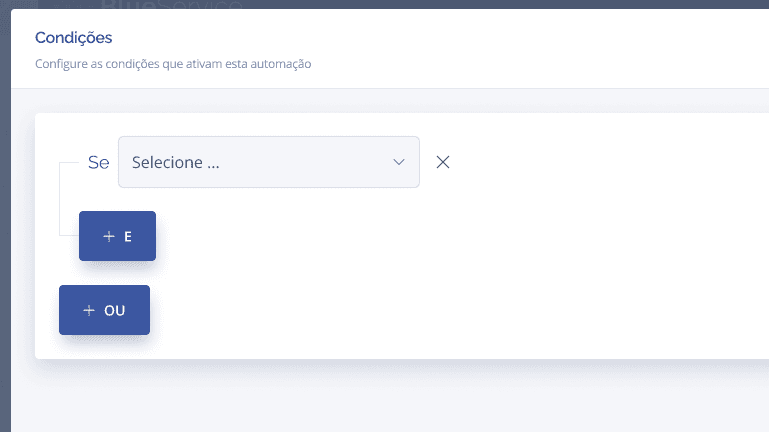
+ AND: adds a condition that must be true at the same time as the others.
+ OR: adds an alternative condition.
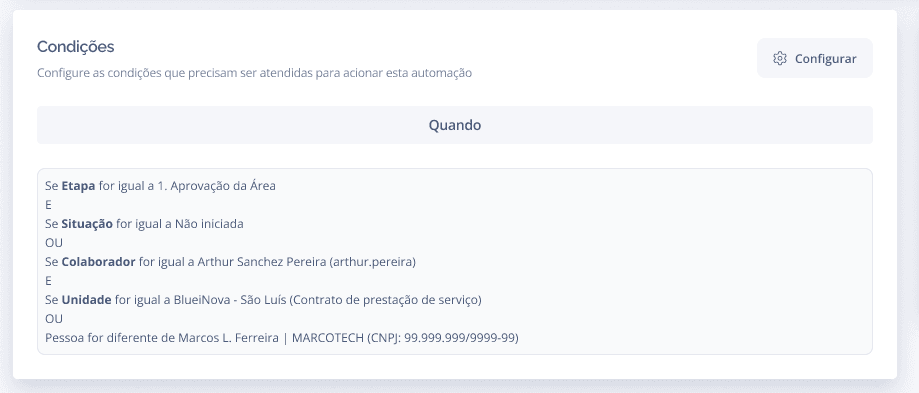
After saving, the configured conditions appear listed in the block:
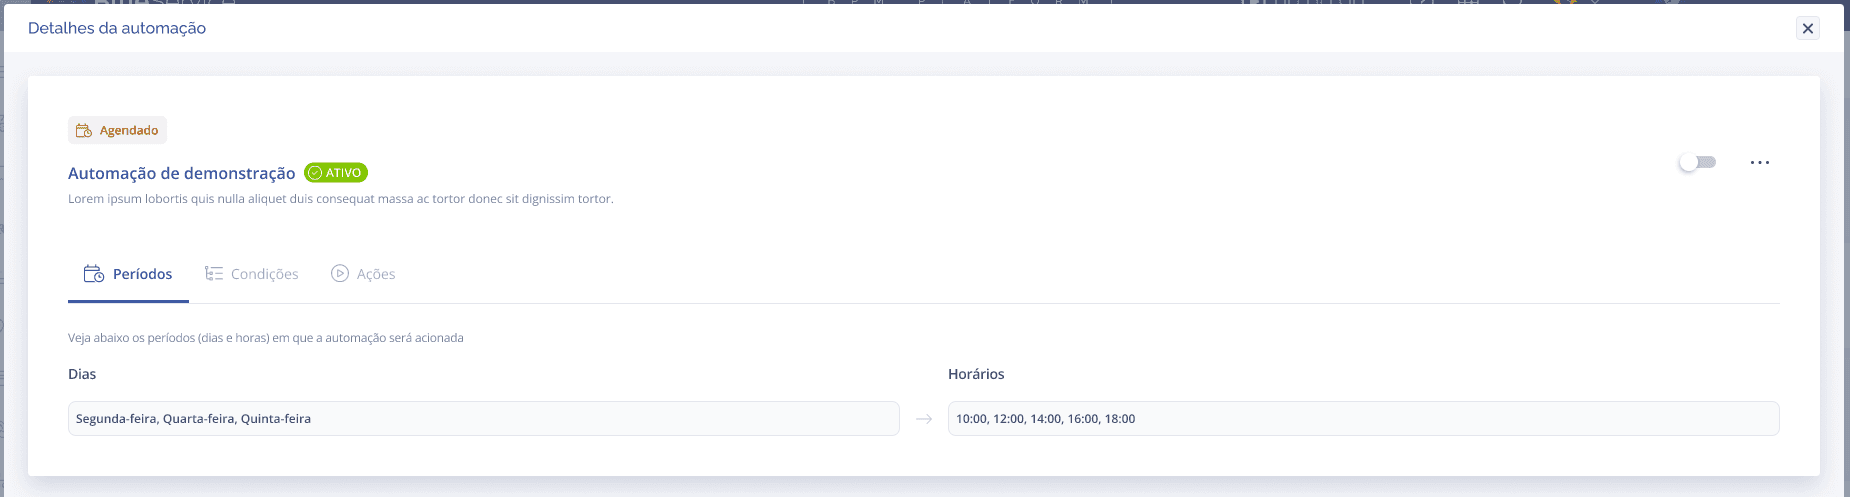
Viewing the Scheduled automation
Click on the view (👁) icon in the listing. The details panel displays 3 tabs: Periods, Conditions and Actions: