
Activity settings
In the Activity Settings area, you define how the Activities module works in your operation: workflows, stages, categories, permissions, triggers, document templates, and much more. To make navigating between these configurations easier, the screen now features a quick access menu instead of the cards that used to be at the top.
Accessing activity settings
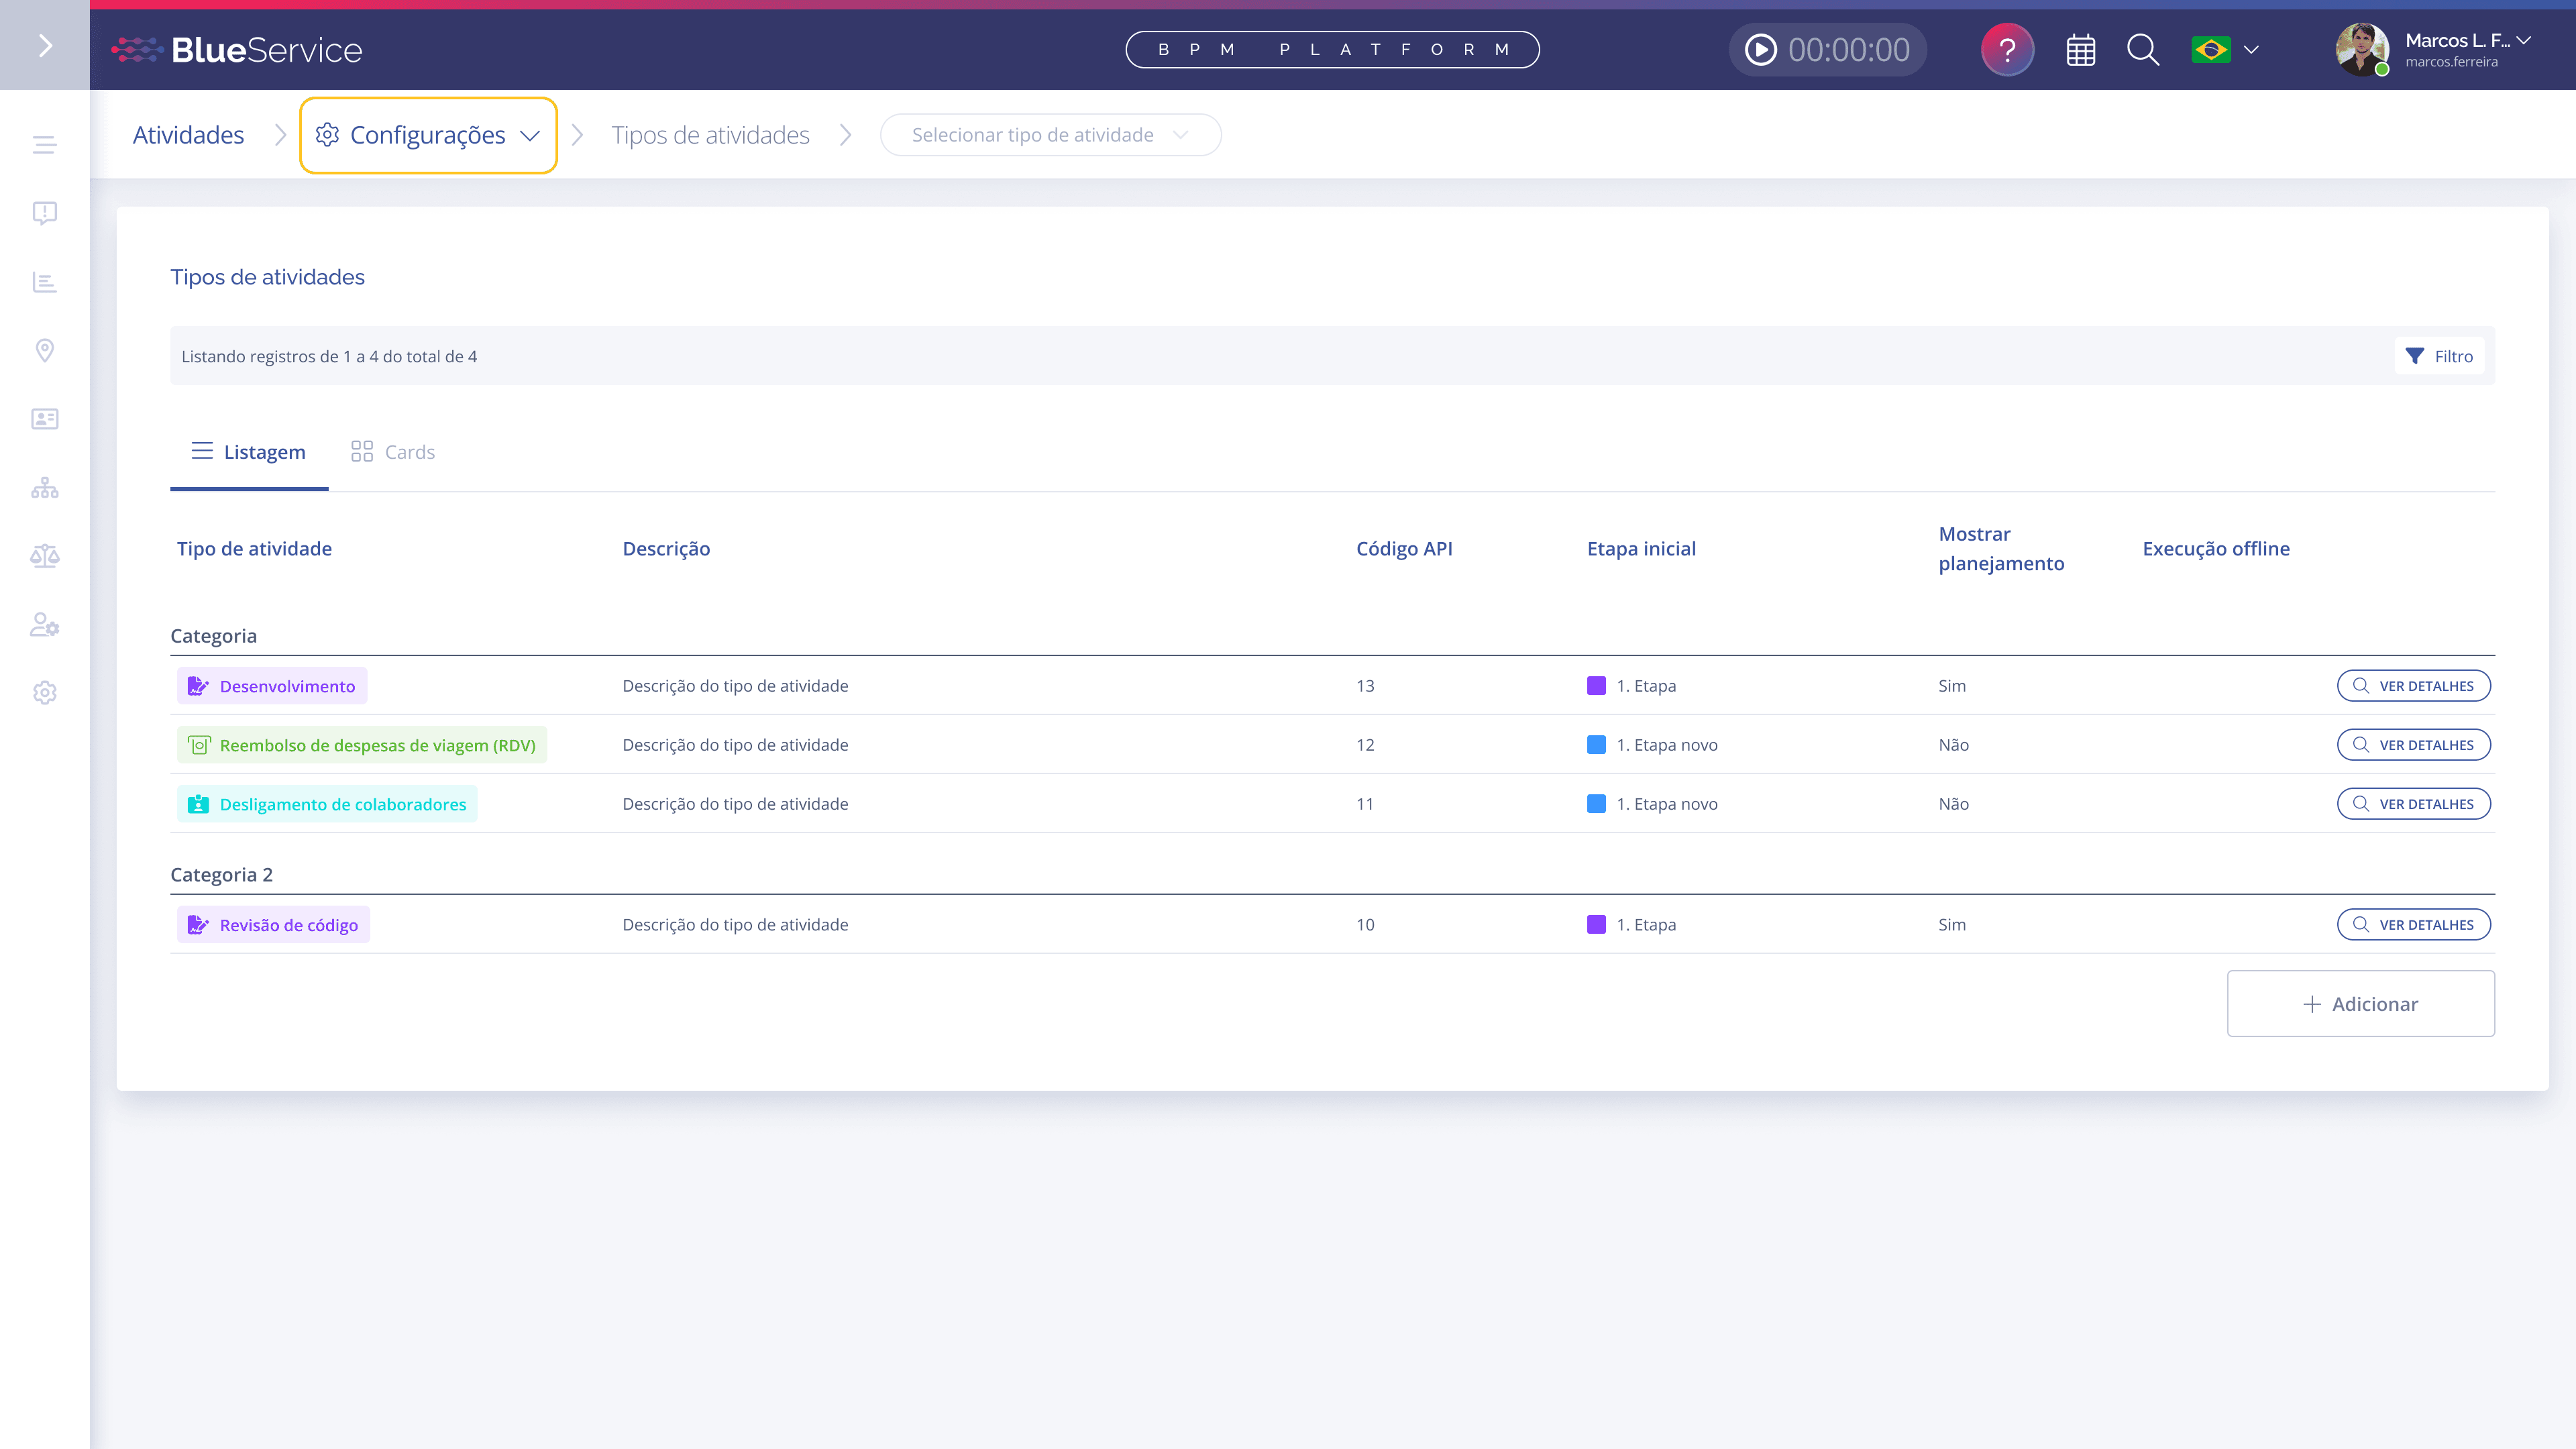
Open the main menu, select the Activities module, and click on Settings.
Navigating the Settings menu
Next to Activities, at the top of the screen, the Settings item is displayed with an icon, the name of the screen, and an arrow indicating it can be expanded. Click on it to open the menu with all available options, organized in four groups:

Workflow
Operational workflows
Stages
Activity type categories
Activity types
Restrictions
Assignee registration permissions
Access profile permissions
Resources
Document generator
Activity triggers
Activity templates
Extra settings
Activity priorities
Link types
Approval types
Time type
When you select an option, the menu closes automatically and you are redirected to the chosen screen — the behavior of each configuration remains the same as before.
Note: The cards that used to be at the top of the Settings screen no longer exist. All options remain available, now gathered in this menu, in the same order.
Activity type configurations
When you open a specific activity type under Activities > Settings > Activity types, you access the Activity Type Settings screen, where automations, fields, sub-activities, and other configurations of this type are concentrated.
Navigating the chips
Just below the activity type header (name, icon, color, and description) are the navigation chips. Each chip represents a setting; when you select it, the corresponding content is loaded and displayed on the same screen, without redirecting to another page.
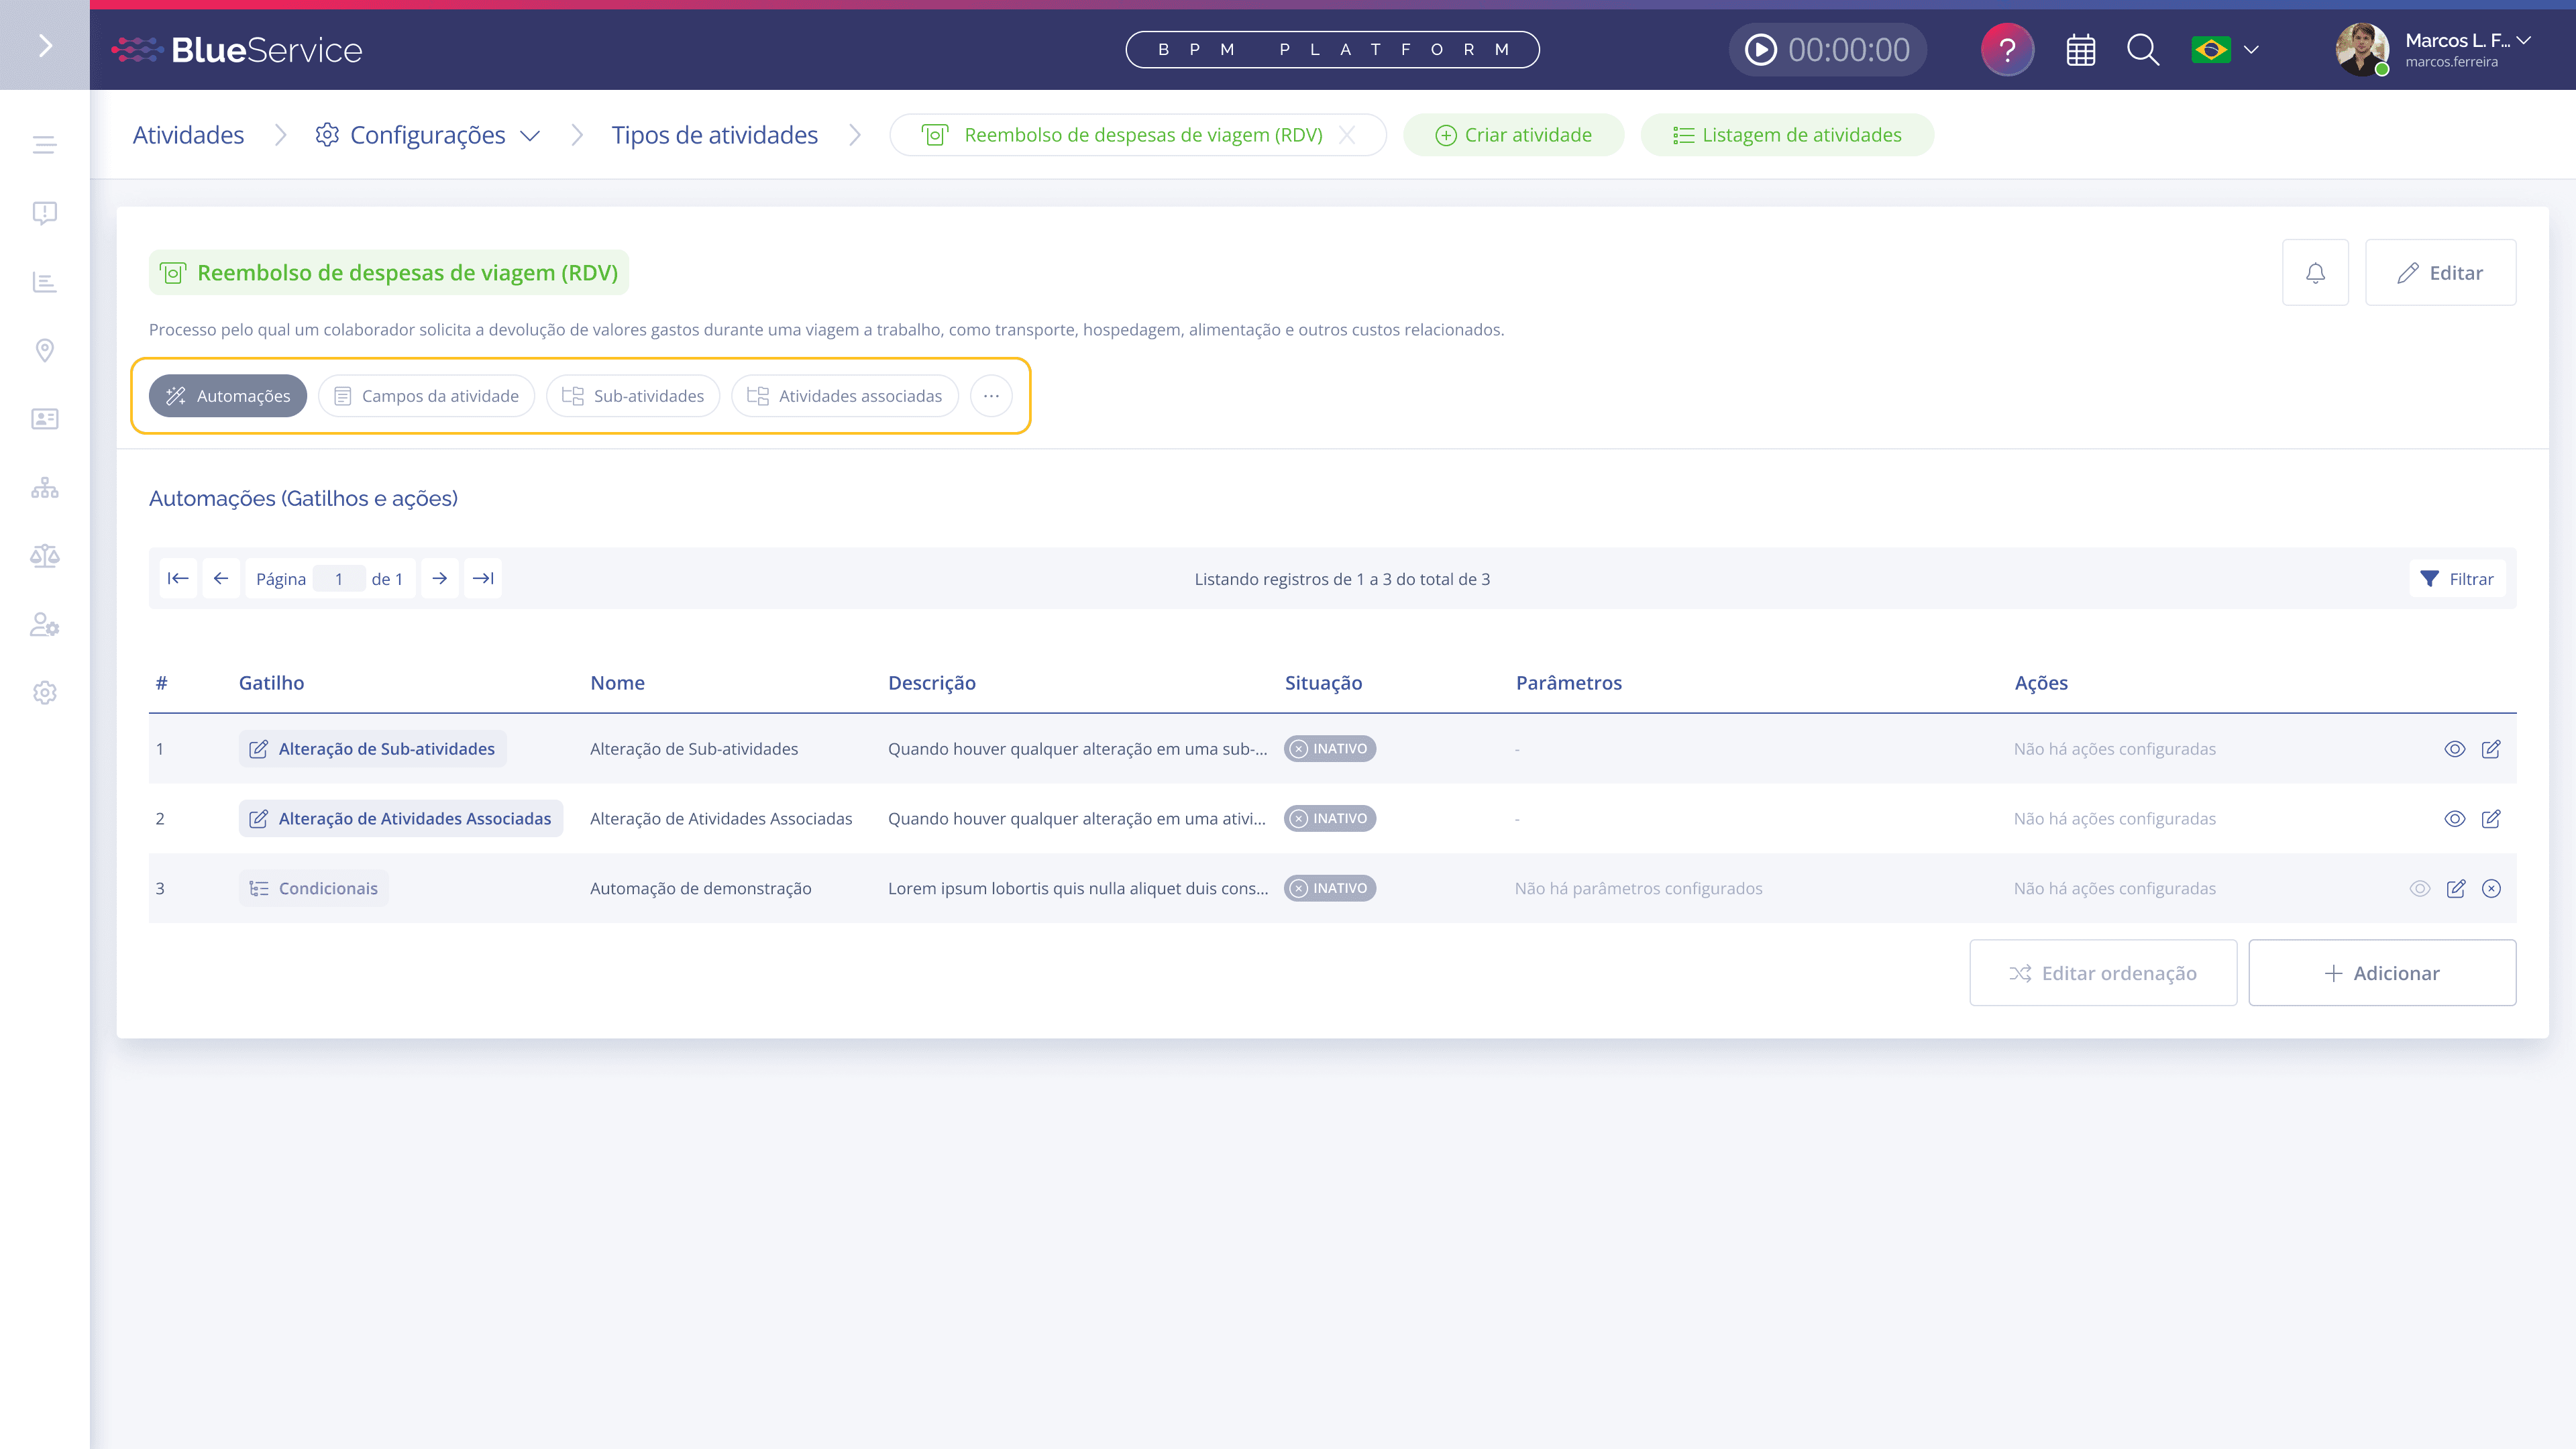
Main chips displayed:
Automations (Triggers and actions)
Activity fields
Sub-activities
Associated activities
Upon entering the screen, the configuration open by default is Automations (Triggers and actions). Only one chip is selected at a time, and the active chip receives visual highlight.
Contextual menu (more options)
The other activity type configurations, previously displayed as cards, are now gathered in the contextual menu, opened by the three-dot icon ("...") next to the chips:
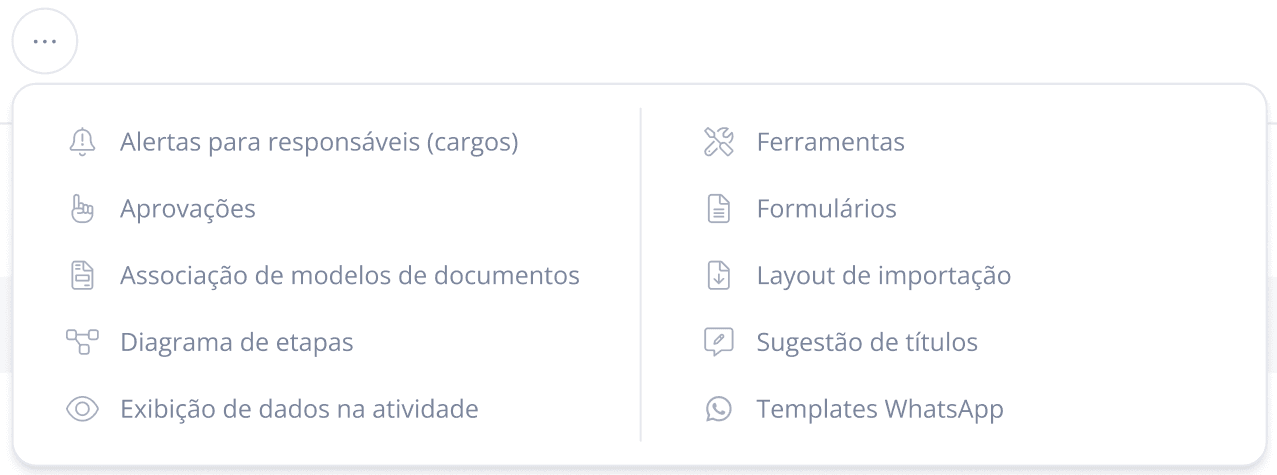
Alerts for assignees (roles)
Approvals
Association of document templates
Stage diagram
Data display in activity
Tools
Forms
Import layout
Title suggestions
WhatsApp Templates
When selecting an item from the menu, the corresponding content is displayed in the same way as when selecting a chip, directly below the header.
Quick actions: Alerts and Edit
Next to the name of the activity type, two buttons give quick access to the most used configurations: the bell icon (Alerts) and the pencil icon (Edit).
Activity alerts and progress
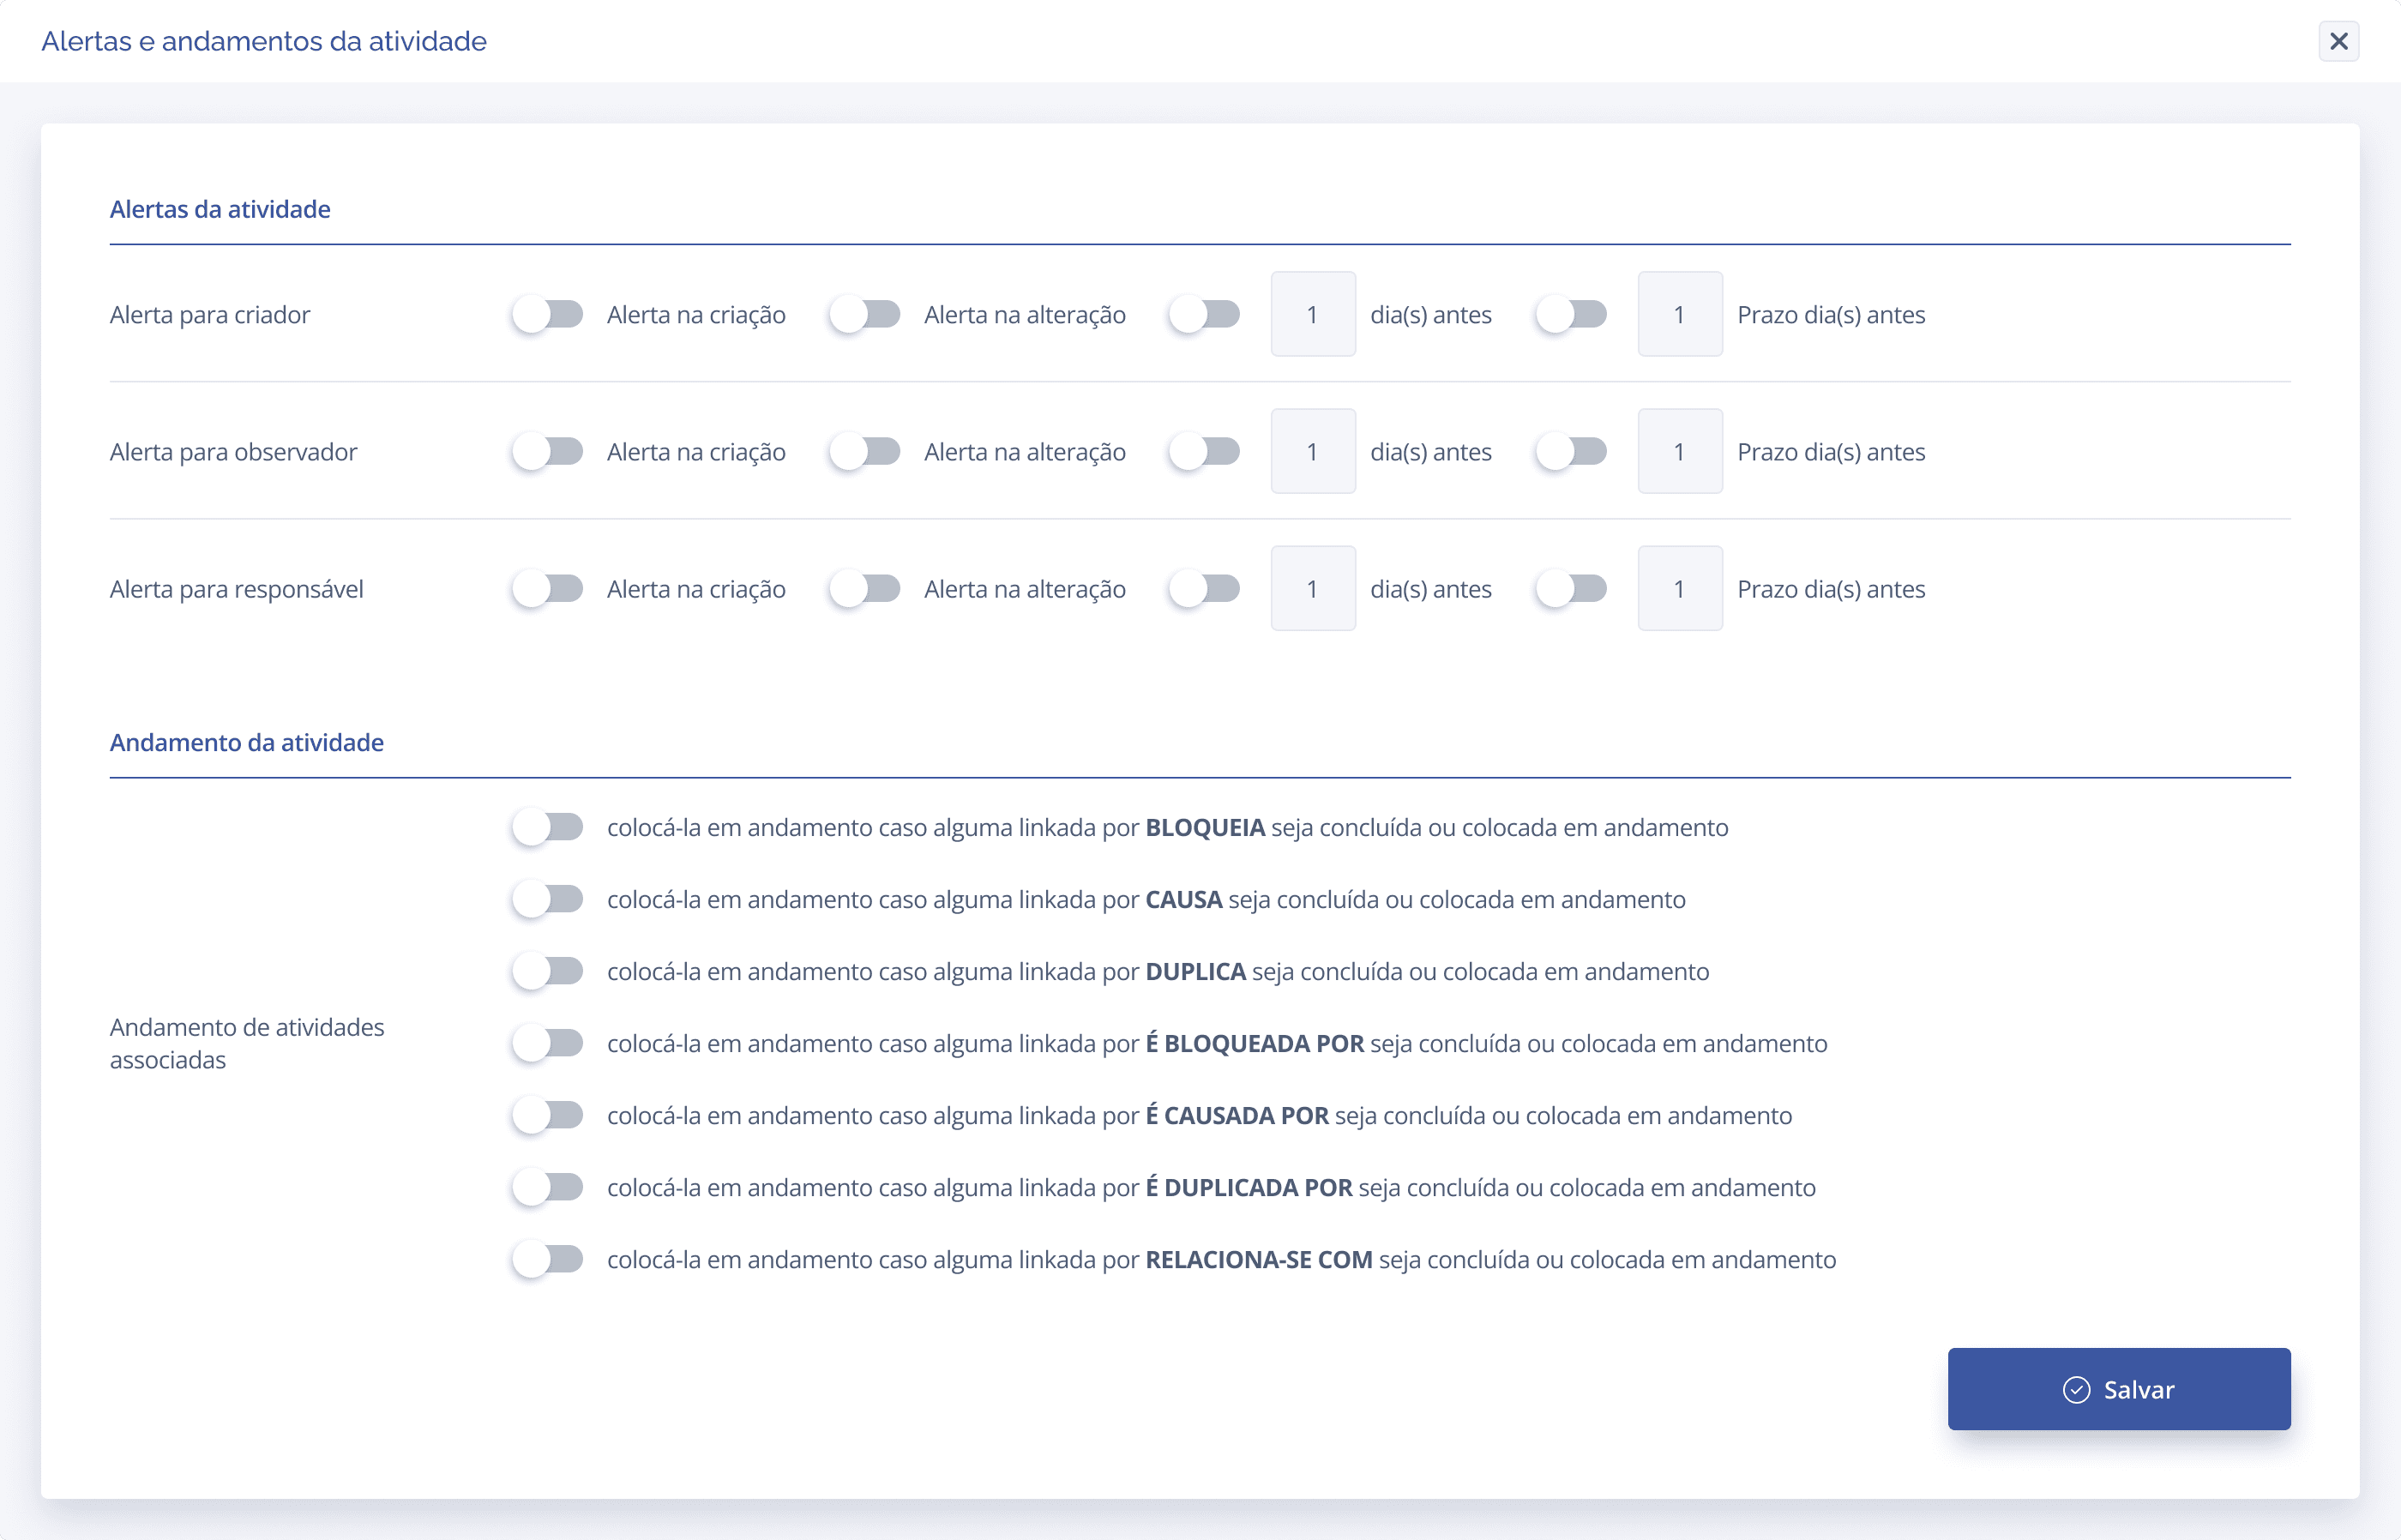
Click on the bell icon to open the Activity alerts and progress modal. In it, you configure:
Creation and due date change alerts for creator, observer, and assignee, with the deadline defined in days before the expiration date.
Automatic progress updates, which place the activity in progress (or complete it) when an associated activity — which blocks, causes, duplicates, is blocked by, is caused by, is duplicated by, or relates to it — is completed or put in progress.
Edit activity type
Click on the pencil icon to open the activity type editing modal, with:
Activity type details: name, category, and description.
Appearance: icon, color, and preview of how the activity type appears on the platform.
General configurations: initial stage, show in planning, automatic cancellation, and status change.
Fixed field configuration: quick access to the Field Association screen.
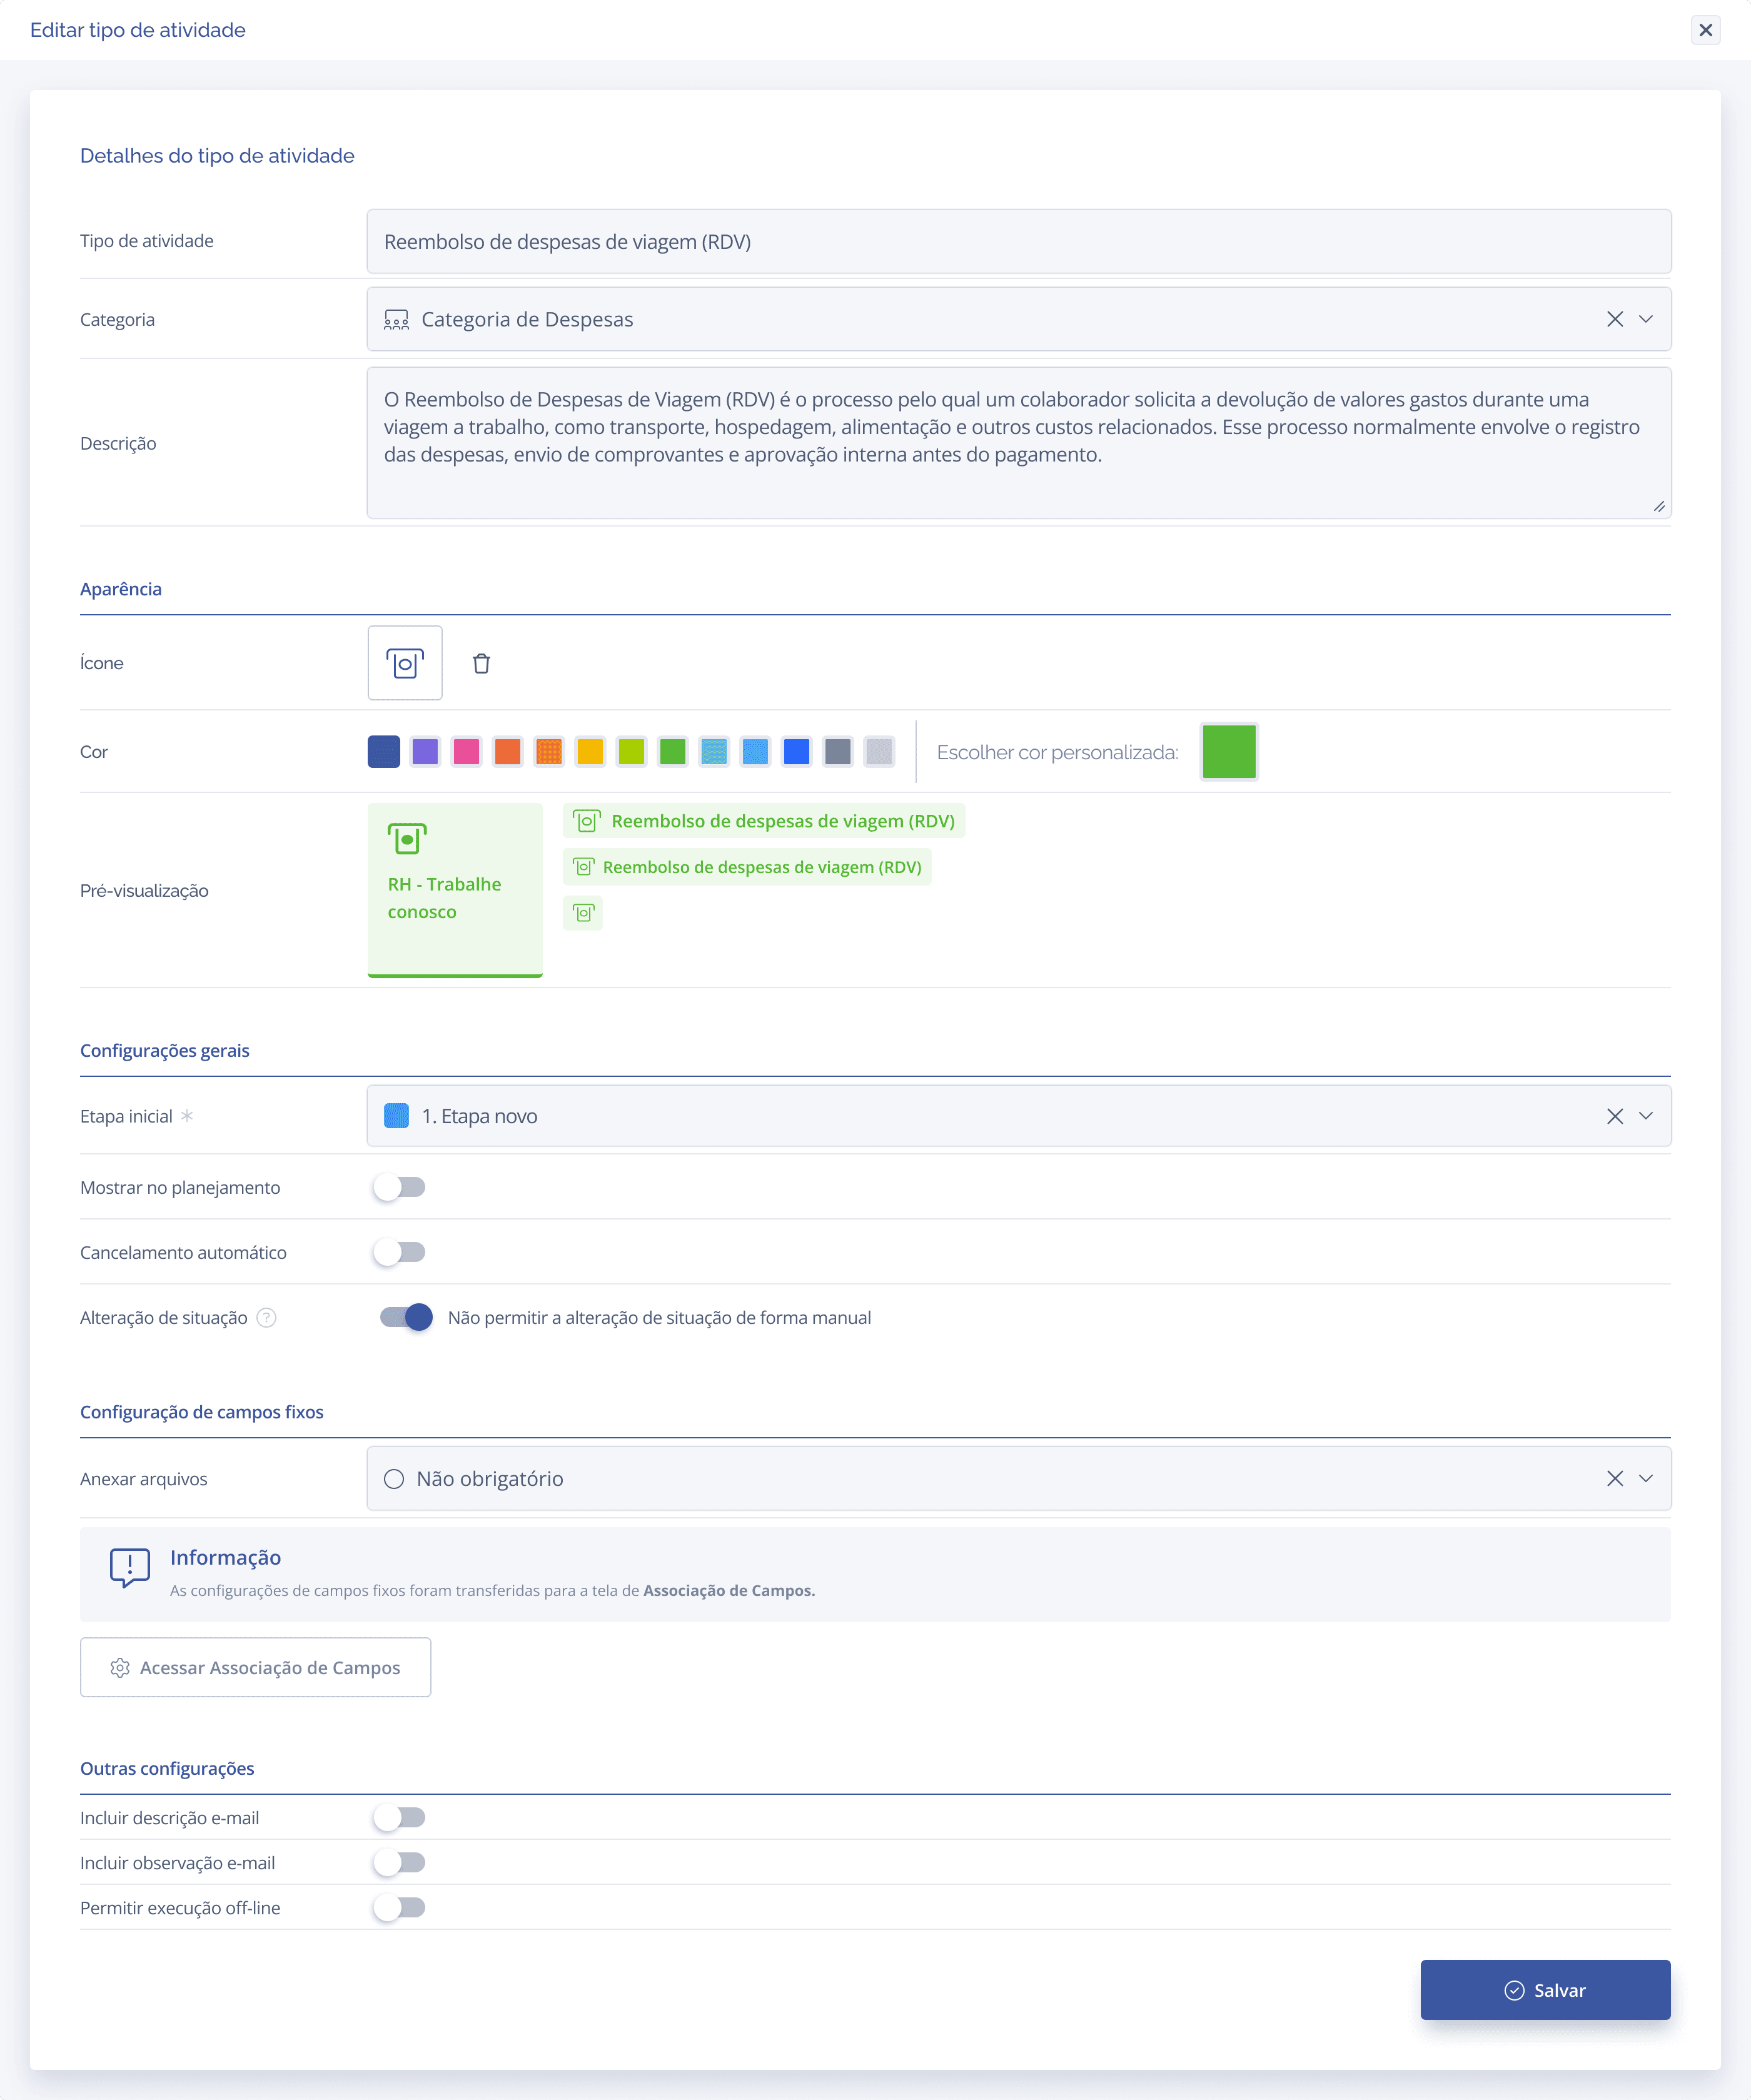
Tip: Changes made in the Alerts and Edit modals are saved using the Save button, without needing to leave the settings screen.