Fixed and dynamic fields of the legal document in the app
Search for content...
Fixed and dynamic fields of the legal document in the app
Editing a legal document is very simple; in this module, we will learn the behavior of all types of fixed and dynamic fields that can make up a legal document.
Important rules!
If the field you want to change is configured on the web platform as: “not editable,” it will not be possible to edit it on the mobile platform.
A user's permission level determines whether you can change fields within a legal document or not.
A user's permission level determines whether you can edit any legal document.
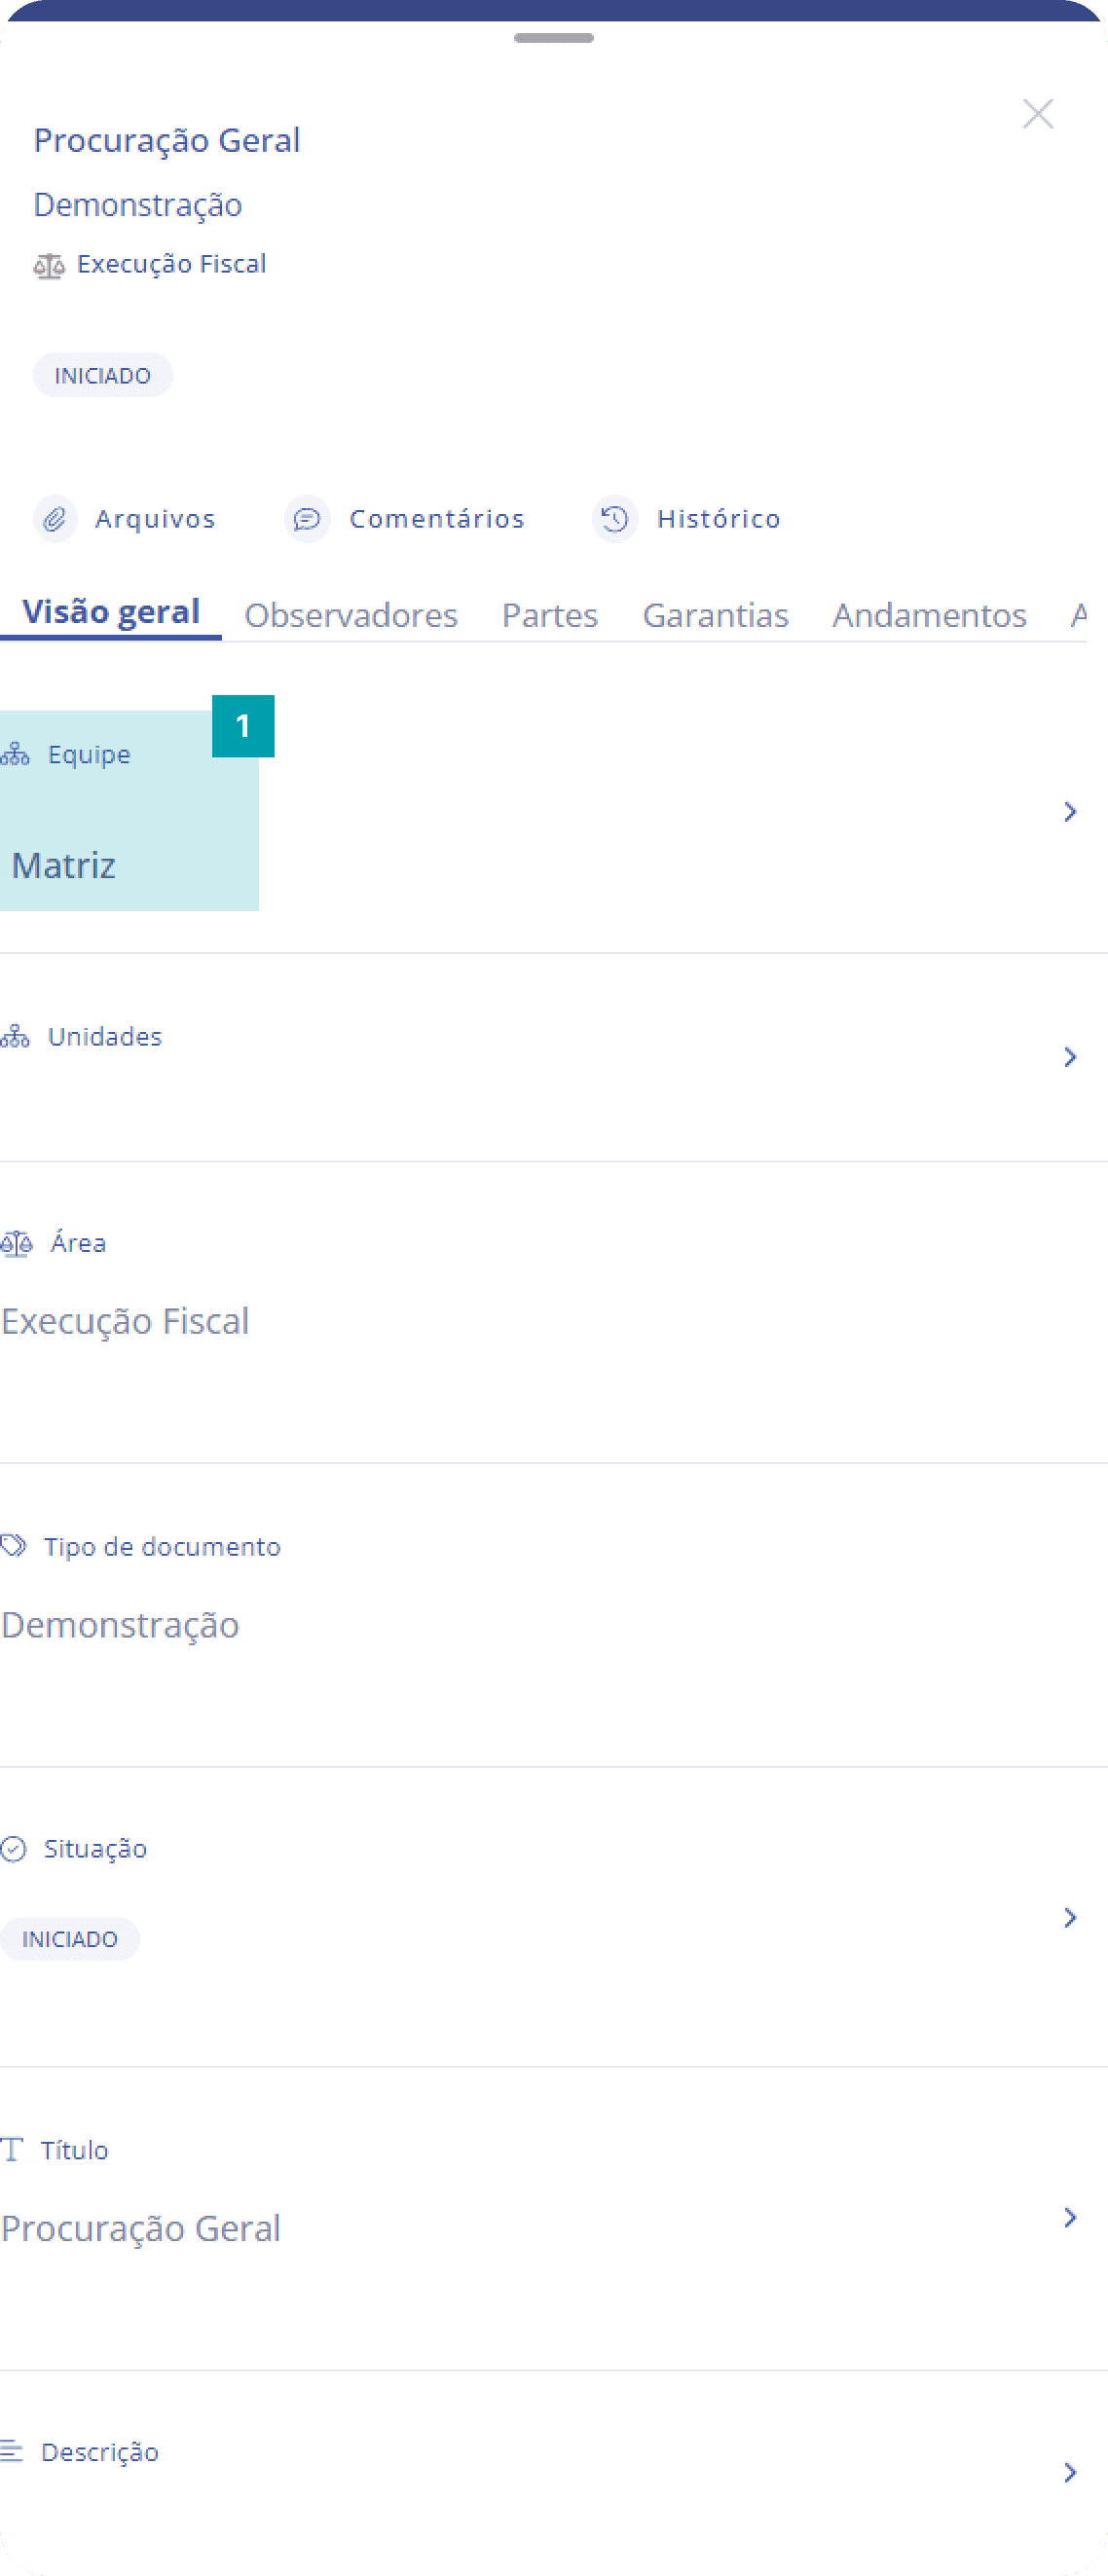
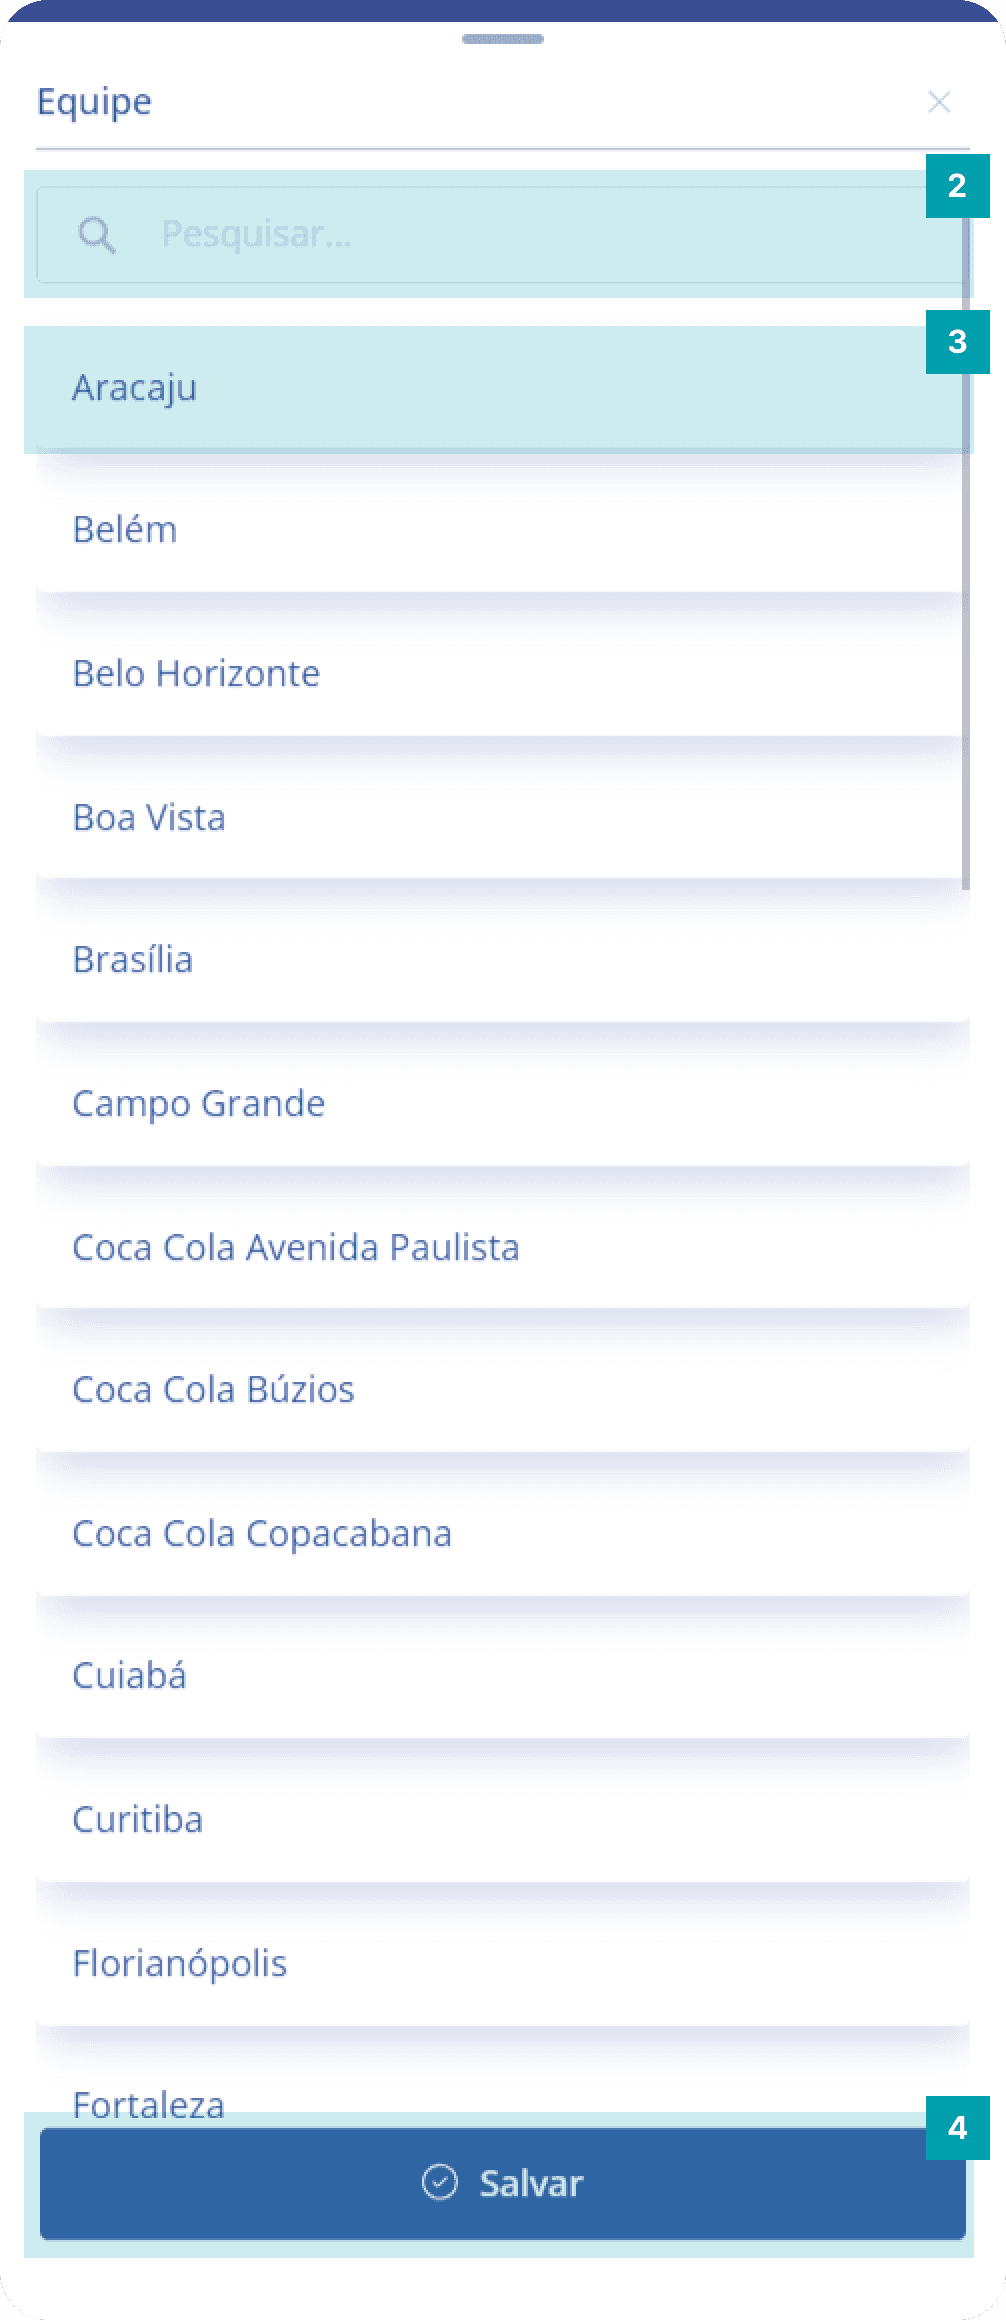
Fixed field: Team
This field determines the team(s) that make up your legal document.
Click on the area of the Team field to open its editing screen.
Search – Click the search field and type the name of the team or branch you want.
Selection – Select the desired team by clicking its area.
Save – Click the Save button to finish your editing.
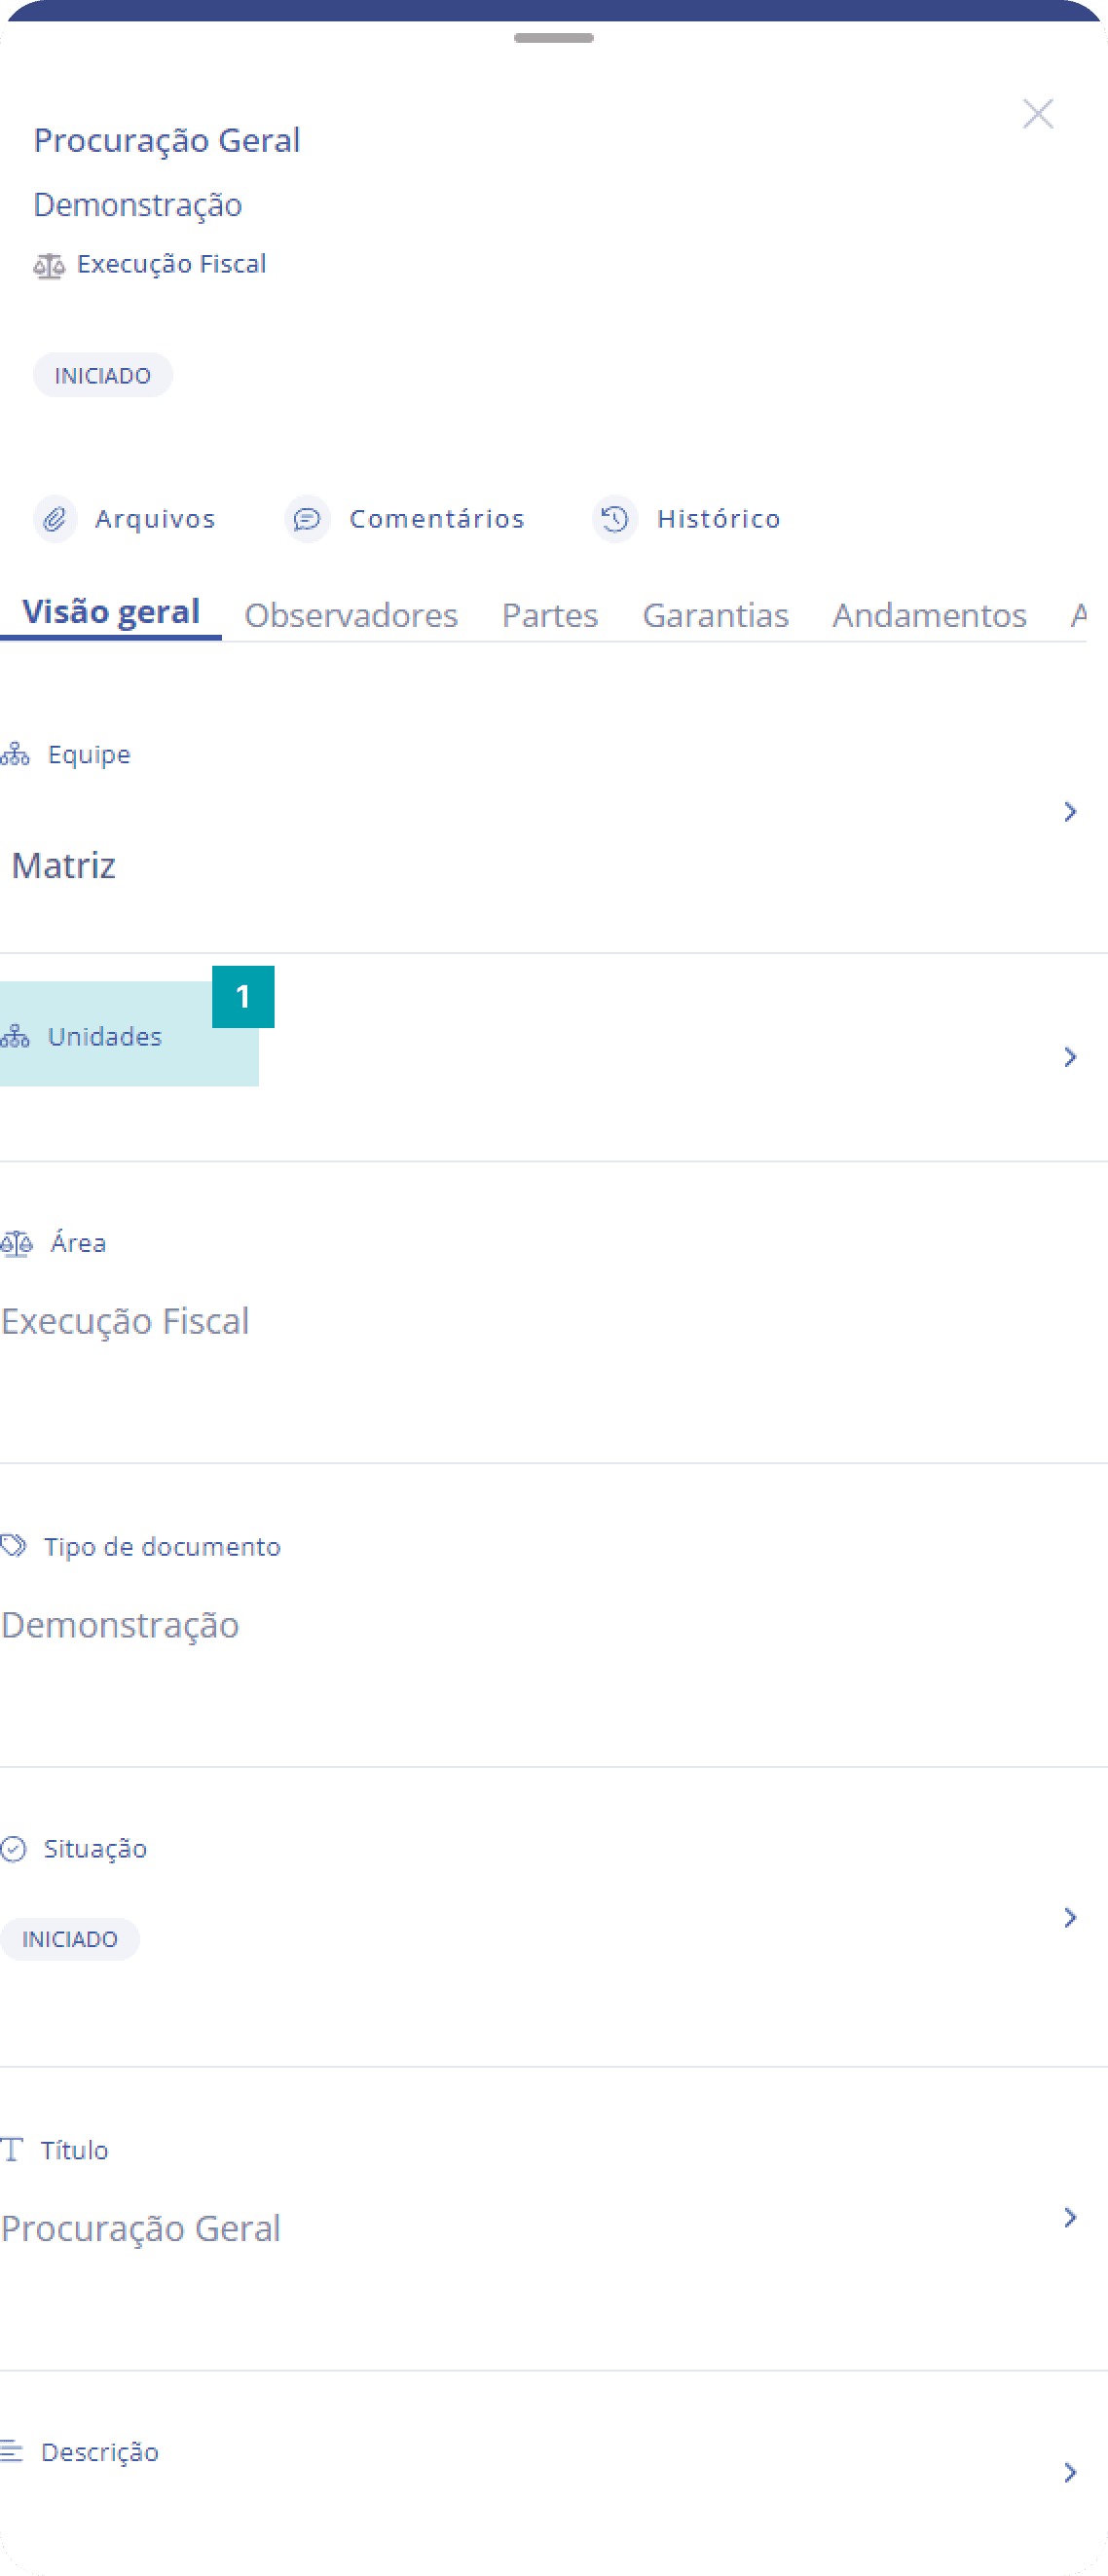
Fixed field: Unit
This field associates a company unit with your legal document.
Click on the area of the Unit field to open its editing screen.
Search – Click the search field and type the name of the unit you want.
Selection – Click on the area of the desired unit to select it.
Save – Click the Save button to finish your editing.
Fixed field: Area
This field only displays the area to which the legal document belongs; it is not editable.
Fixed field: Document type
This field only displays the document type to which the legal document belongs; it is not editable.
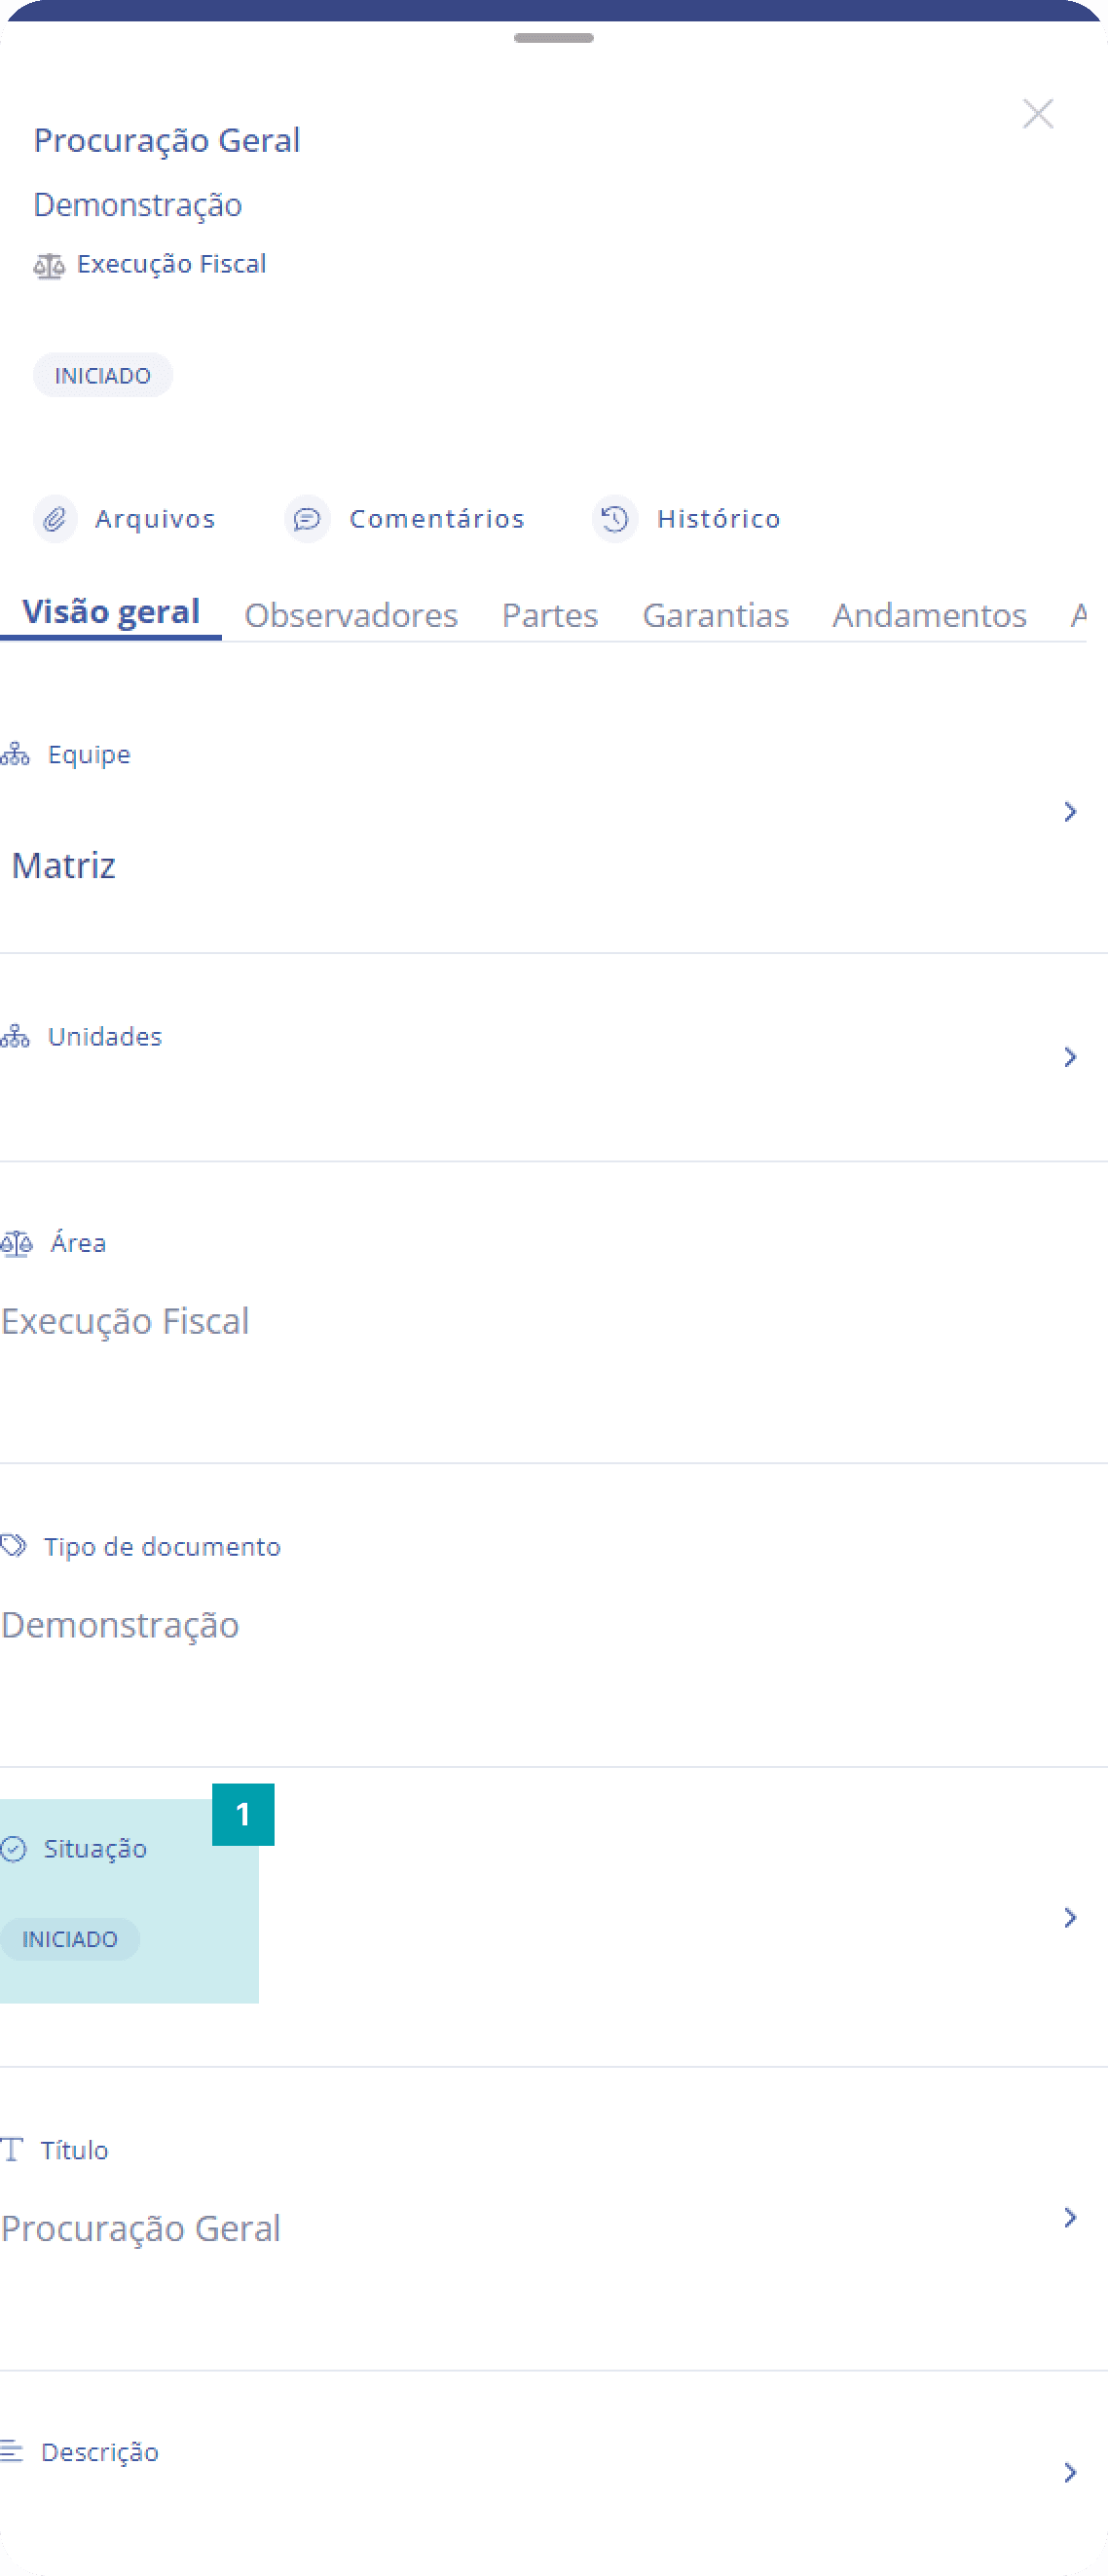
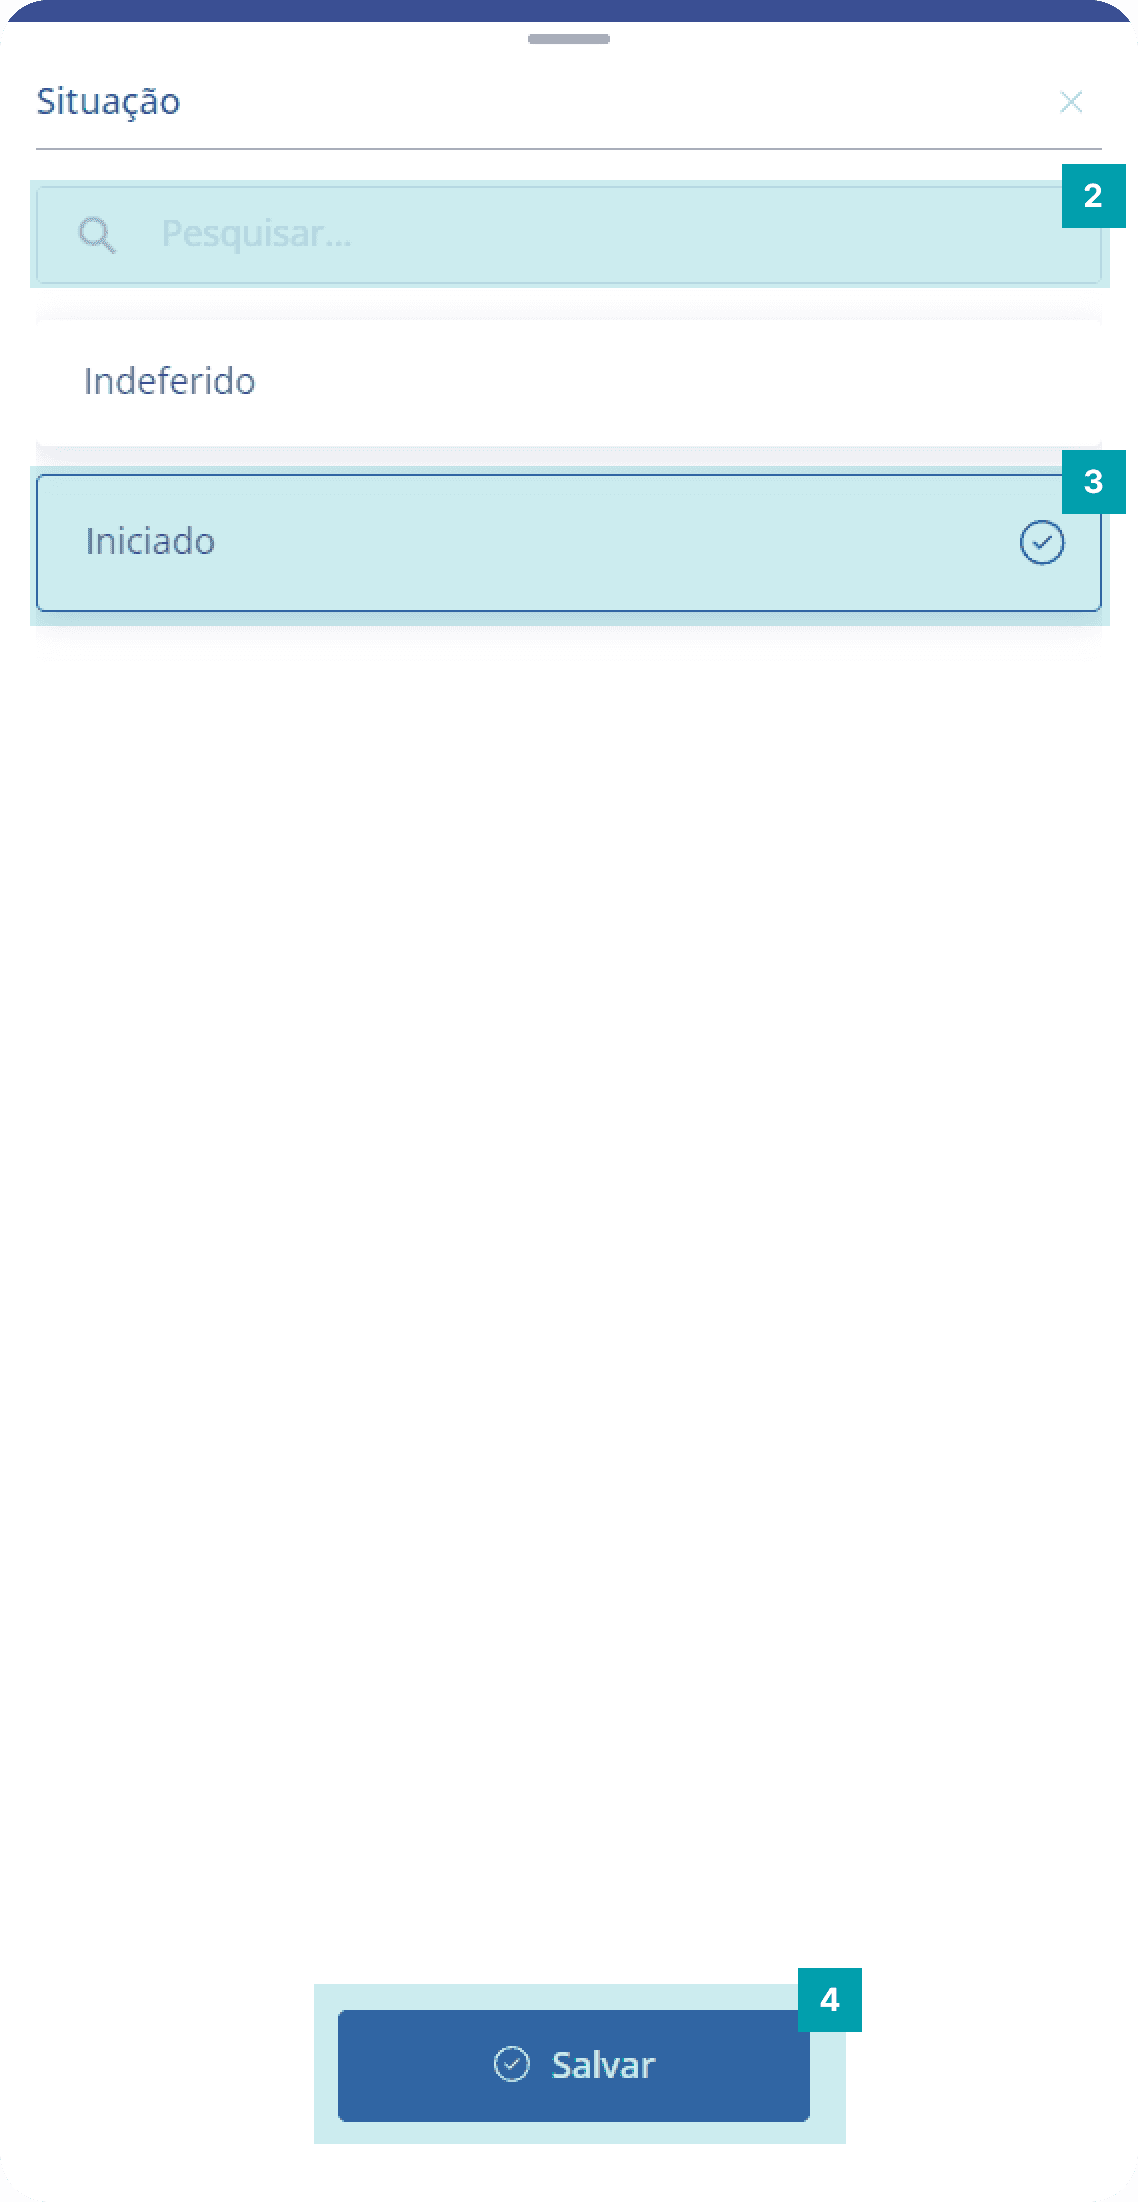
Fixed field: Status
This field defines the status of your legal document.
Click on the area of the Status field to open its editing screen.
Search – Click the search field and type the name of the status you want.
Select the desired status by clicking its area.
Save – Click the Save button to finish your editing.
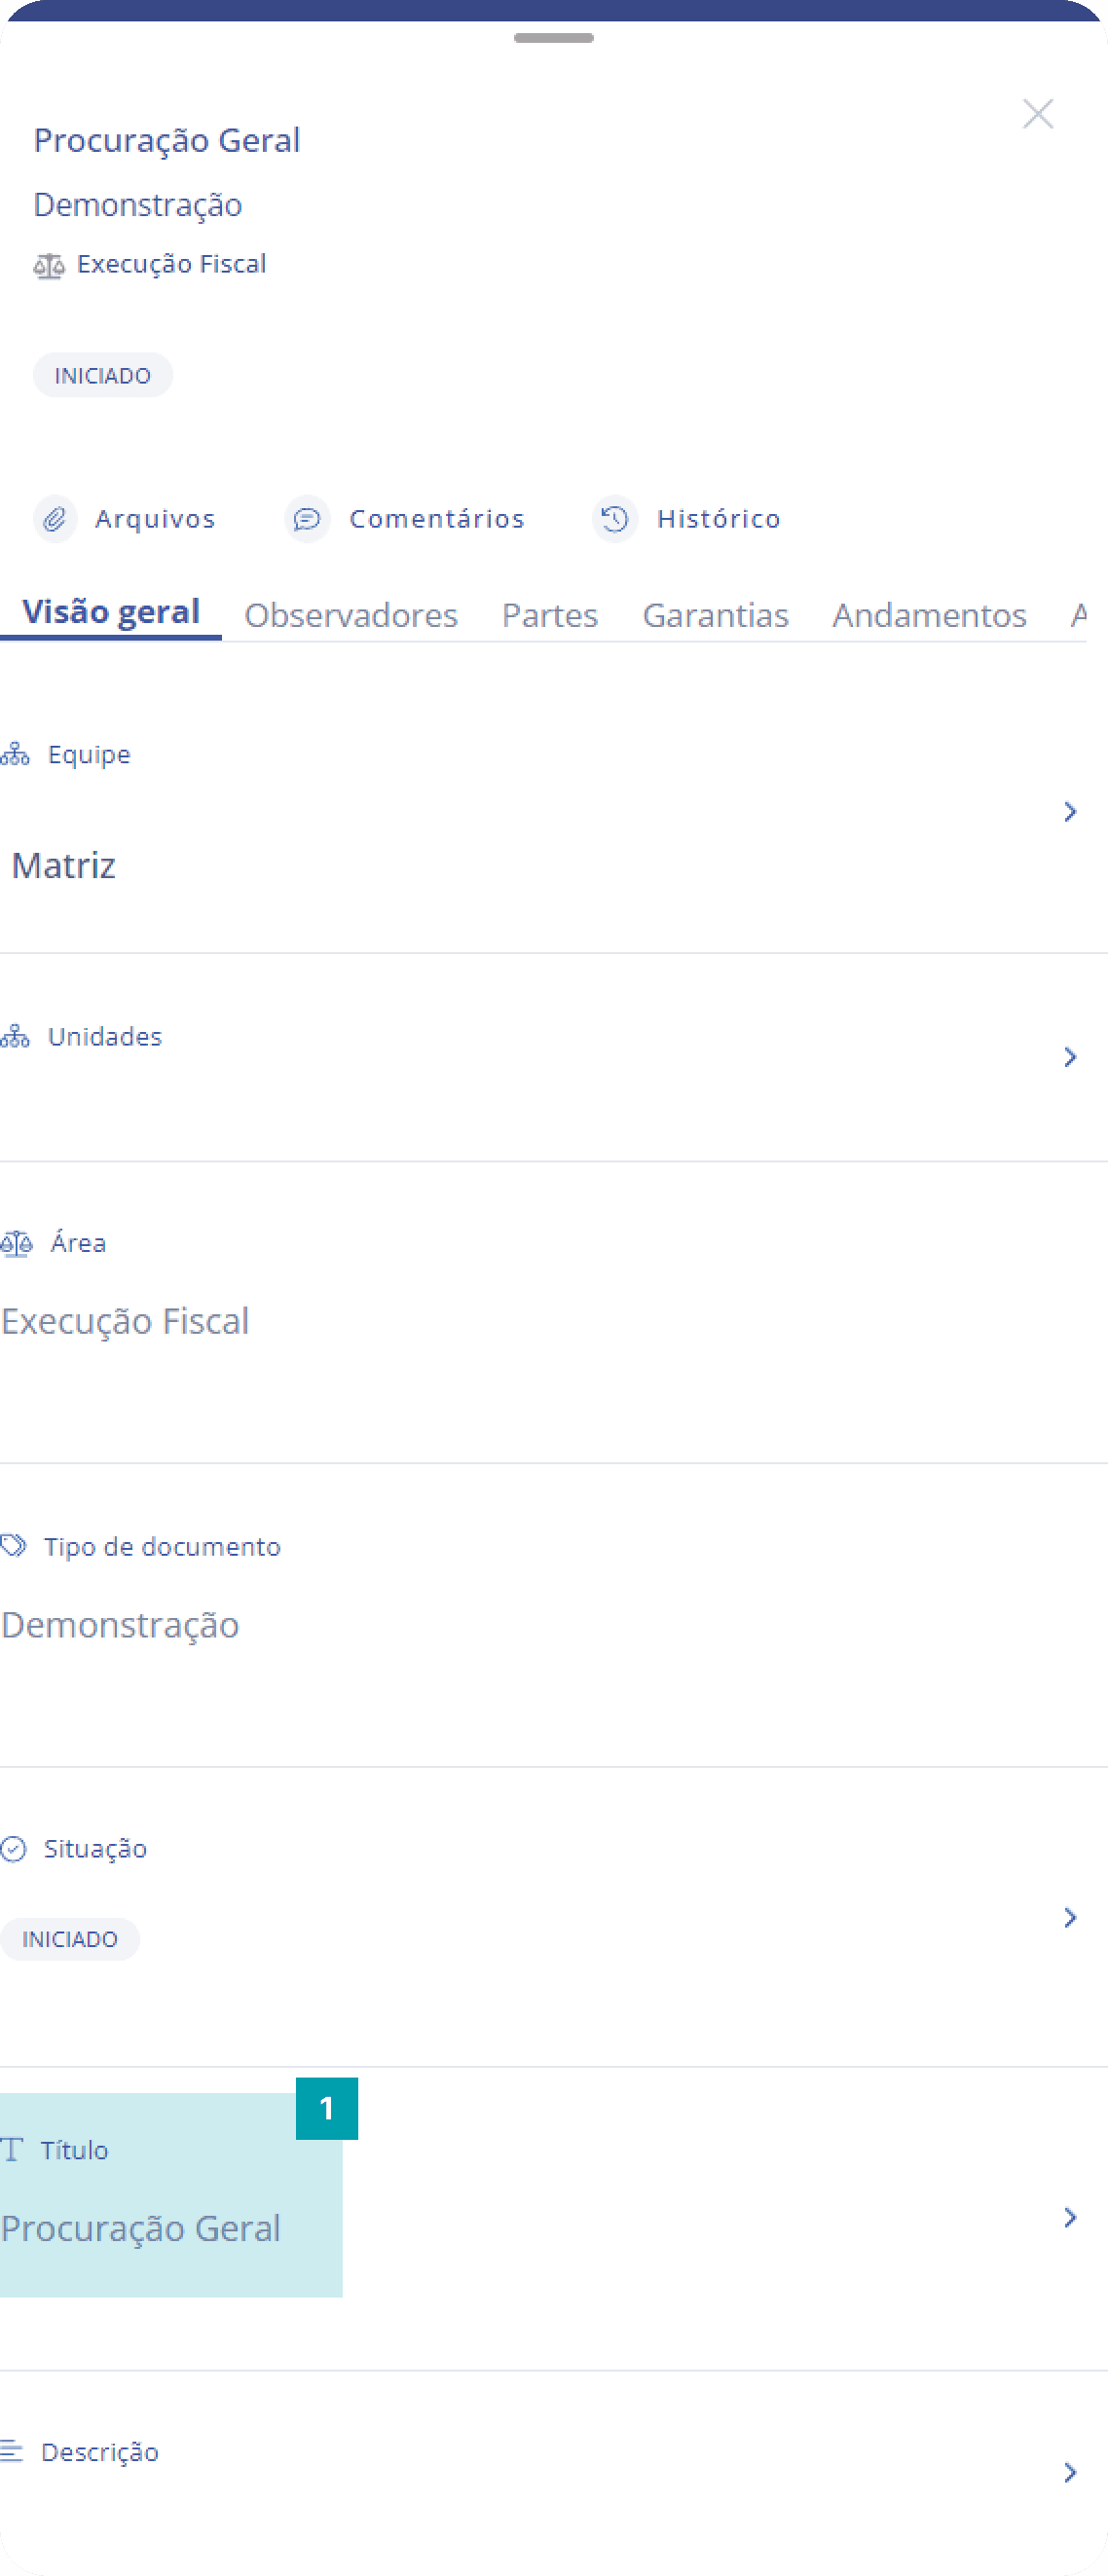
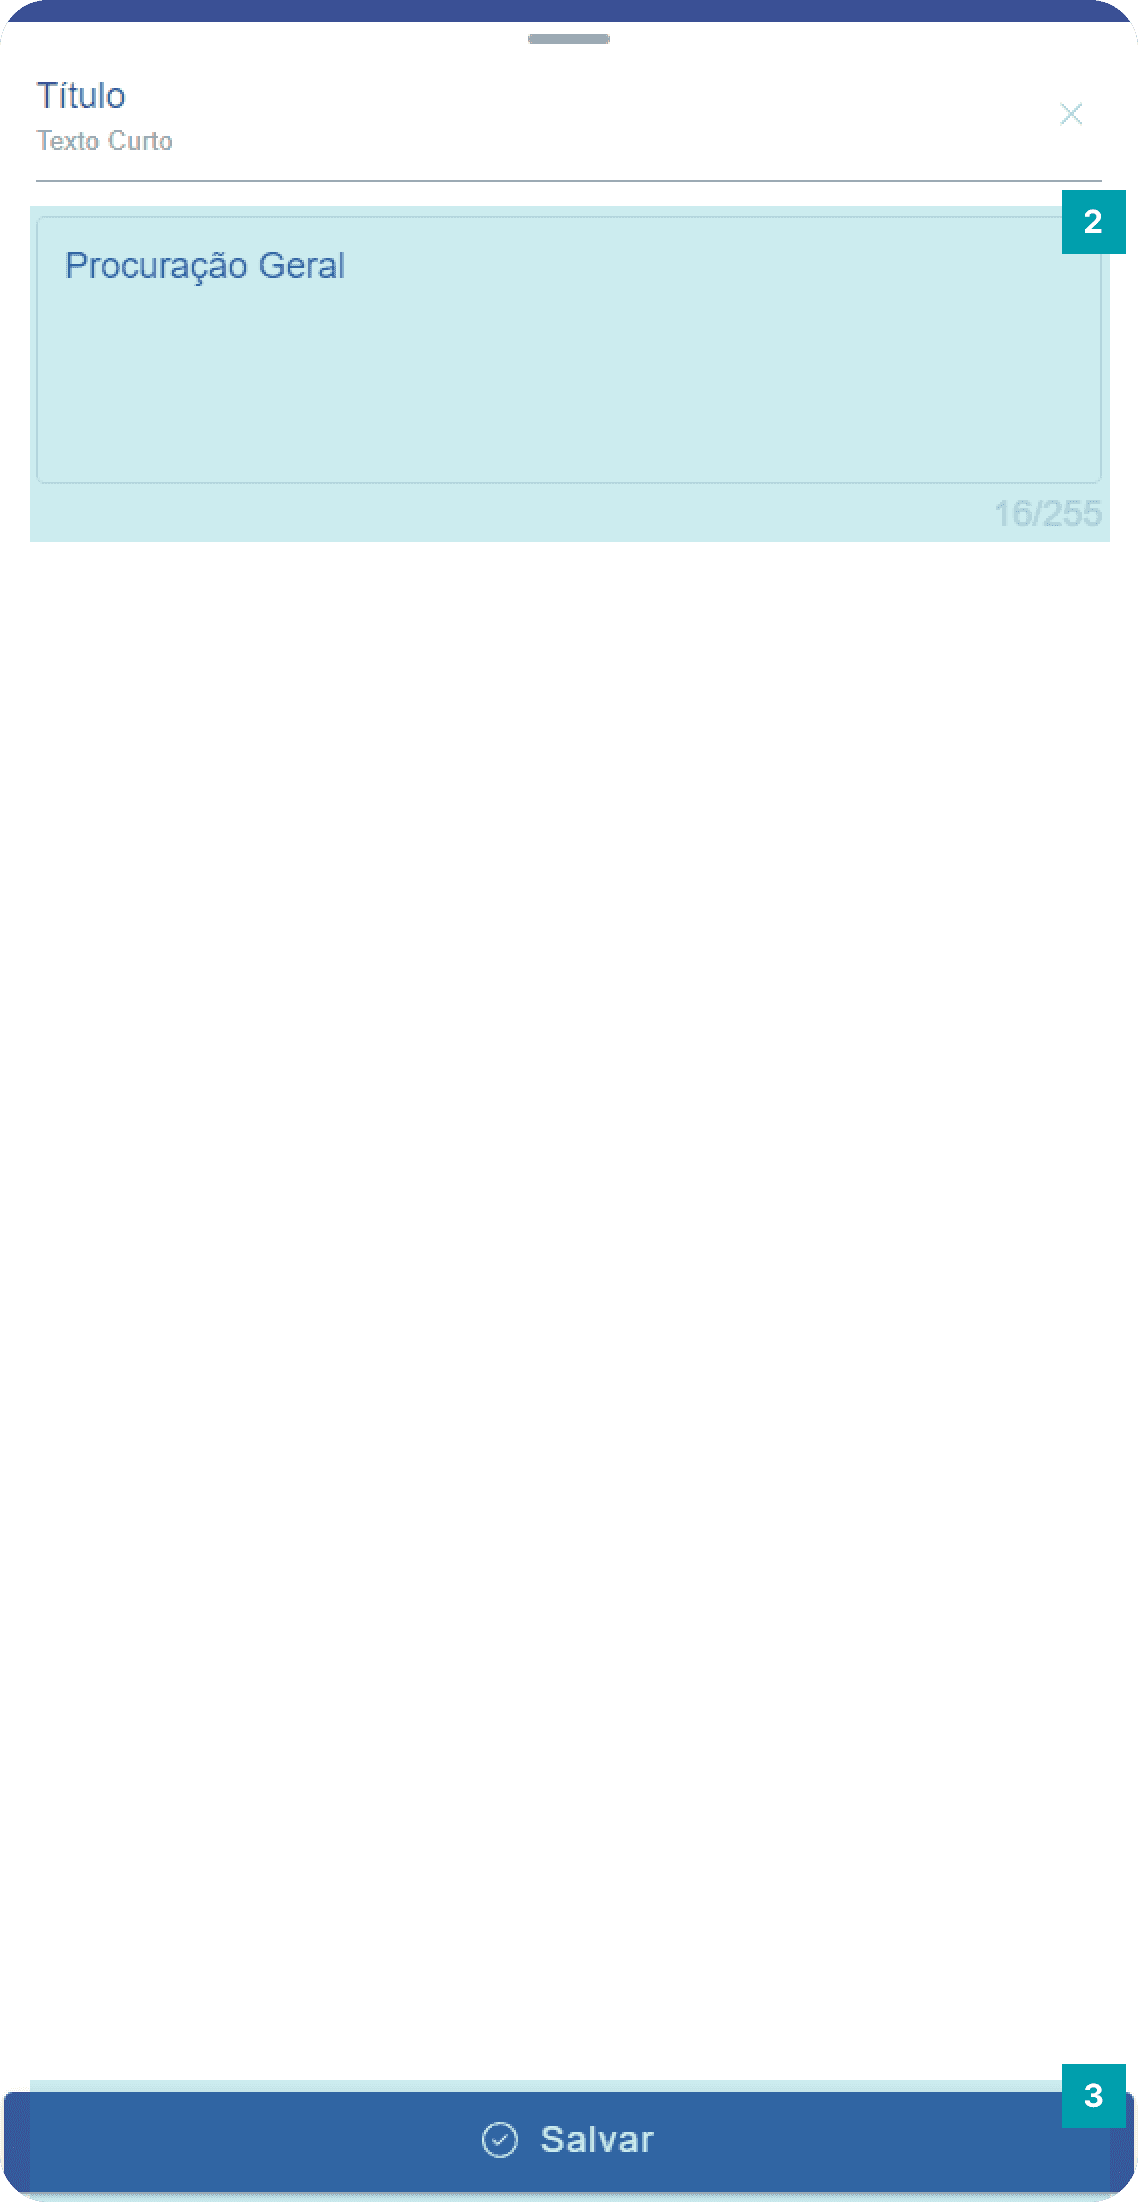
Fixed field: Title
This field defines an identification title for the legal document.
Click on the area of the Title field to open its editing screen.
In the text field, type the desired title.
Save – Click the Save button to finish your editing.
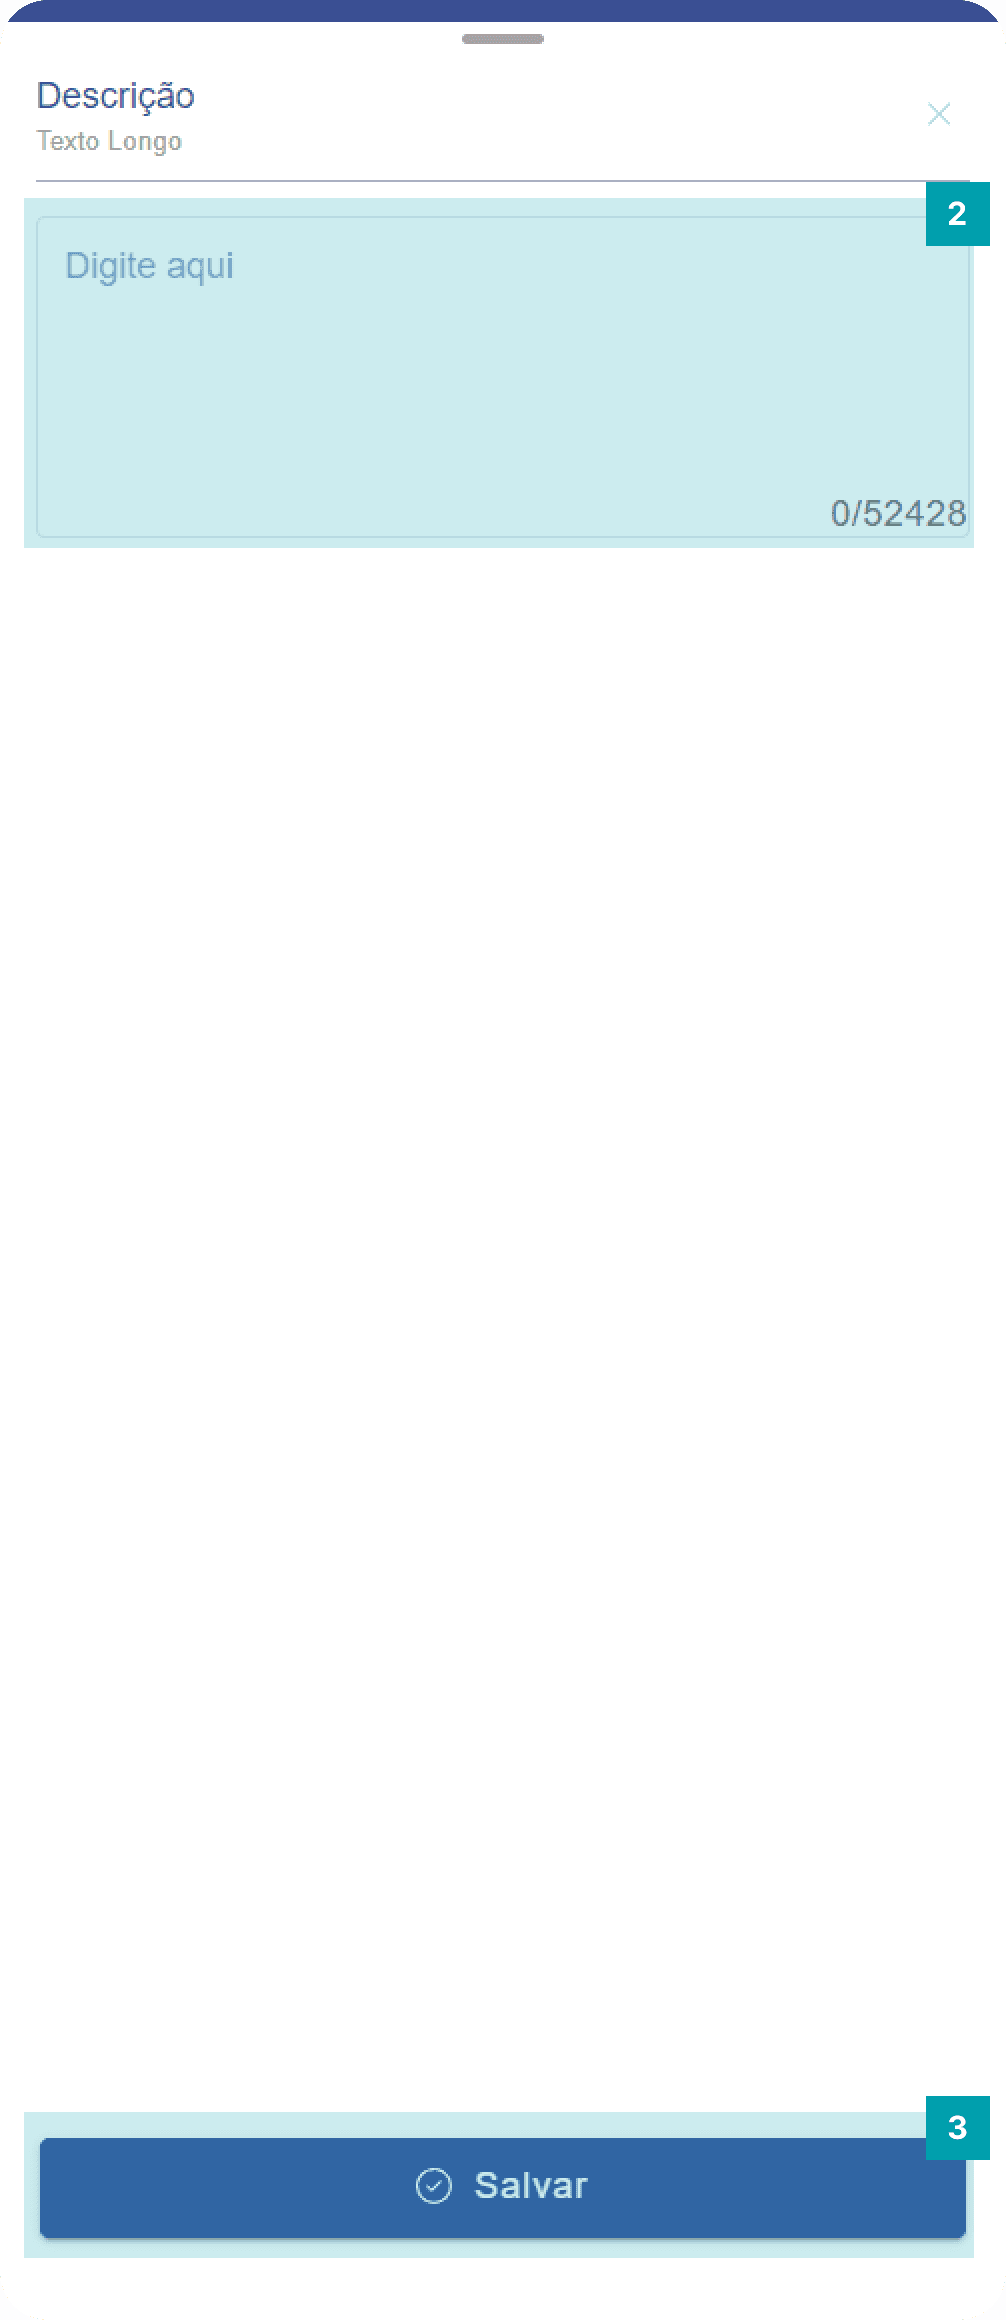
Fixed fields: Description
This field complements the unit's information.
Click on the area of the Description field to open its editing screen.
Click on the text field and type the content you want to insert.
Save – Click the Save button to finish your editing.
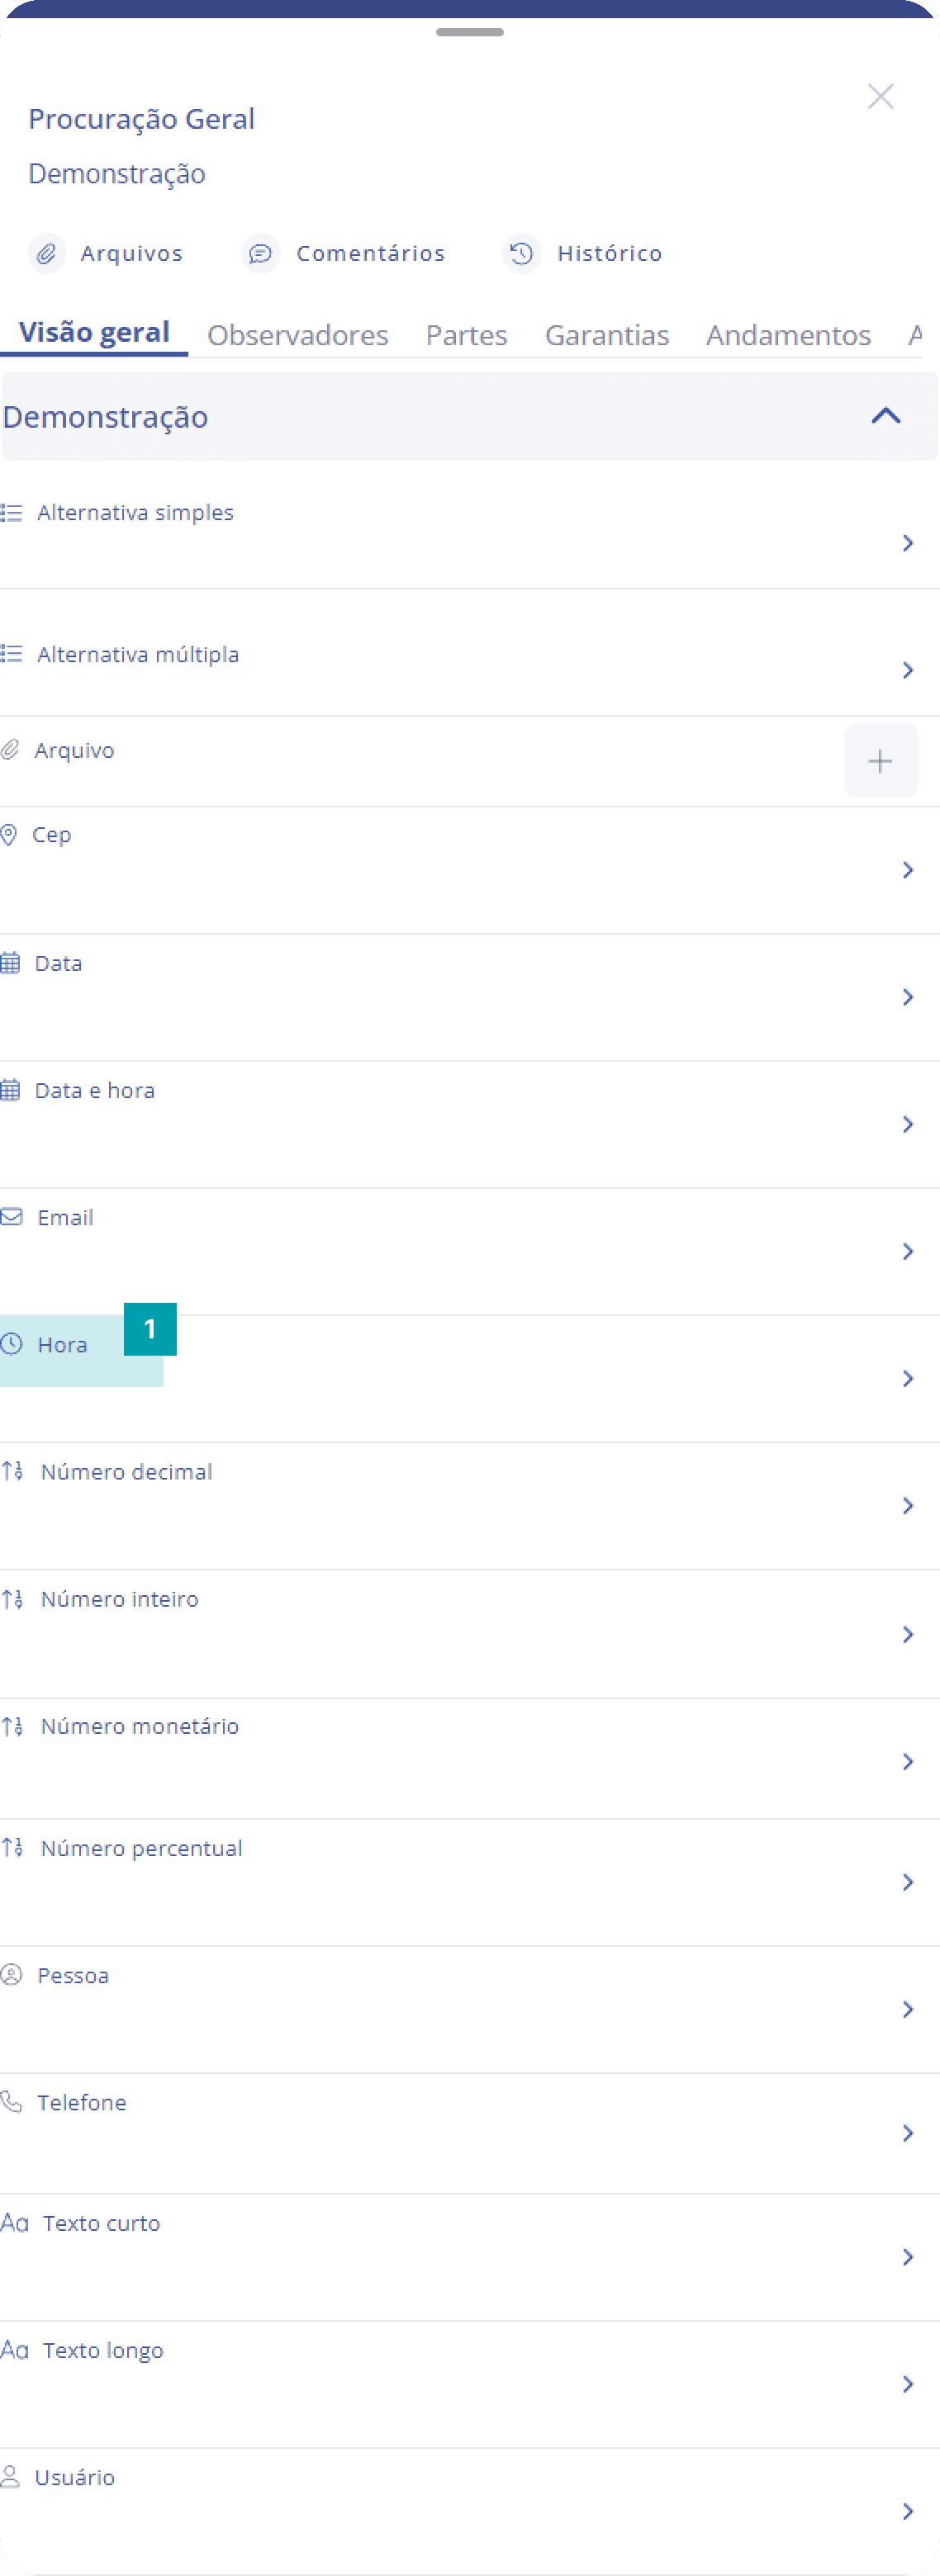
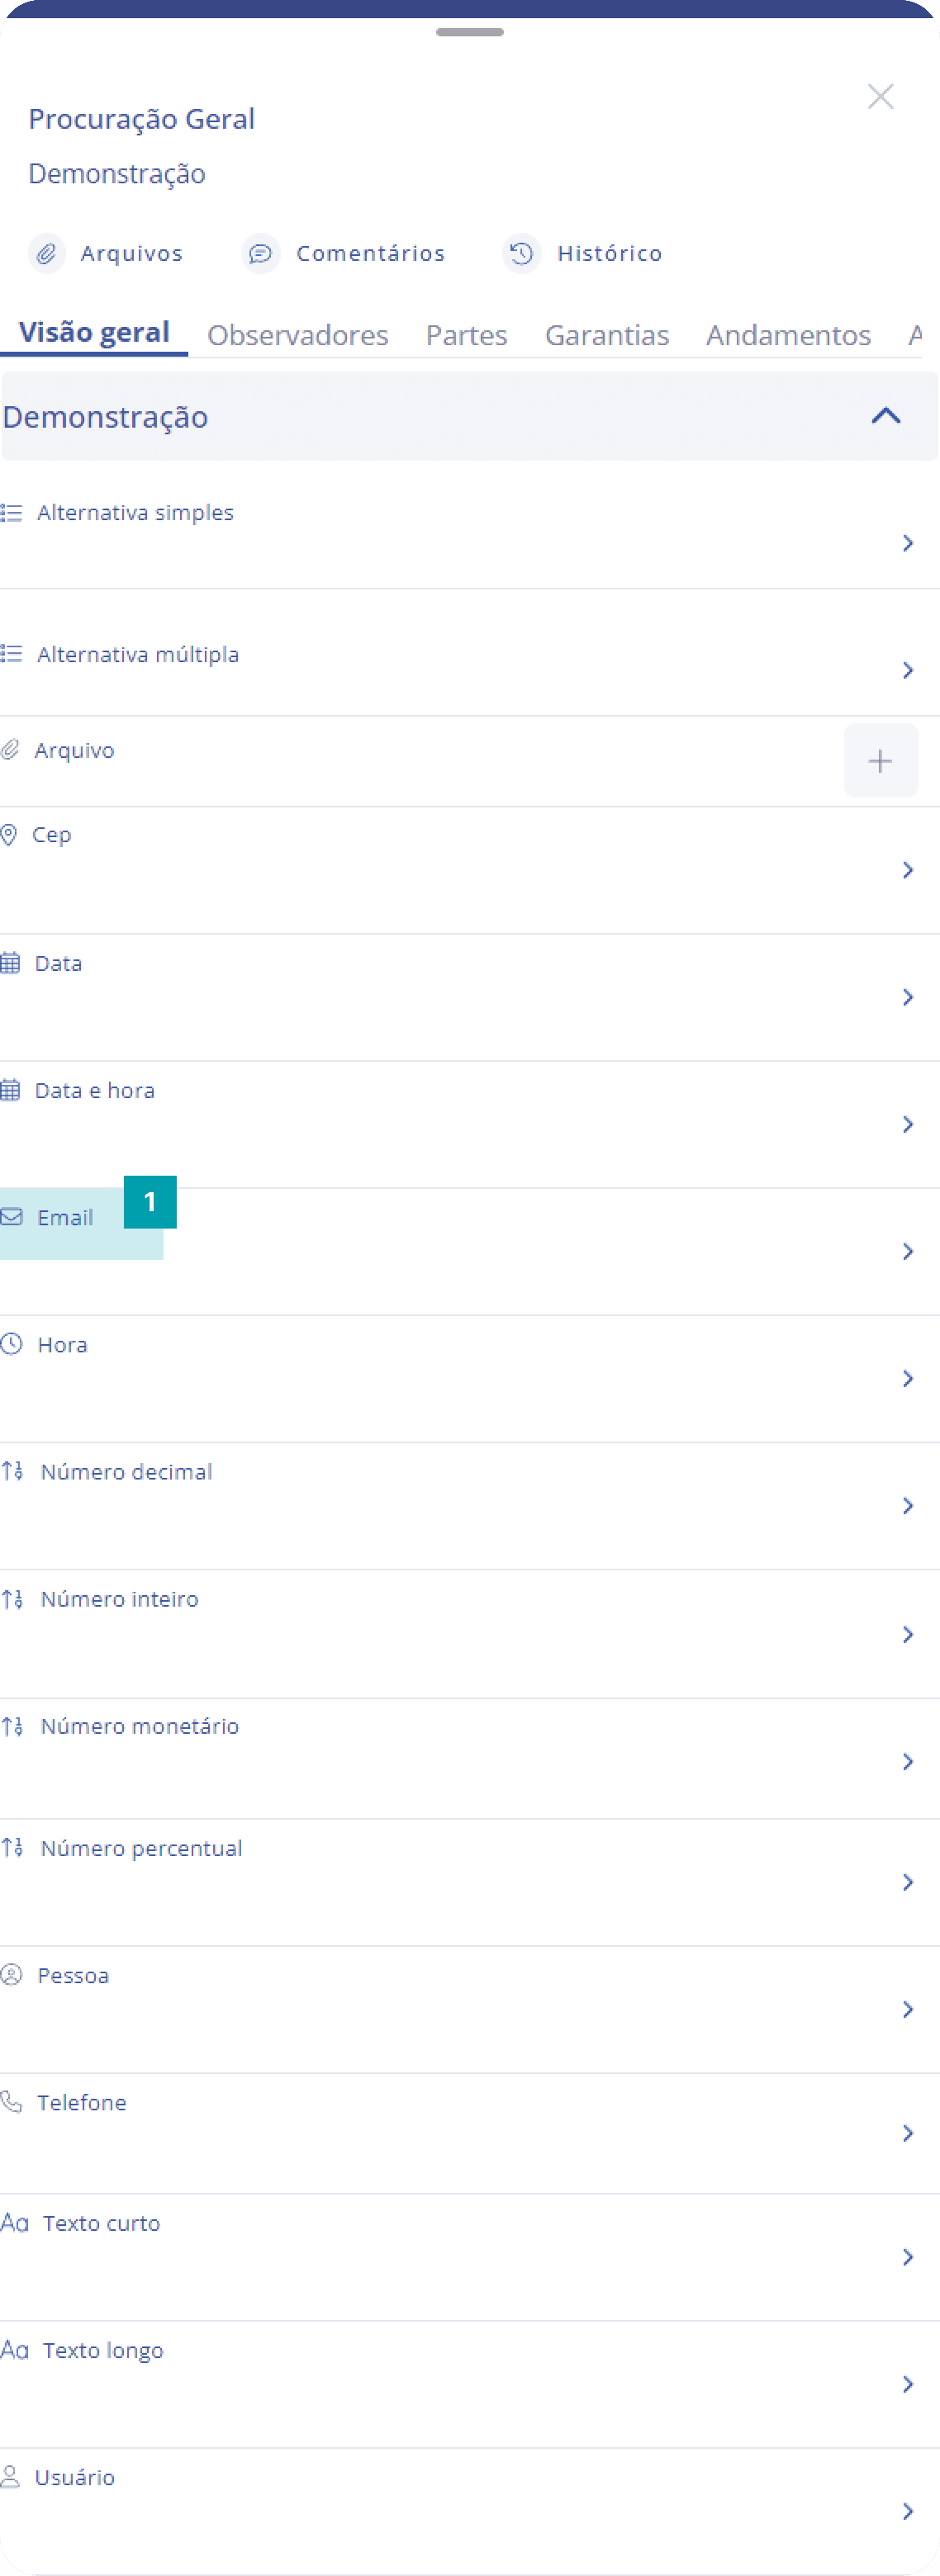
Important note! * When editing a field, the system automatically updates the unit form, bringing the new information to the mobile unit and synchronizing it simultaneously with the web platform. This makes it possible to track your updates in real time, regardless of the device you are using. * The types of dynamic fields can be easily identified; the field type is always described just below the field title on its editing screen.
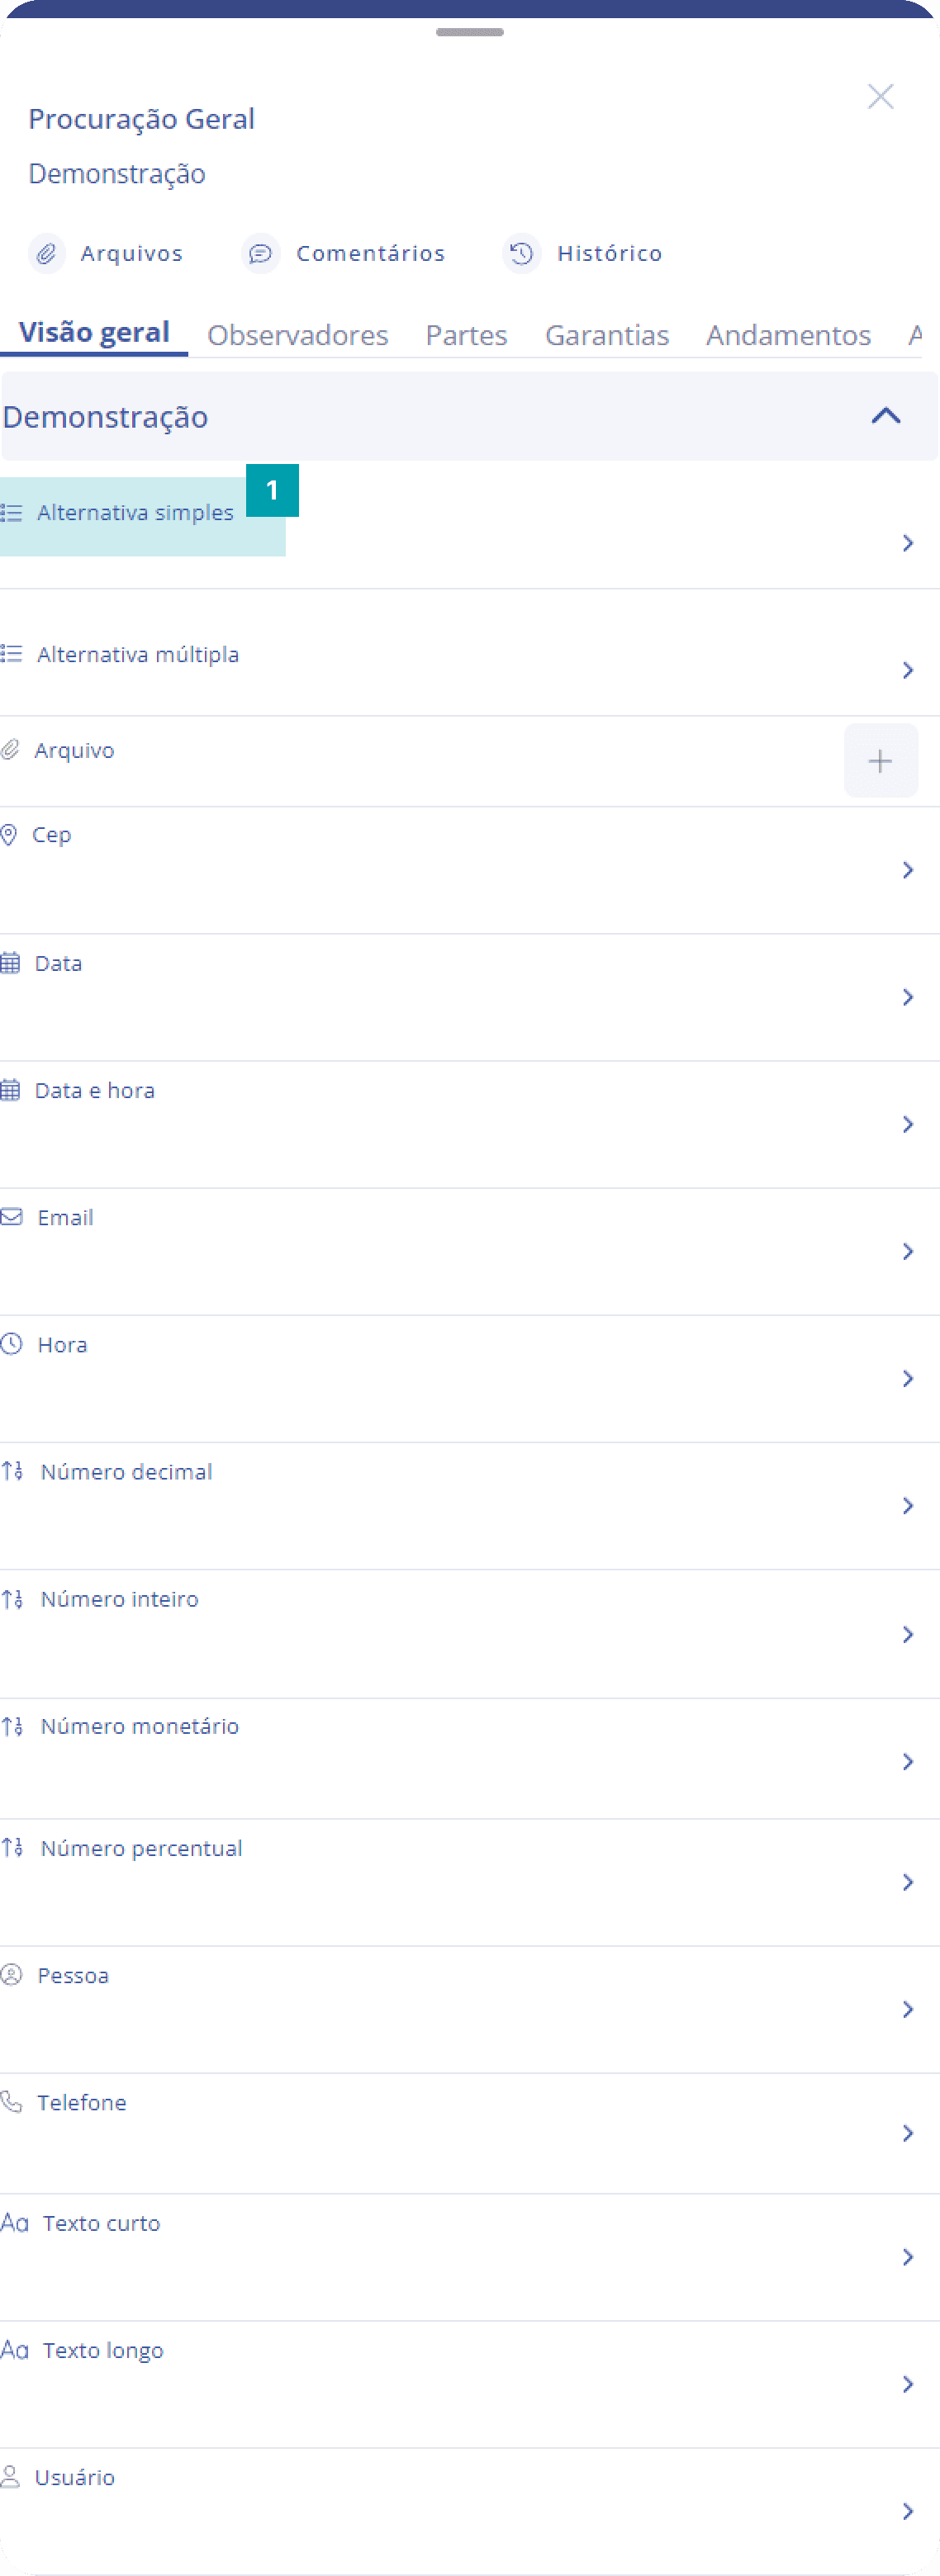
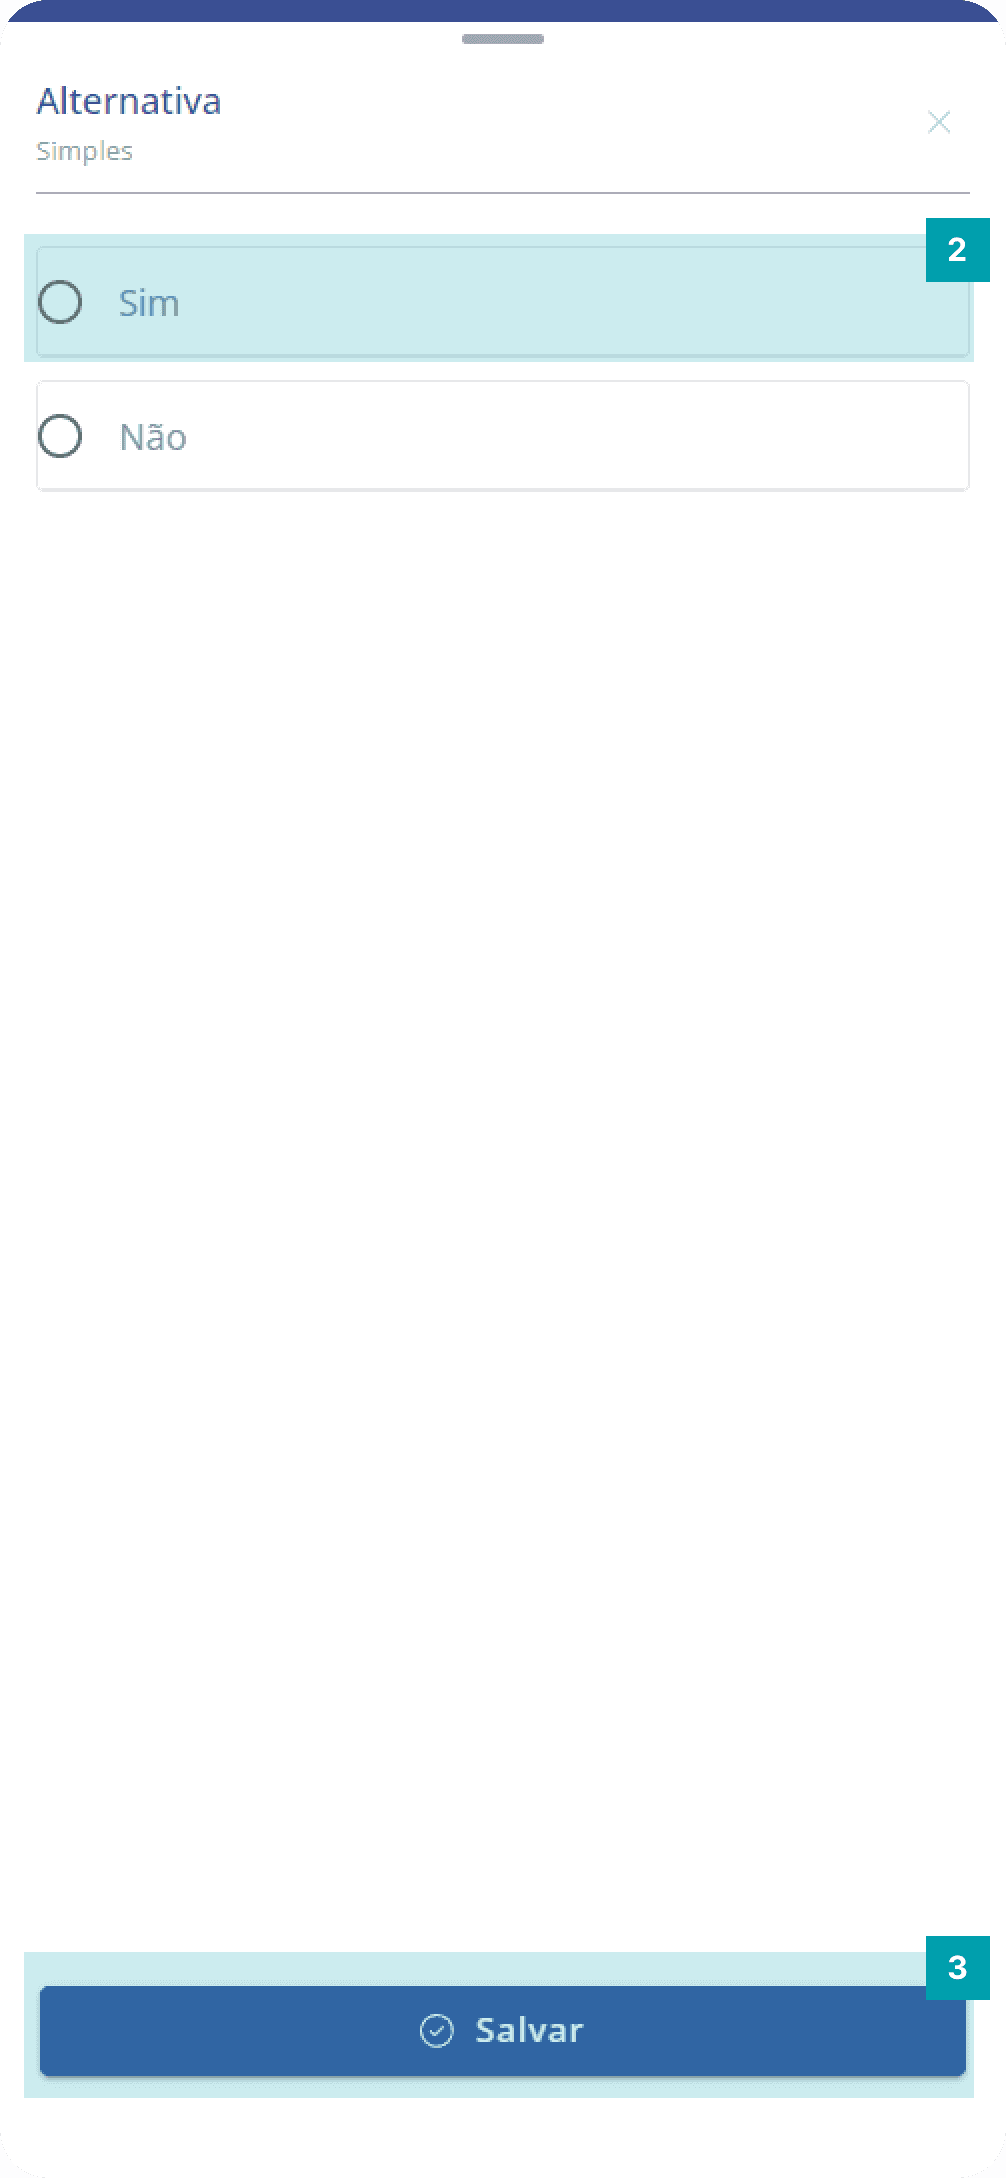
Dynamic field type: Single choice
This field allows the user to select only one option to fill in.
Click on the area of the Single choice field to open its editing screen.
Selection – Click on the area of the desired option to select it.
Save – Click the Save button to finish your editing.
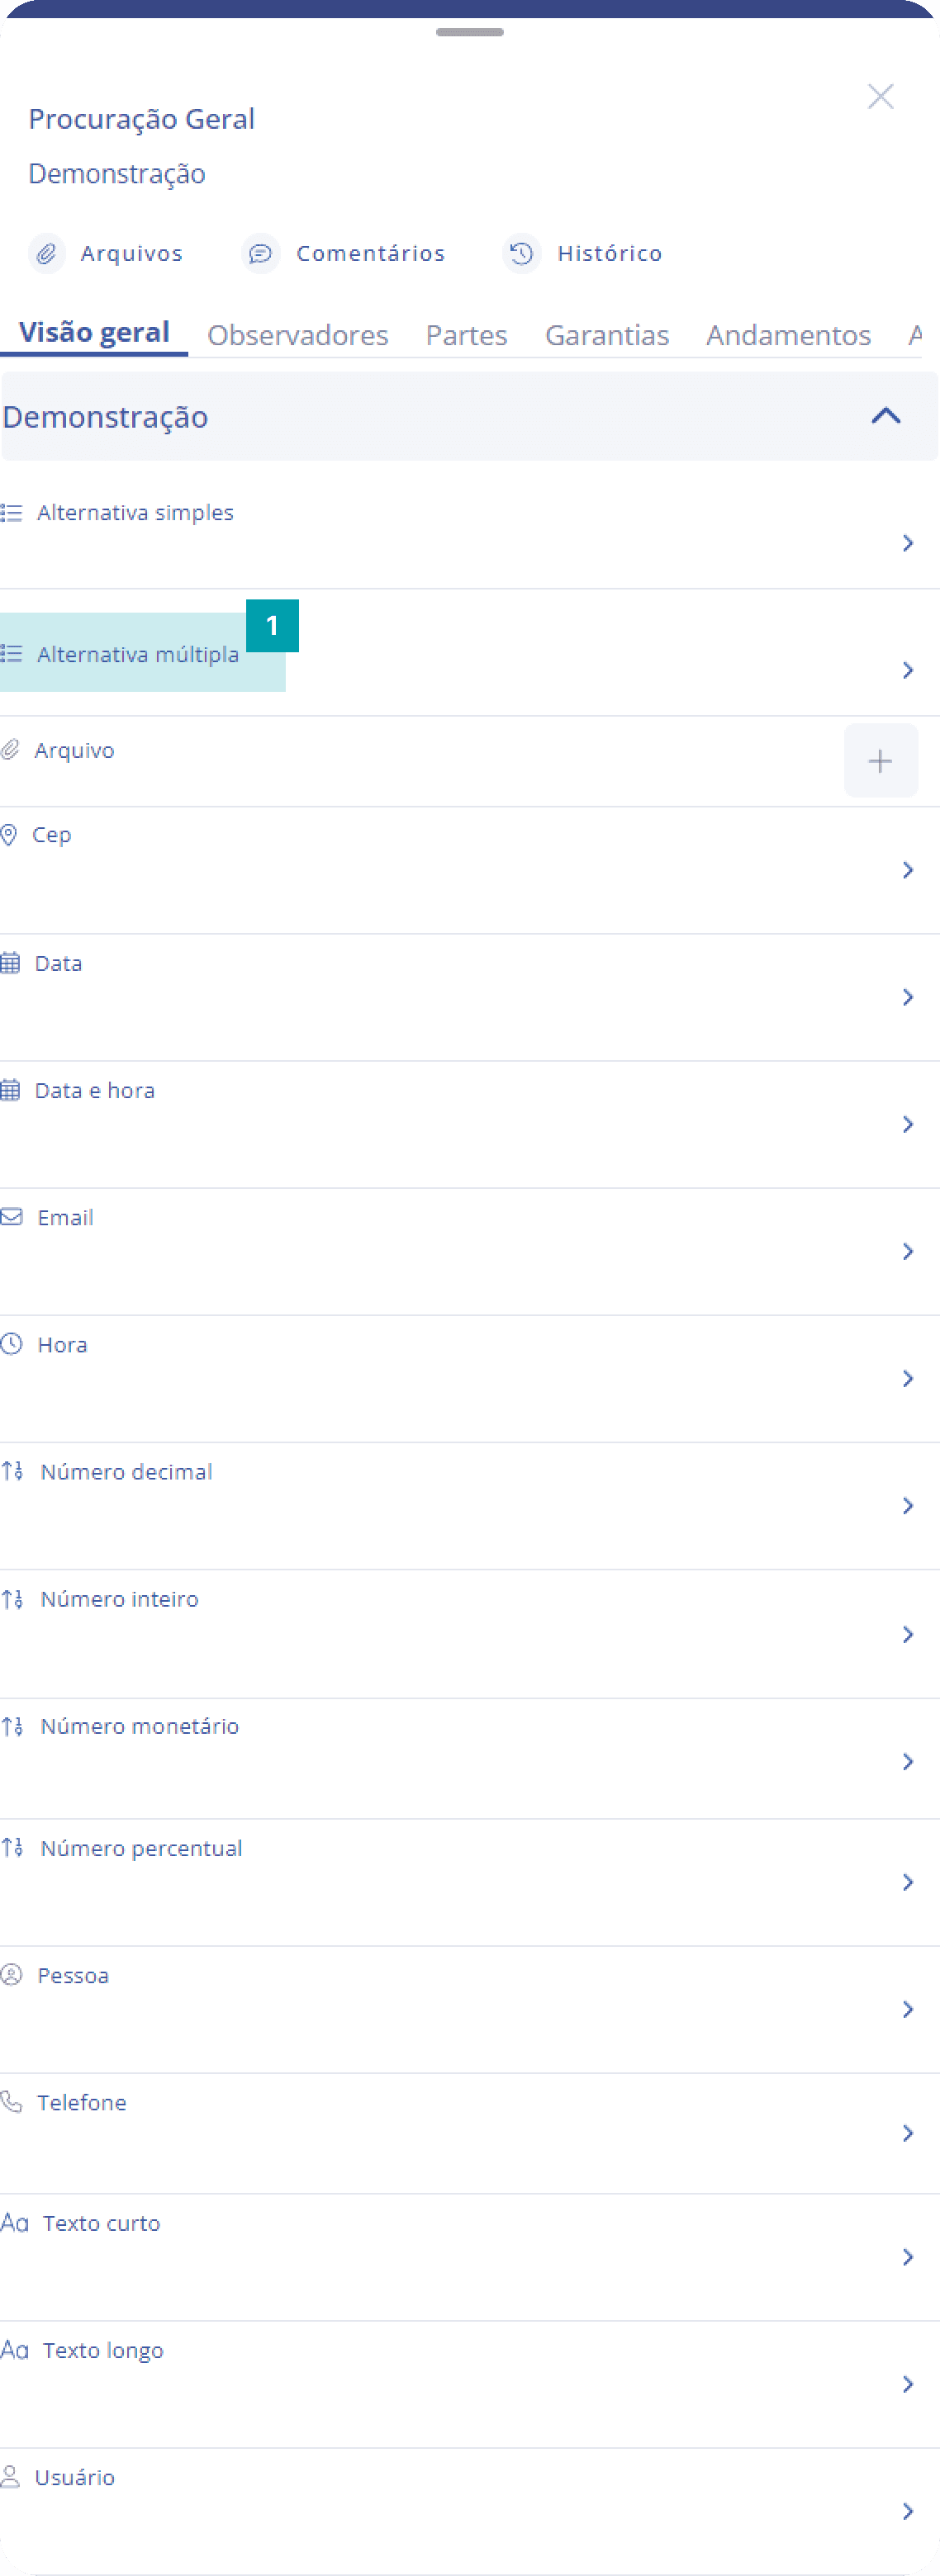
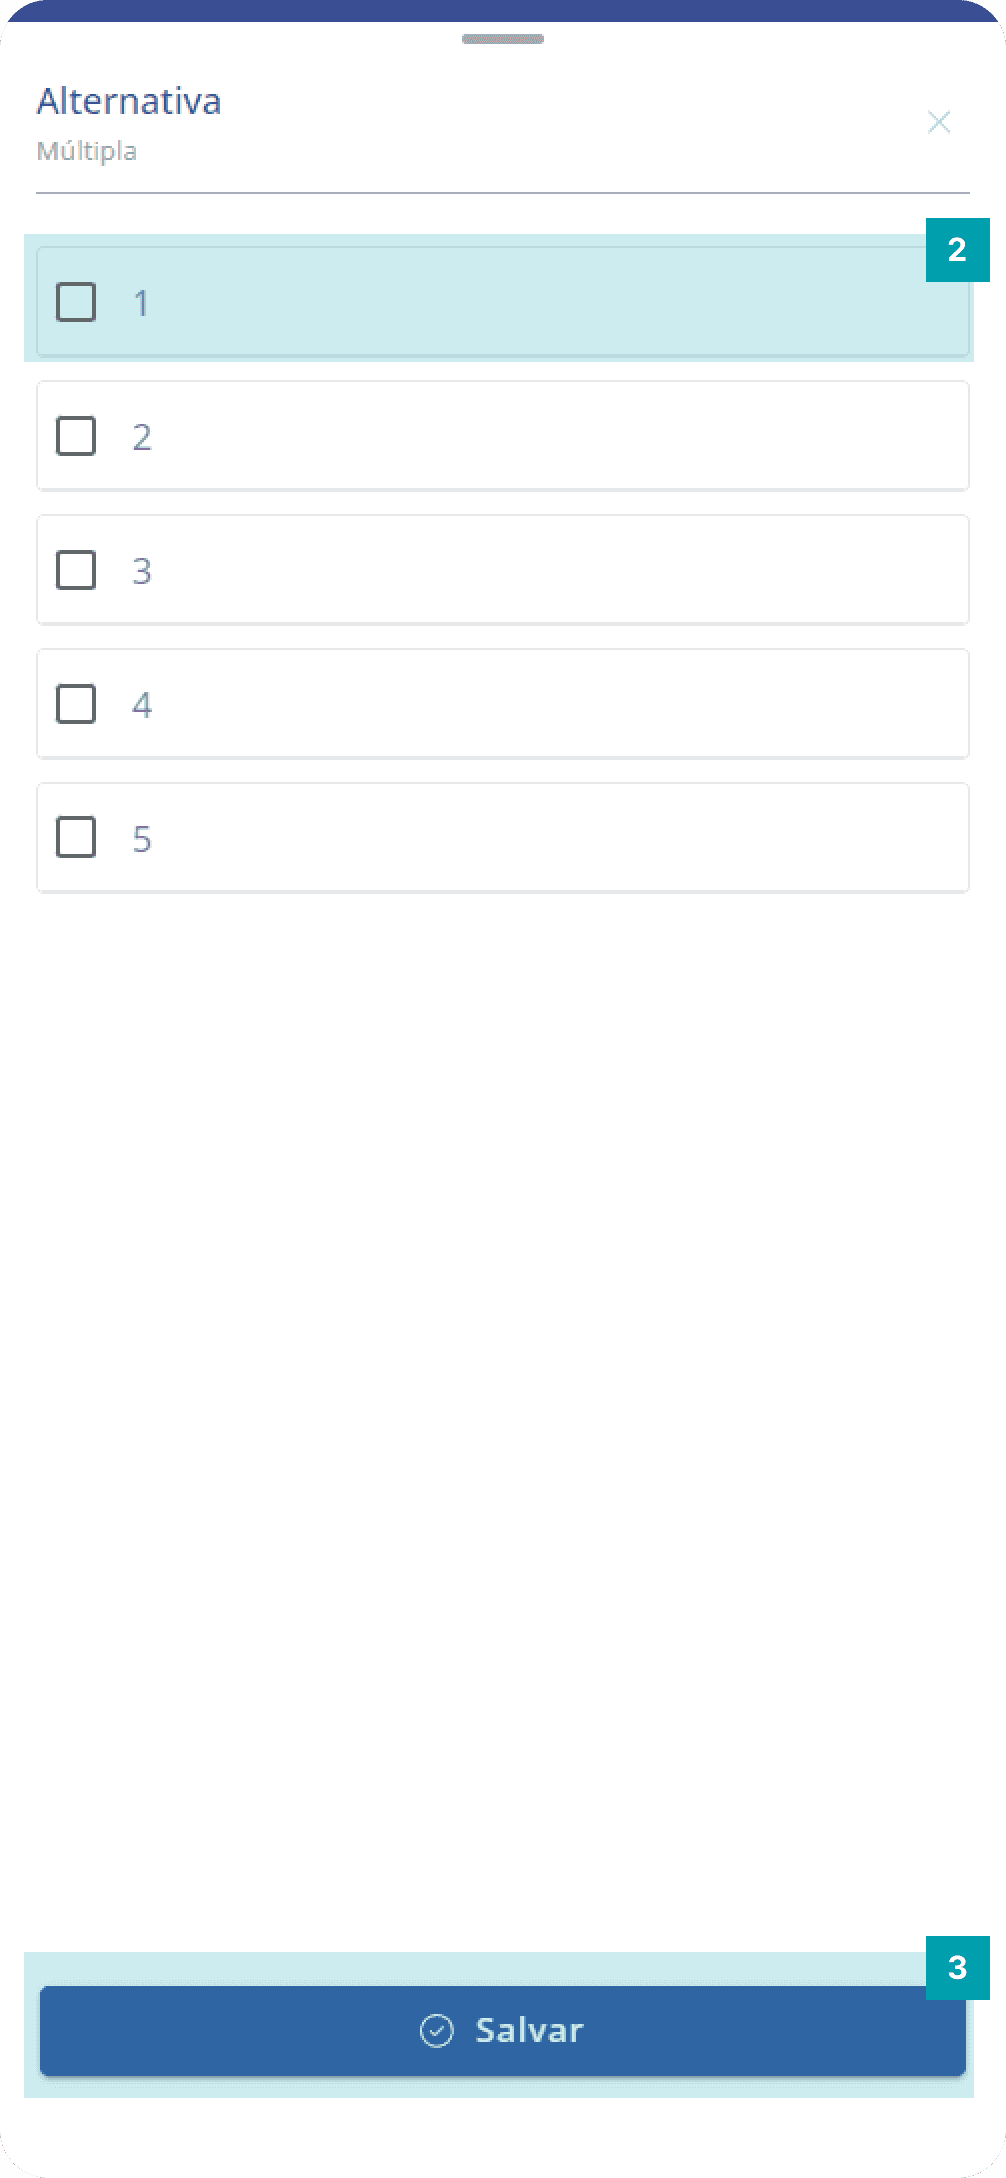
Dynamic field type: Multiple choice
This field allows the user to select one or more options to fill in.
Click on the area of the Multiple choice field to open its editing screen.
Selection – Click on the area of the desired option(s) to select it/them.
Save – Click the Save button to finish your editing.
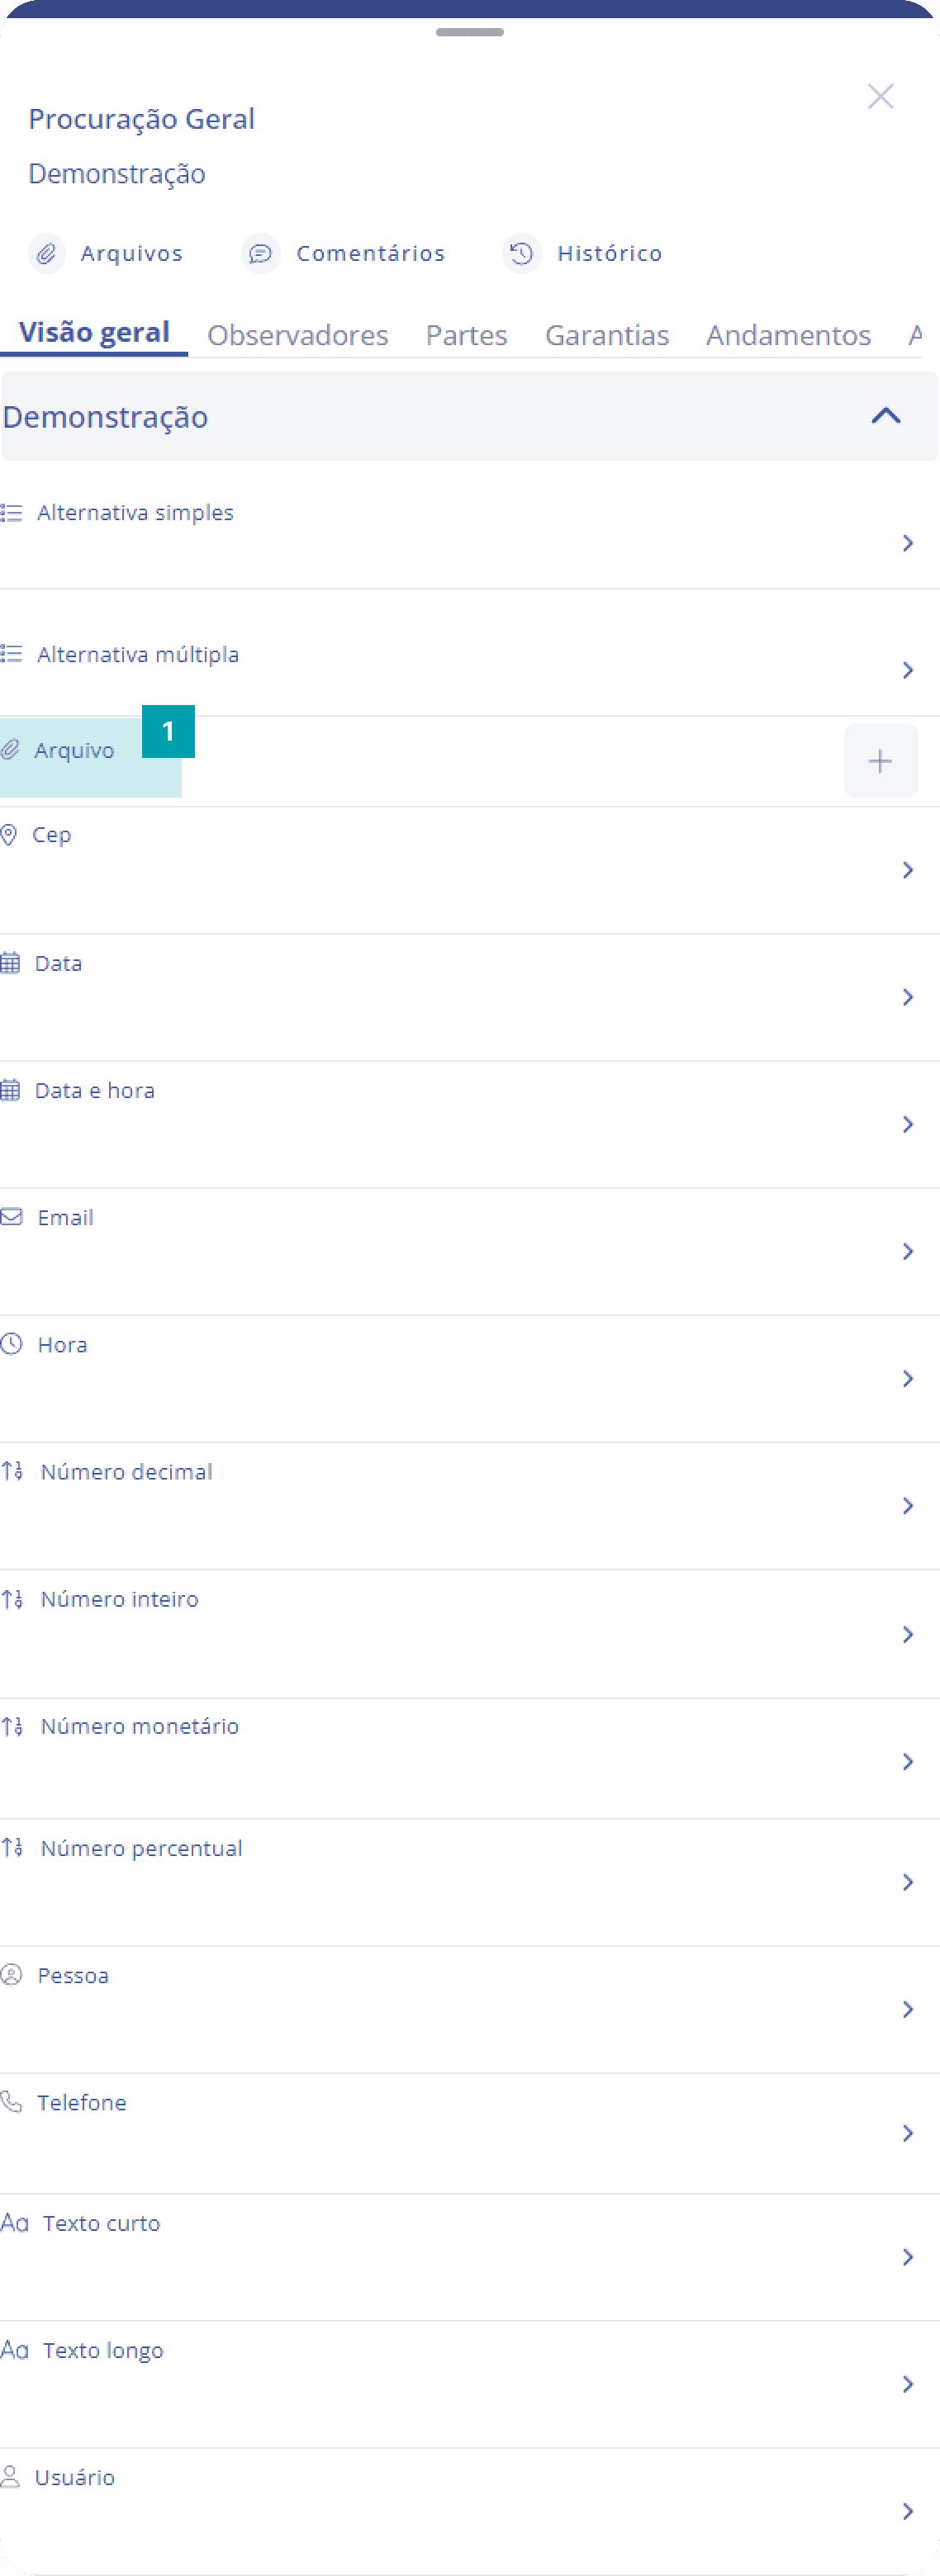
Dynamic field type: File
The file field is intended to attach a file to the activity.
Click on the area of the File field to open its editing screen.
Add file – Click the button to open the file upload submenu with the following options that allow you to:
Take a photo or record a video in real time.
Search for and insert images or videos saved in the device gallery.
Search for and insert files saved on the device.
Save – Click the Save button to finish your editing.
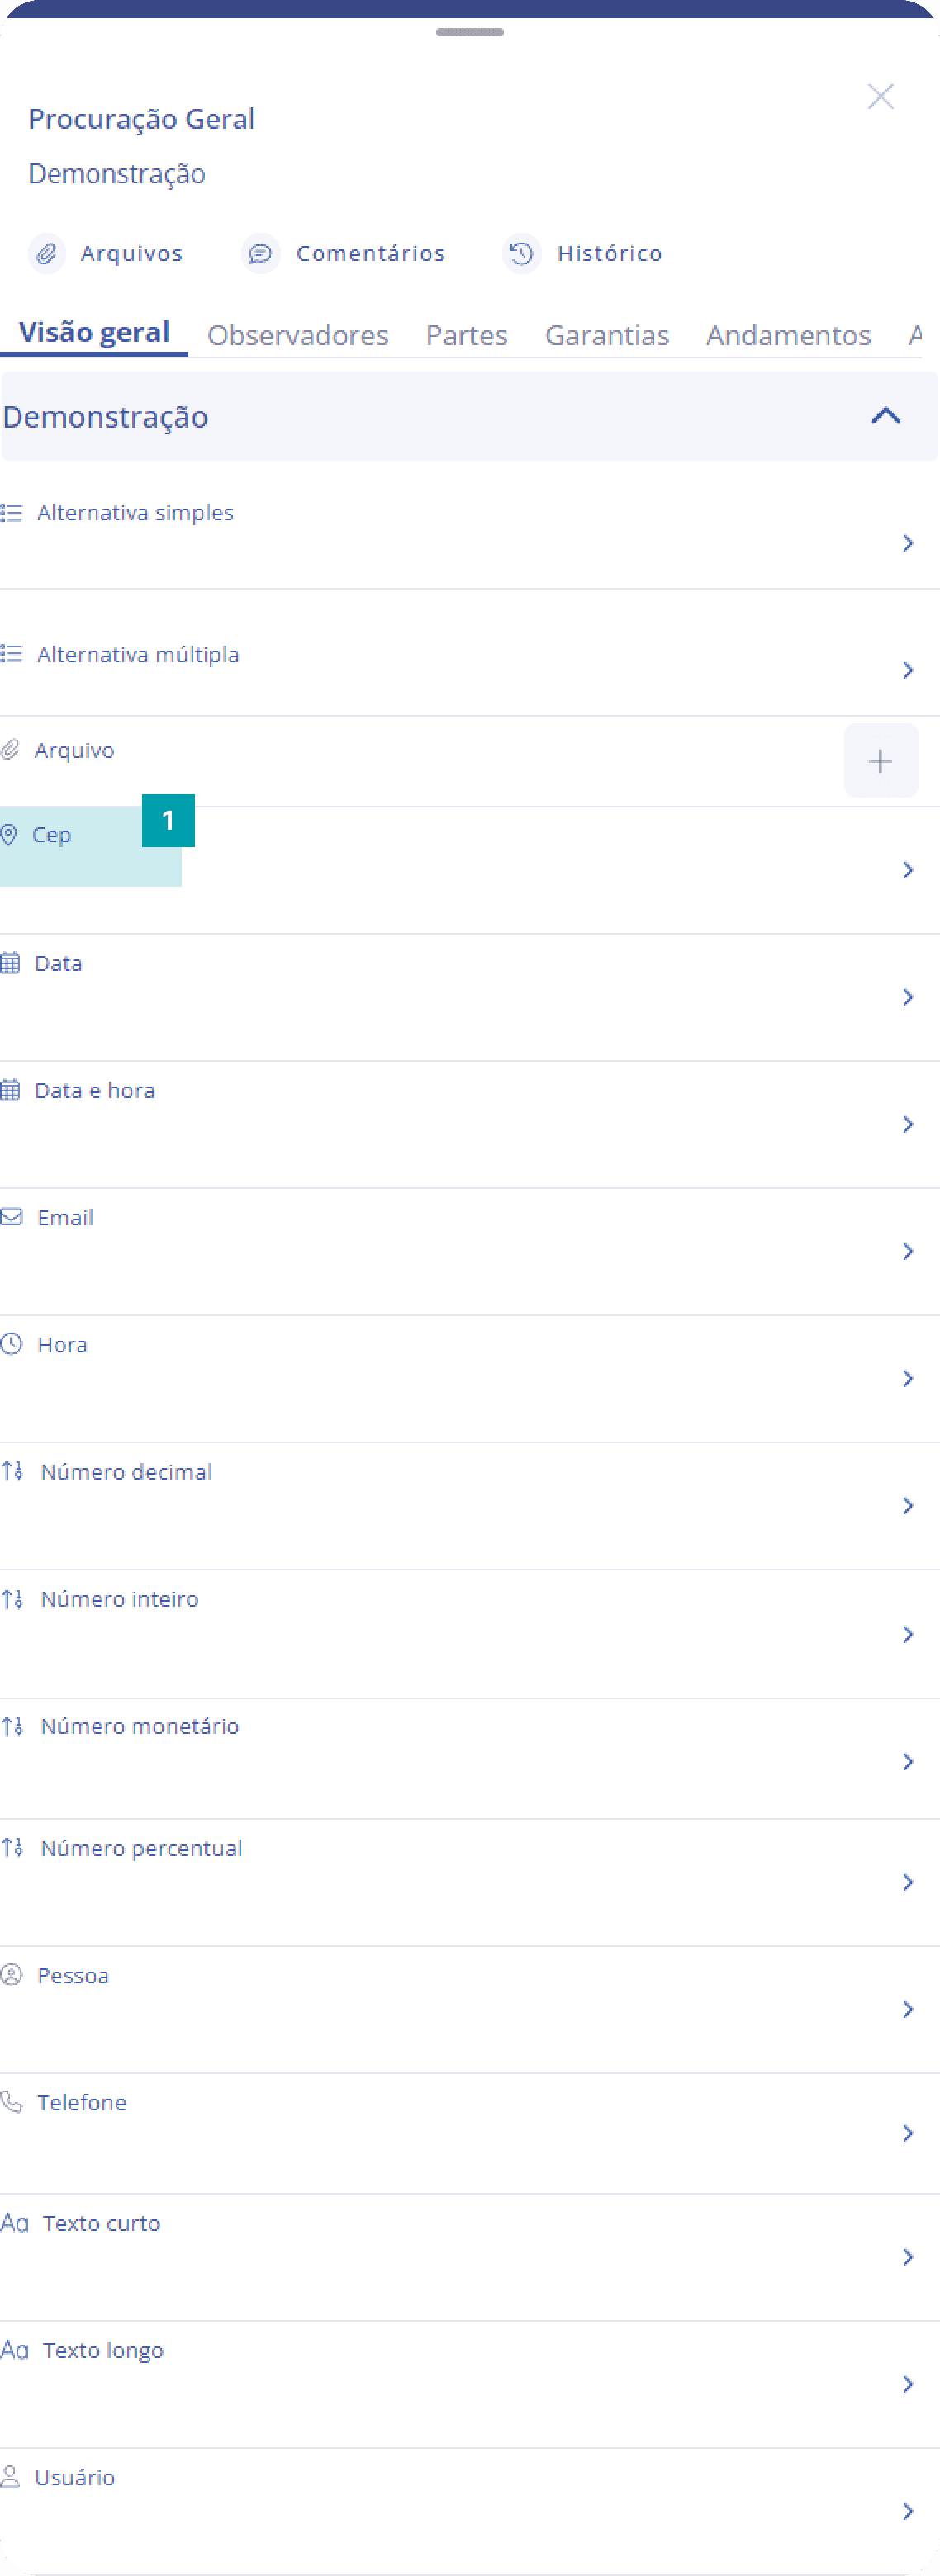
Dynamic field type: ZIP code
Specific field for recording and documenting ZIP code numbers.
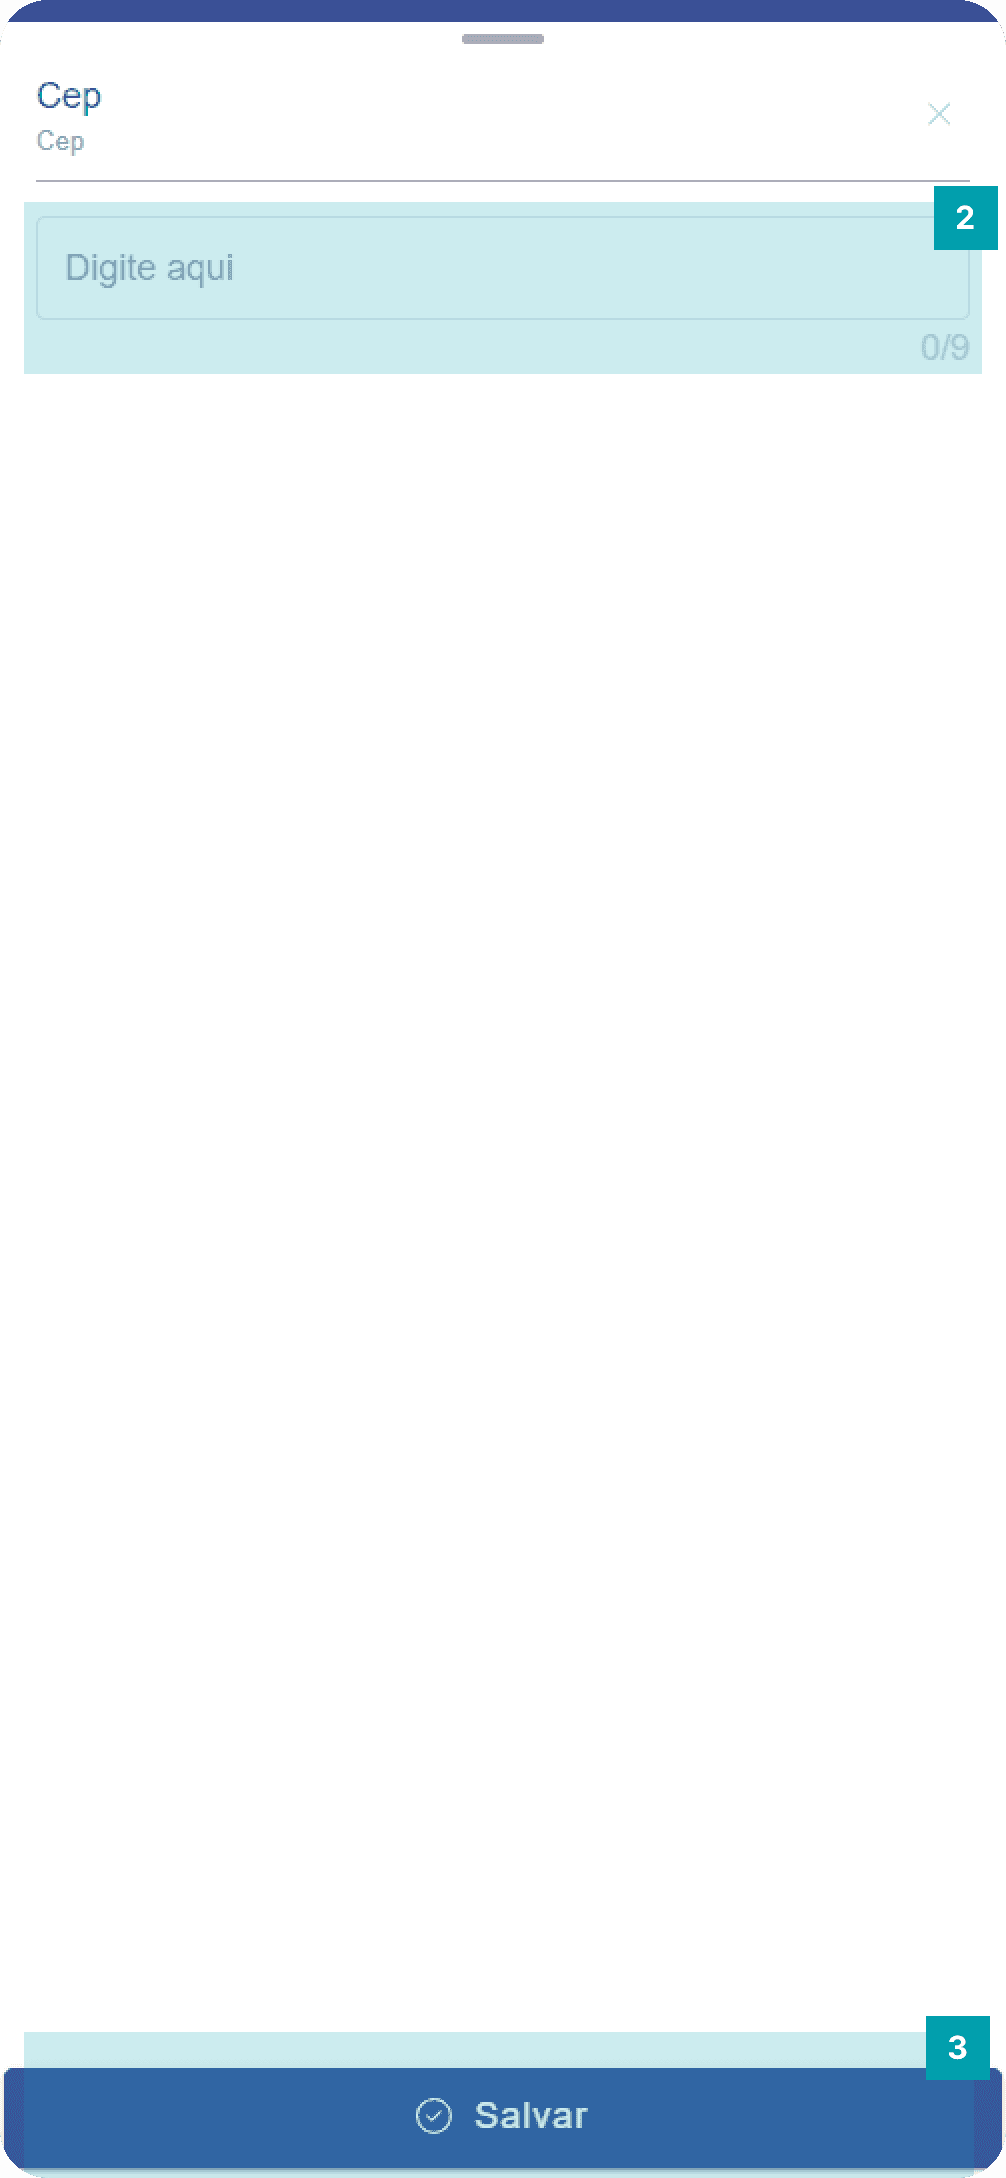
Click on the area of the dynamic field type ZIP code to open its editing screen.
Type the desired ZIP code number.
Save – Click the Save button to finish your editing.
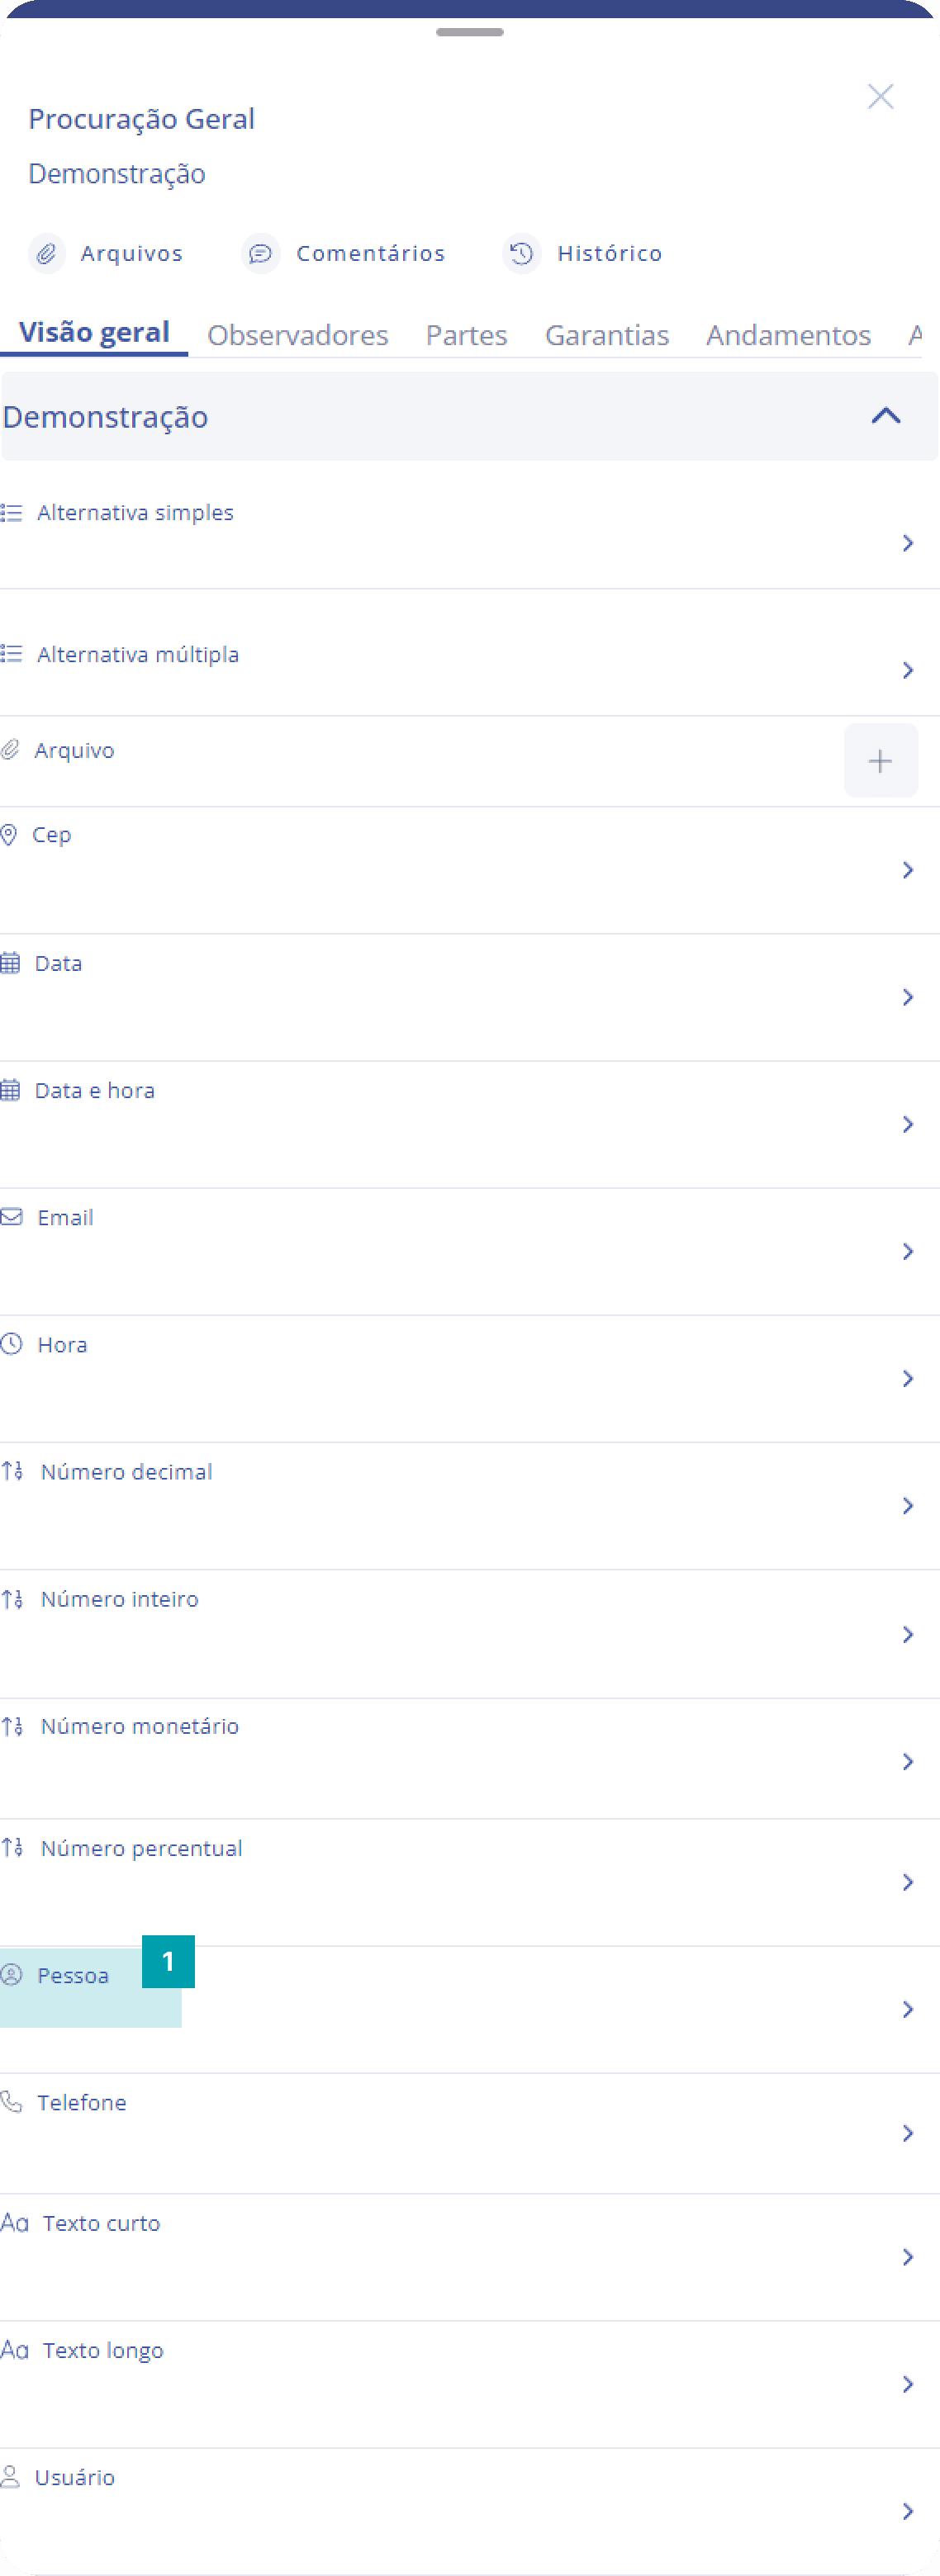
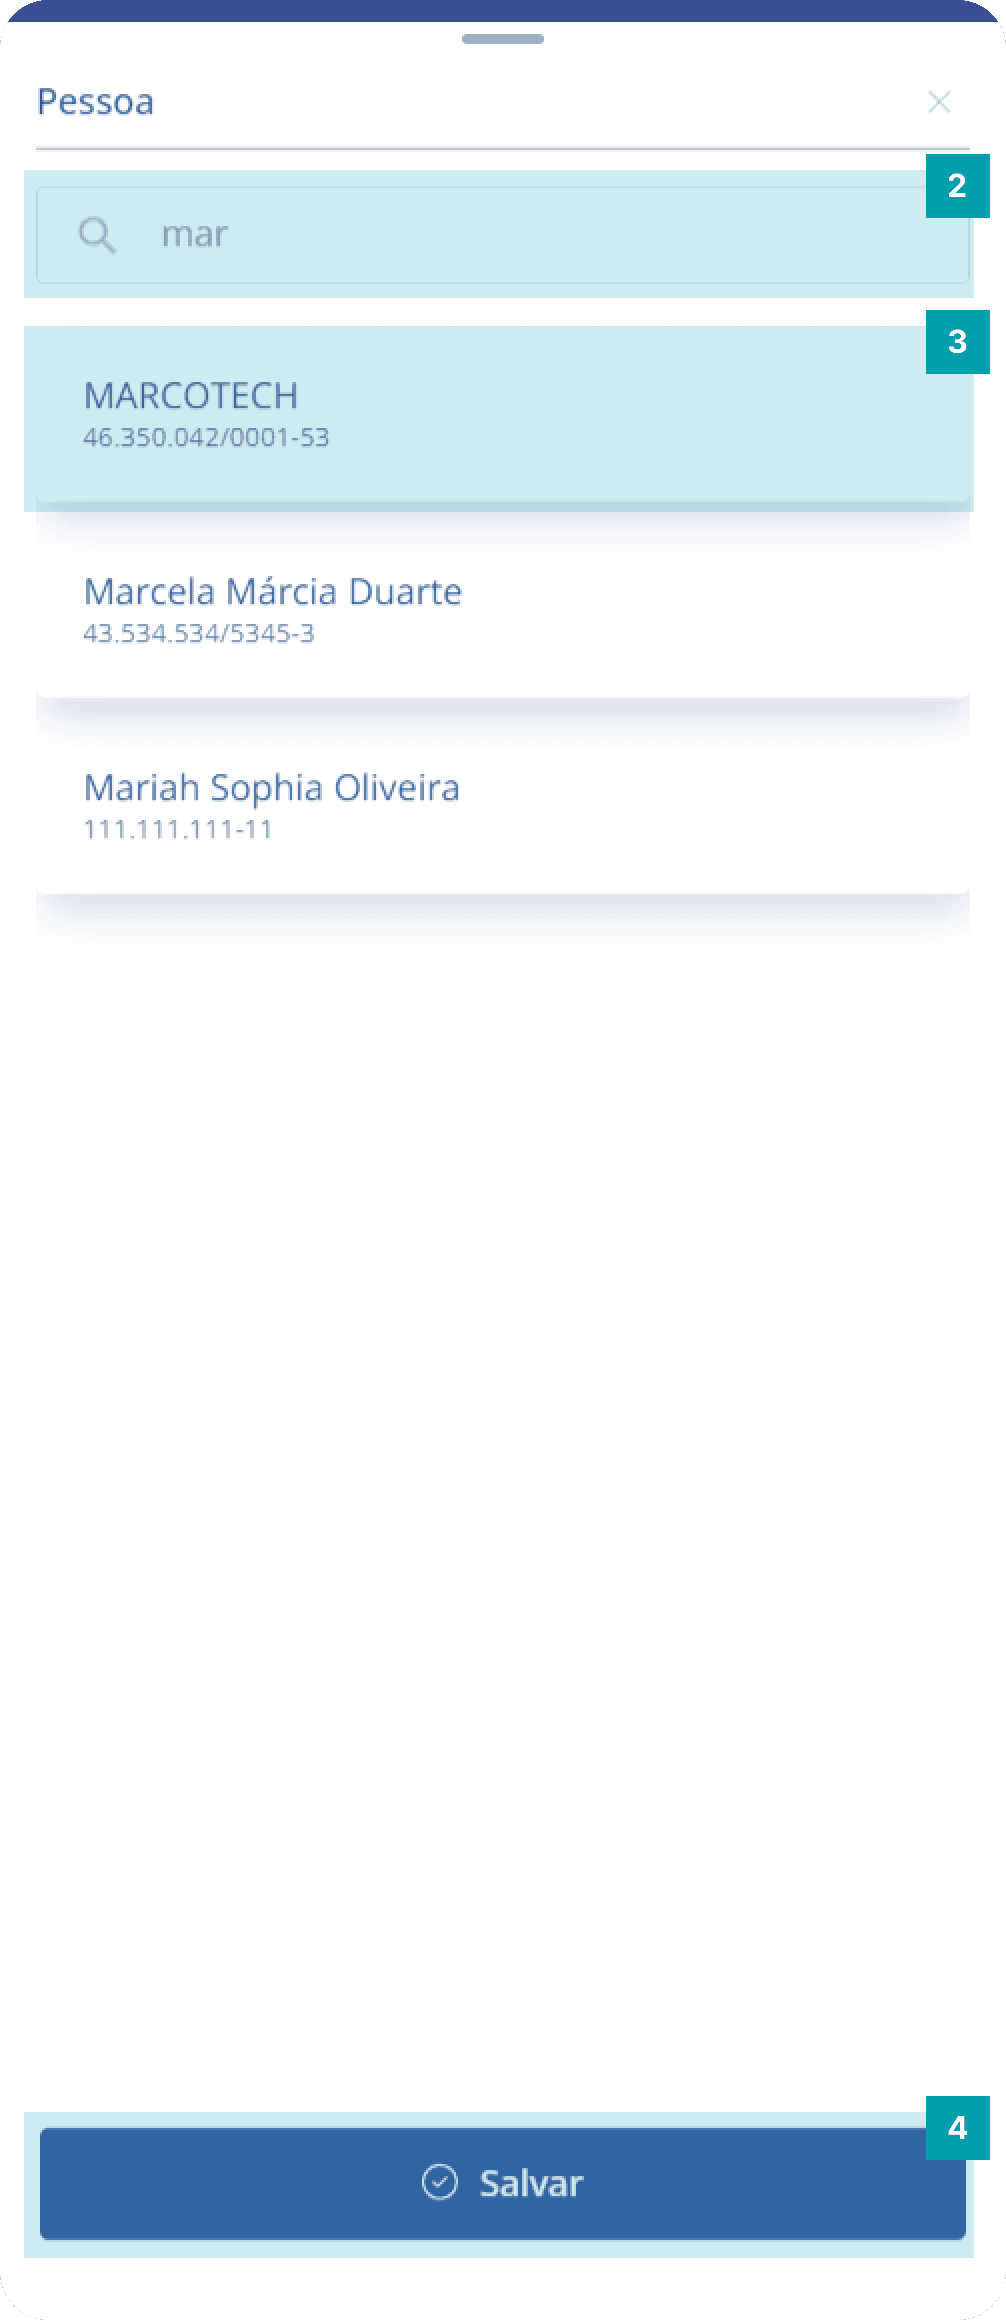
Dynamic field type: Person
Specific field for recording and associating clients registered in the system with the unit form.
Click on the area of the Person field to open its editing screen.
Search – Click the search field and type the name of the person you want.
Selection – Click on the area of the desired person to select it.
Save – Click the Save button to finish your editing.
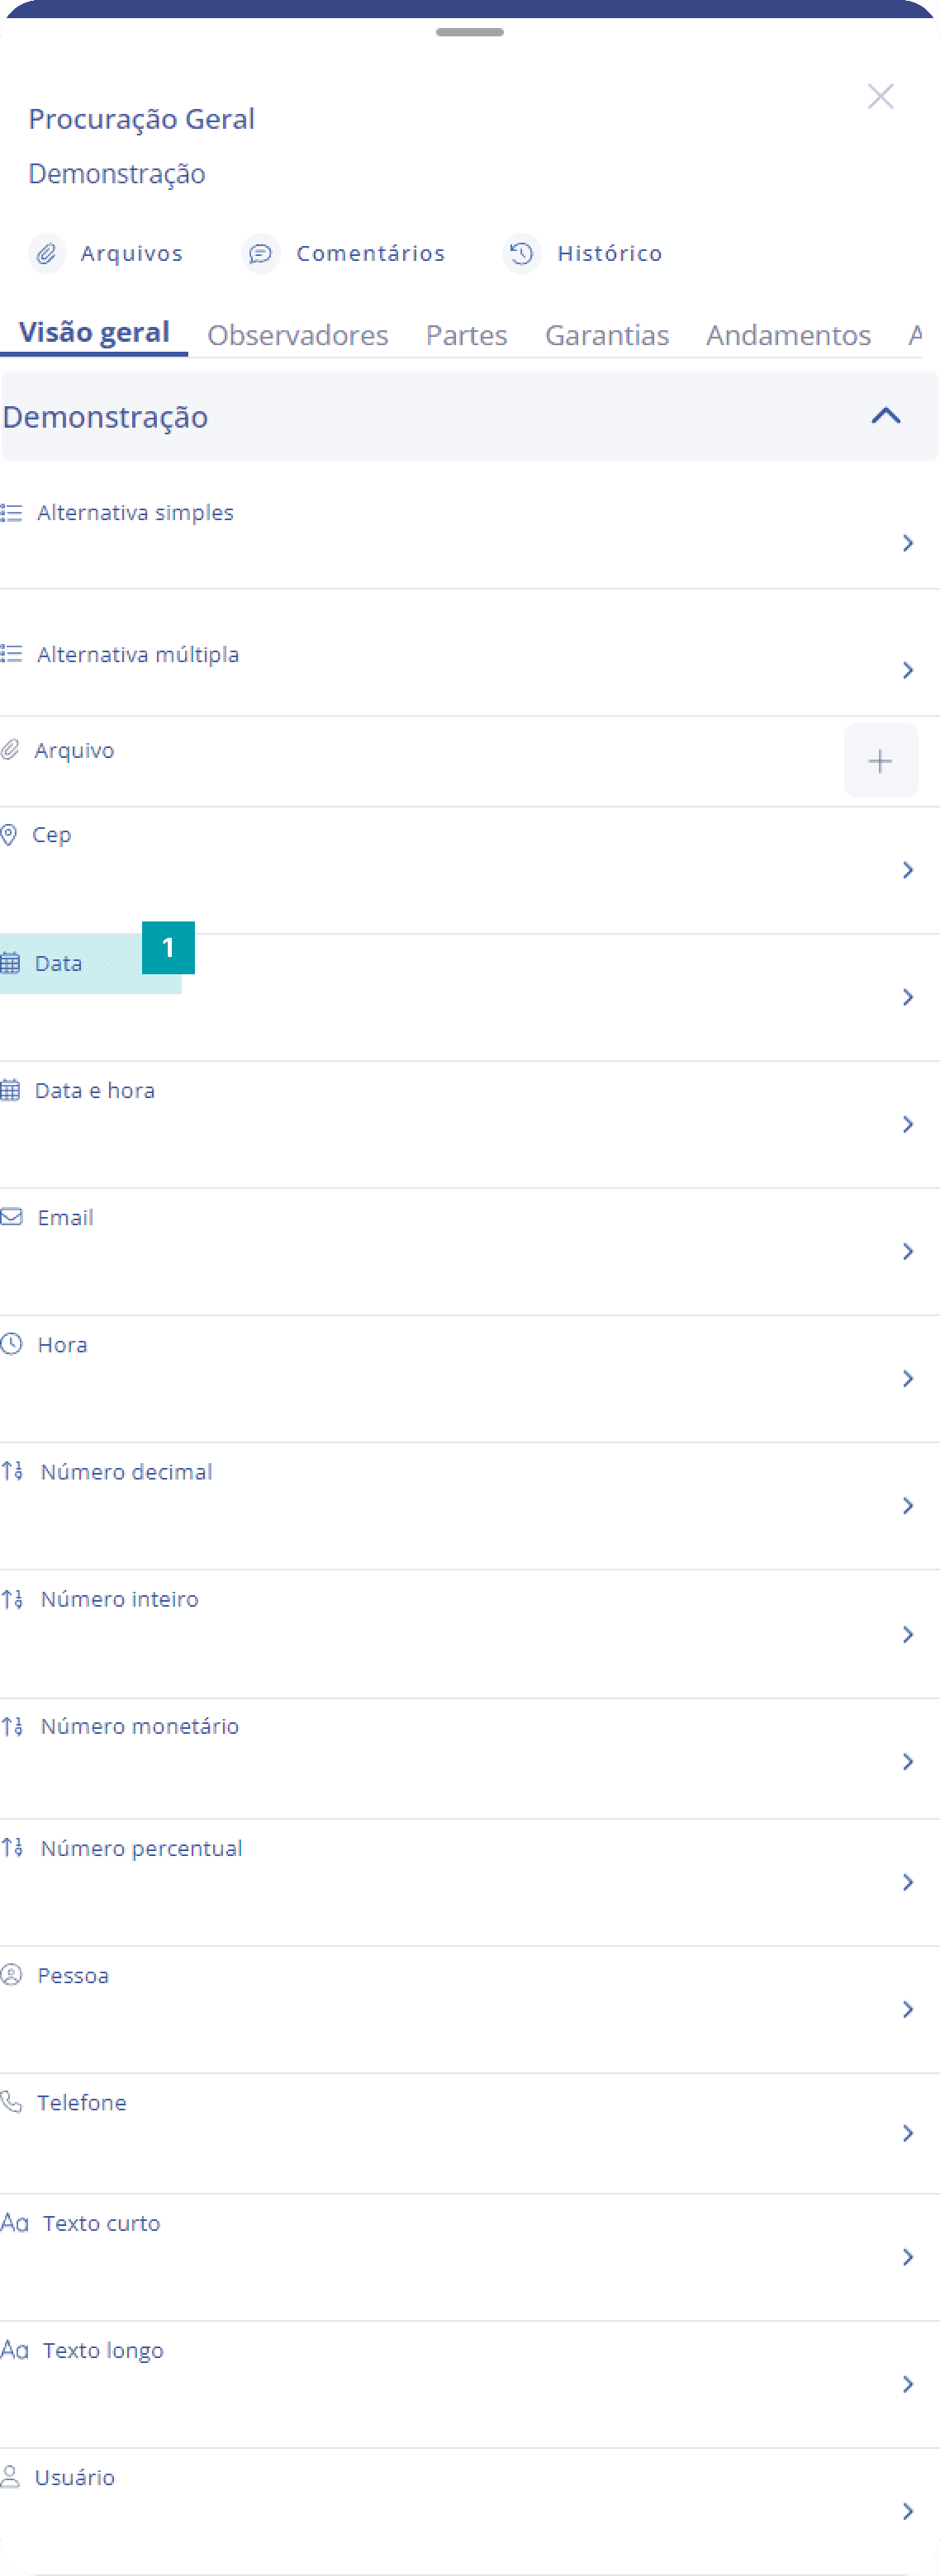
Dynamic field type: Date
Specific field for recording and documenting dates in the unit form.
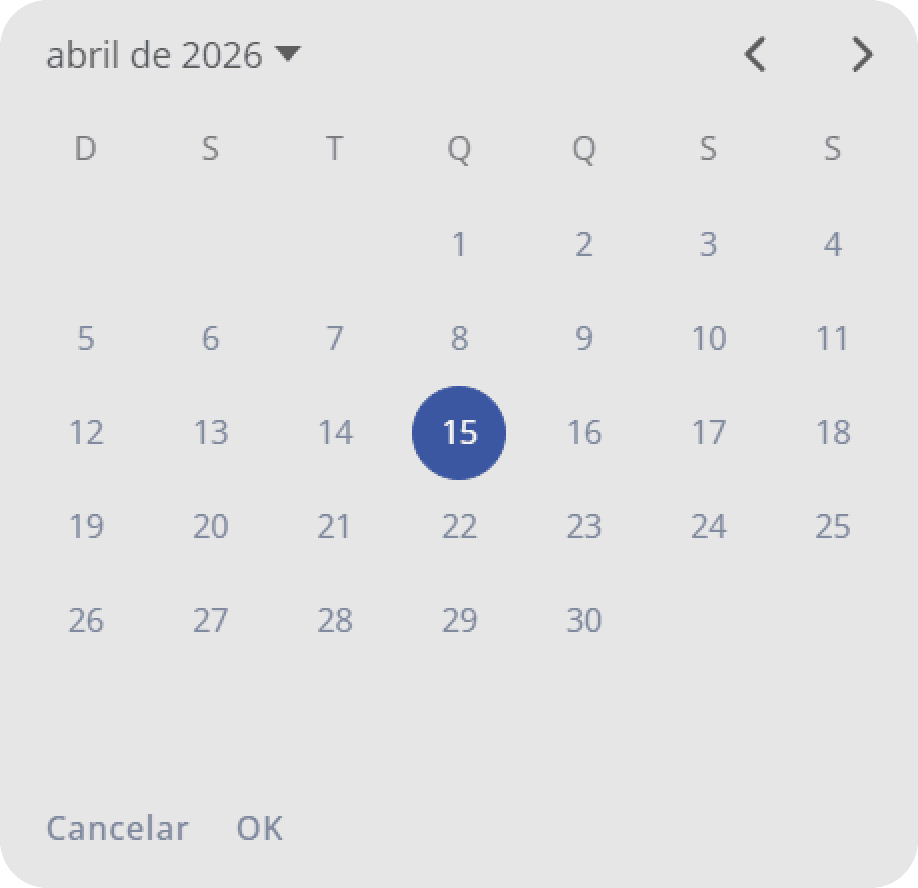
Click on the area of the Date field to open its editing screen.
Date – When clicked, a floating modal opens so you can choose the desired day.
Save – Click the Save button to finish your editing.
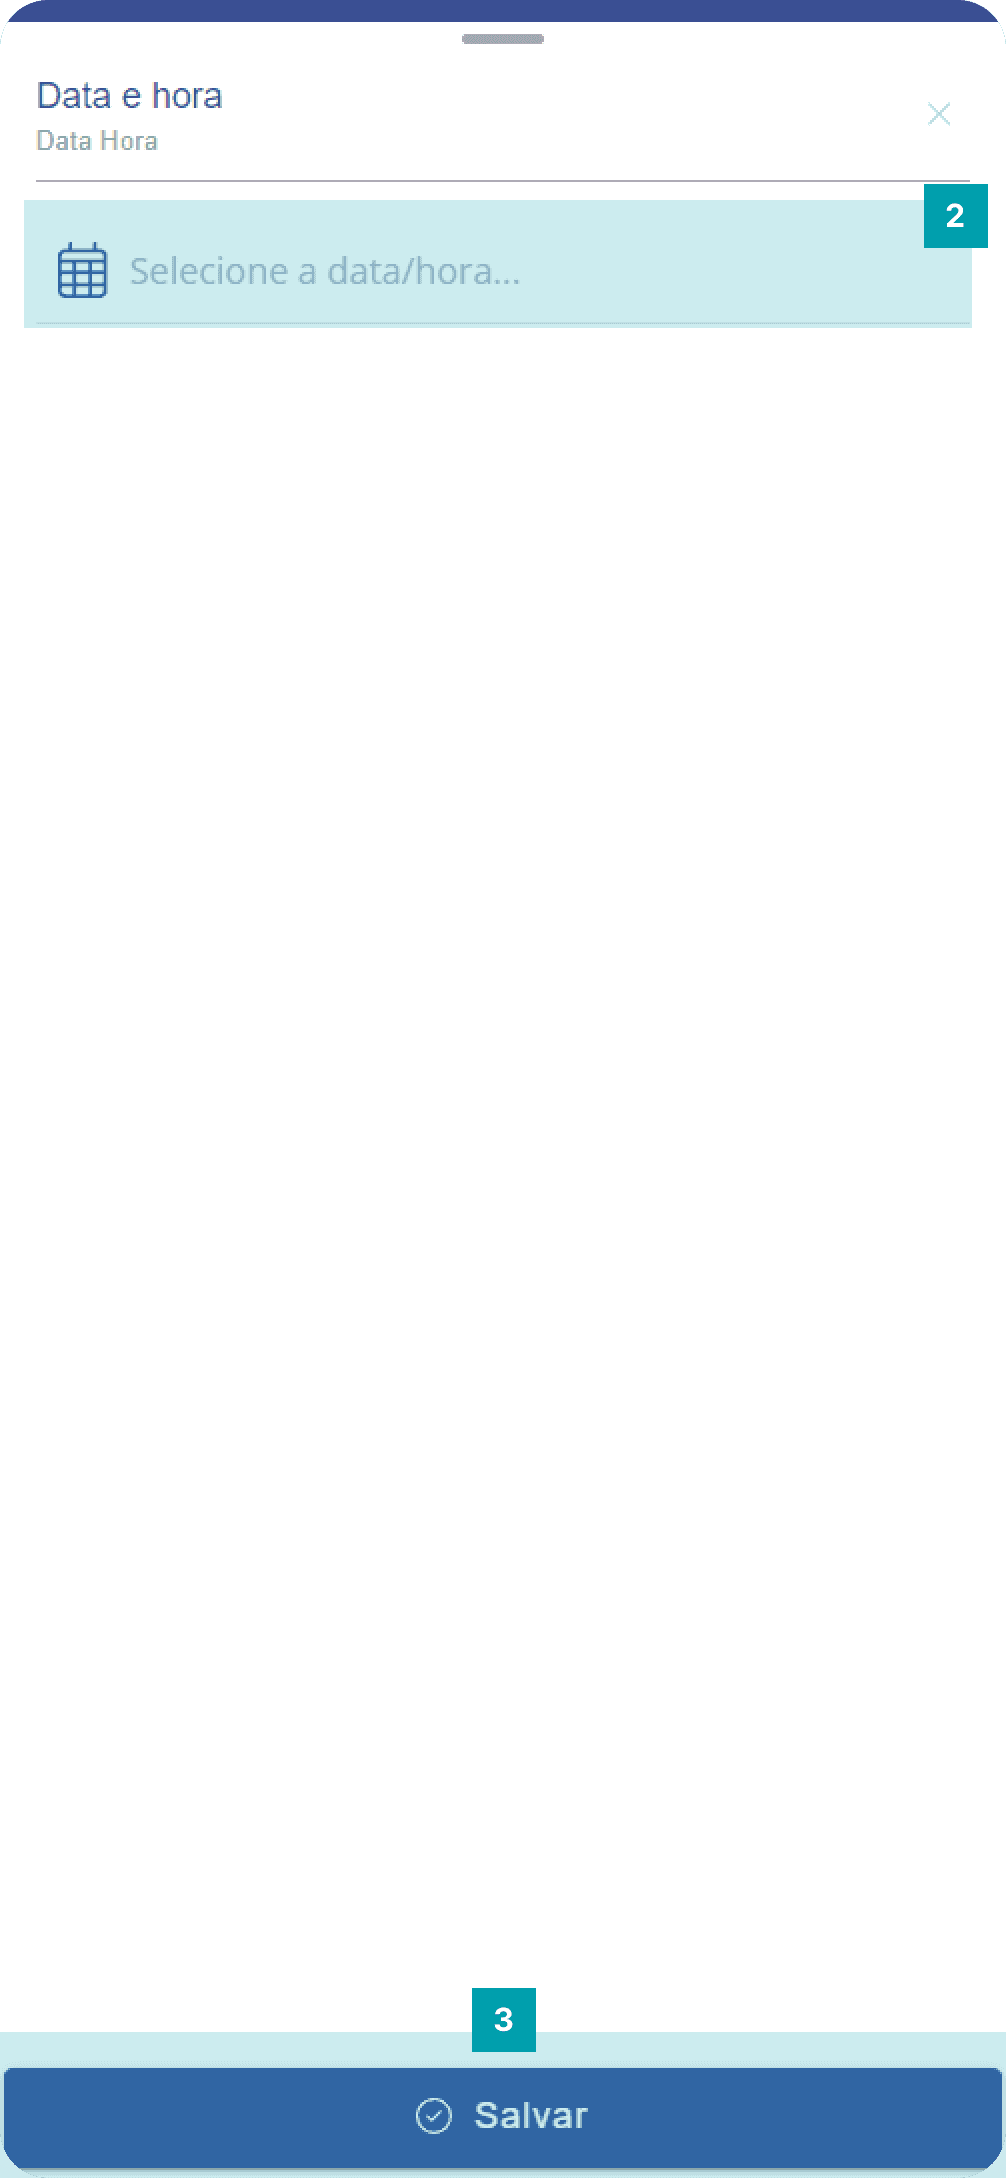
Dynamic field type: Date and time
Specific field for recording and documenting dates and times in the unit form.
Click on the area of the Date and time field to open its editing screen.
Date and time – When clicked, a floating modal opens so you can choose the desired day and time.
Save – Click the Save button to finish your editing.
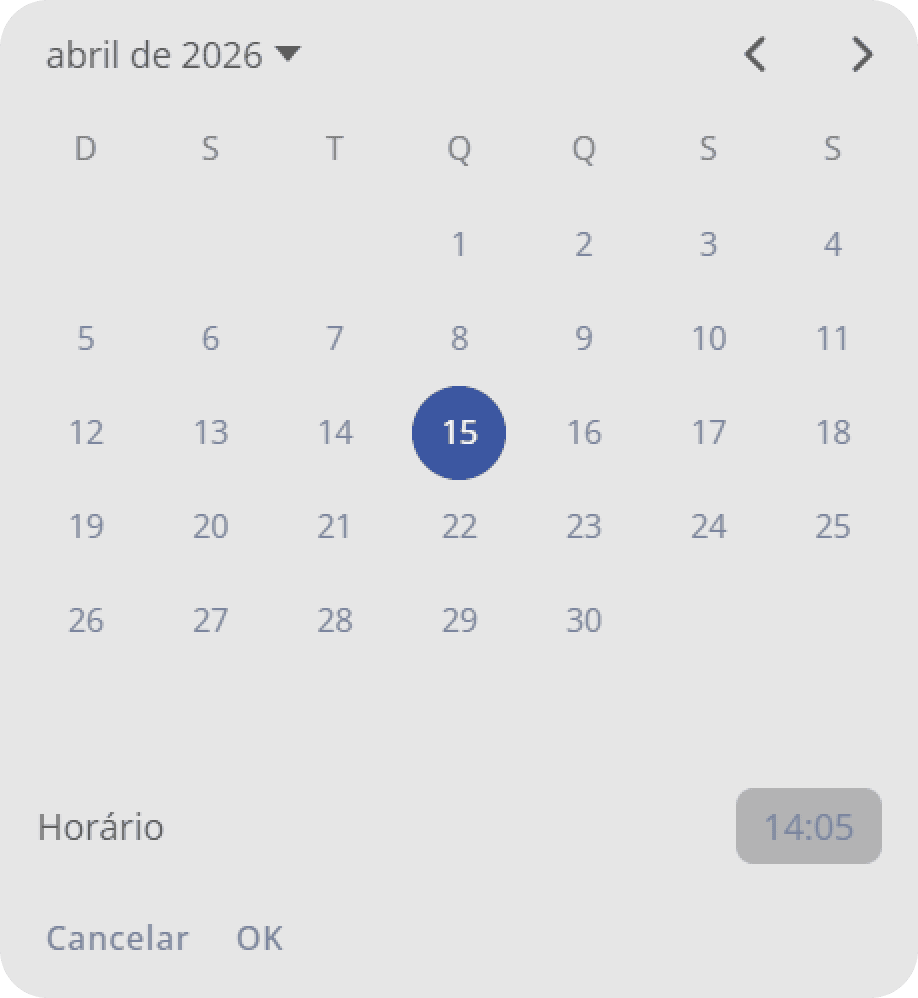
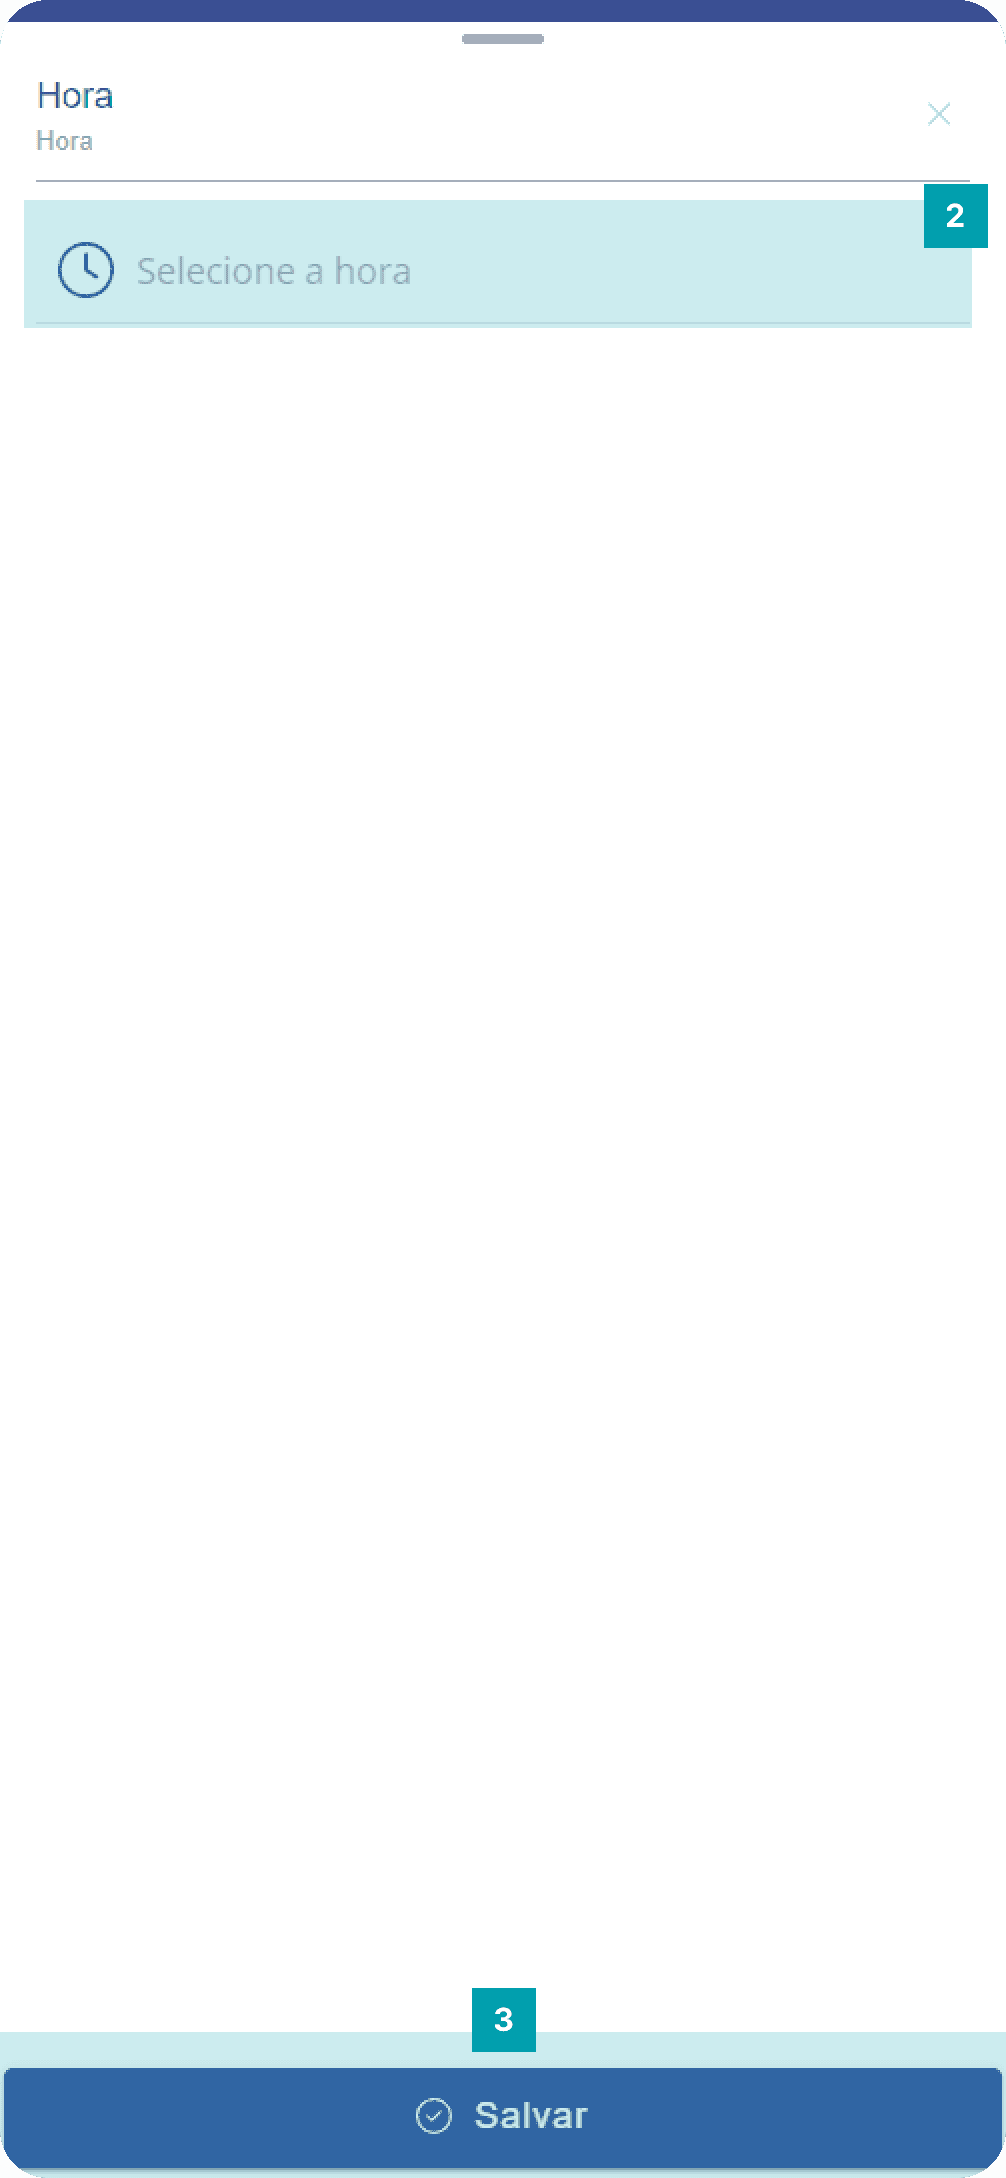
Dynamic field type: Time
Specific field for recording and documenting times in the unit form.
Click on the area of the Time field to open its editing screen.
Time – When clicked, it allows you to set specific hours and minutes.
Save – Click the Save button to finish your editing.
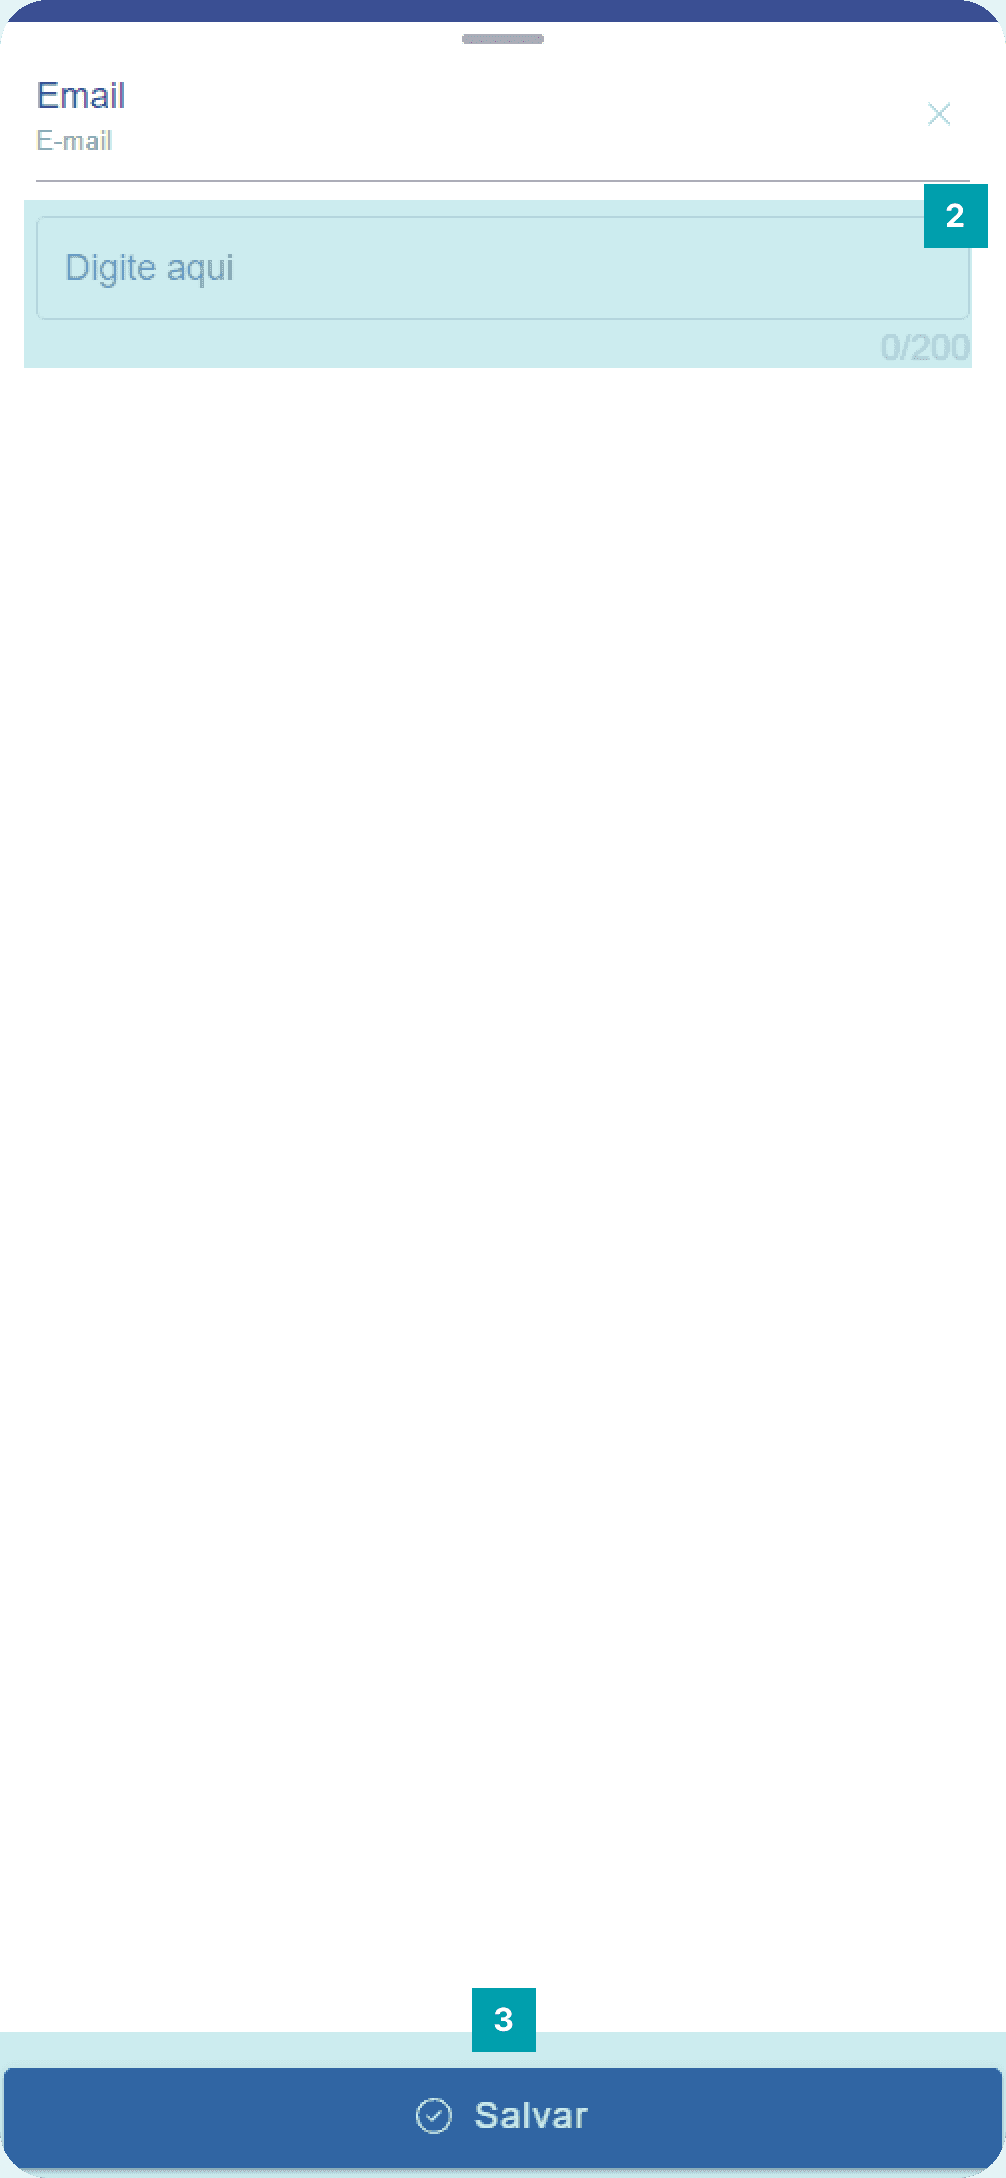
Dynamic field type: Email
Specific field for recording and documenting email addresses.
Click on the area of the dynamic field type email to open its editing screen.
Type the desired email address.
Save – Click the Save button to finish your editing.
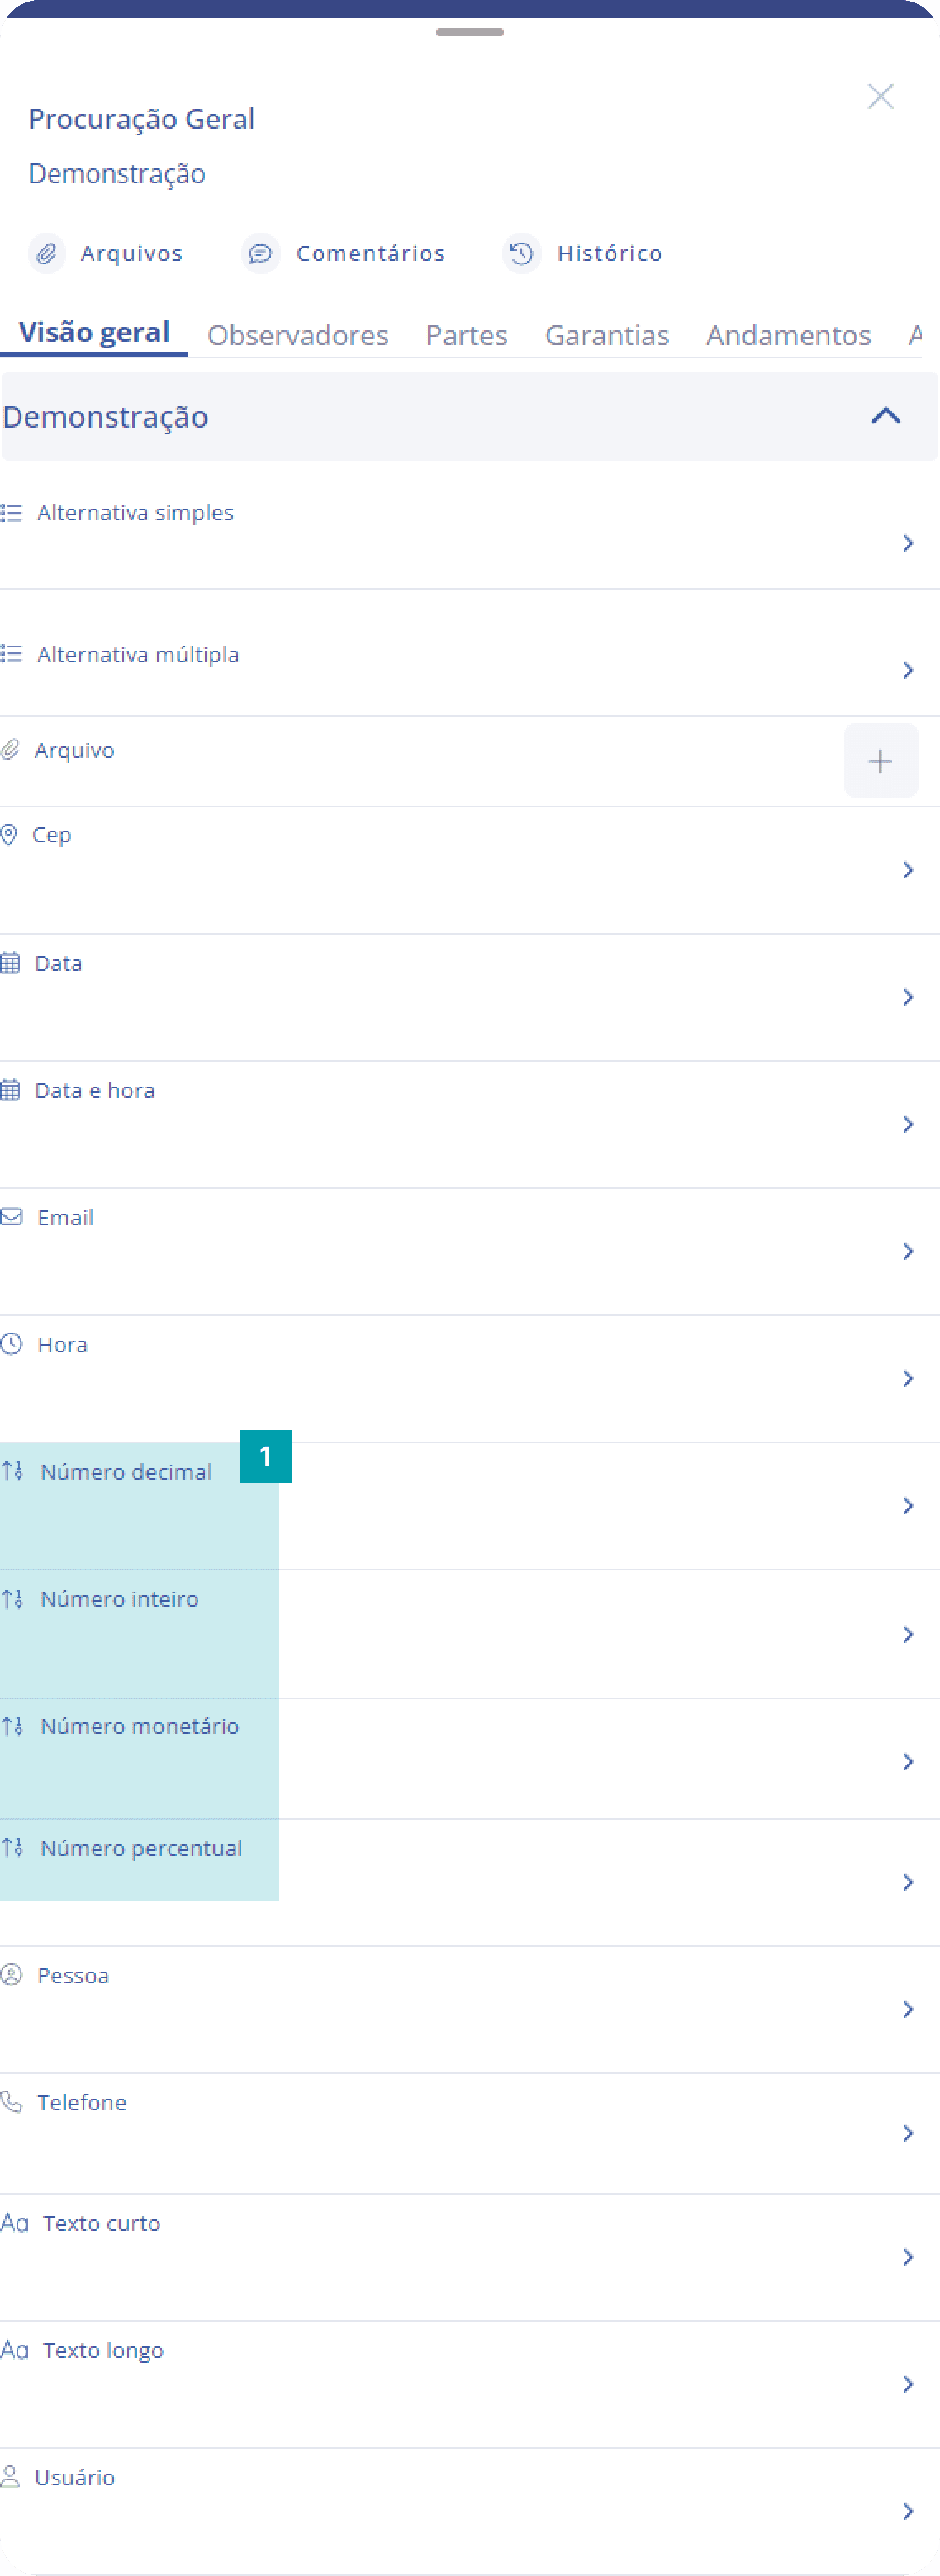
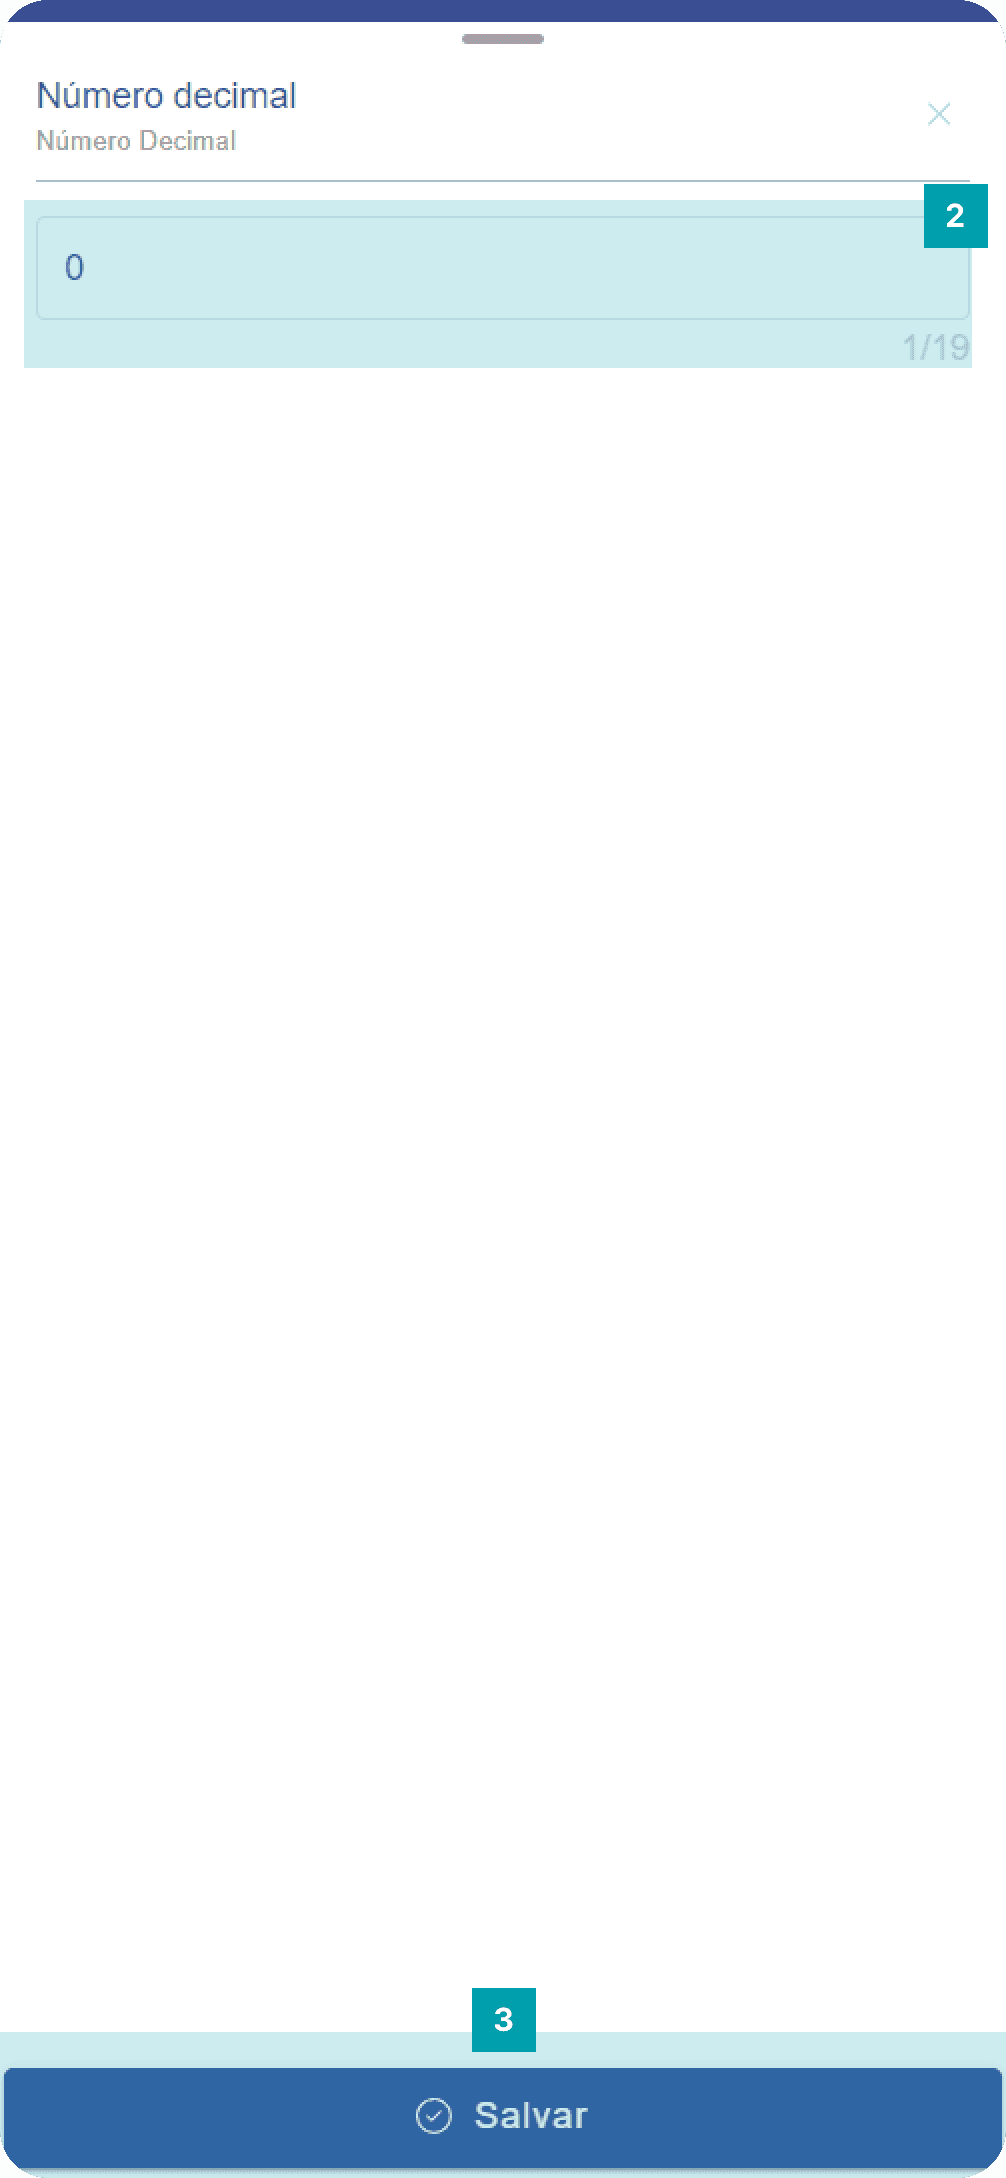
Dynamic fields of the type: Decimal number, Integer, Monetary, and Percentage
Numeric fields follow the same editing pattern and are essential for documenting information in units.
Click on the area of the dynamic field type “Decimal number, integer, monetary, or percentage” to open its editing screen.
Type the desired value in the field's value area.
Save – Click the Save button to finish your editing.
Important note! The fields of the types “percentage,” “decimal,” and “monetary” have decimal places; the number of decimal places shown in the field is configured through the web platform. Commas or periods are inserted automatically by the system according to the configured settings.
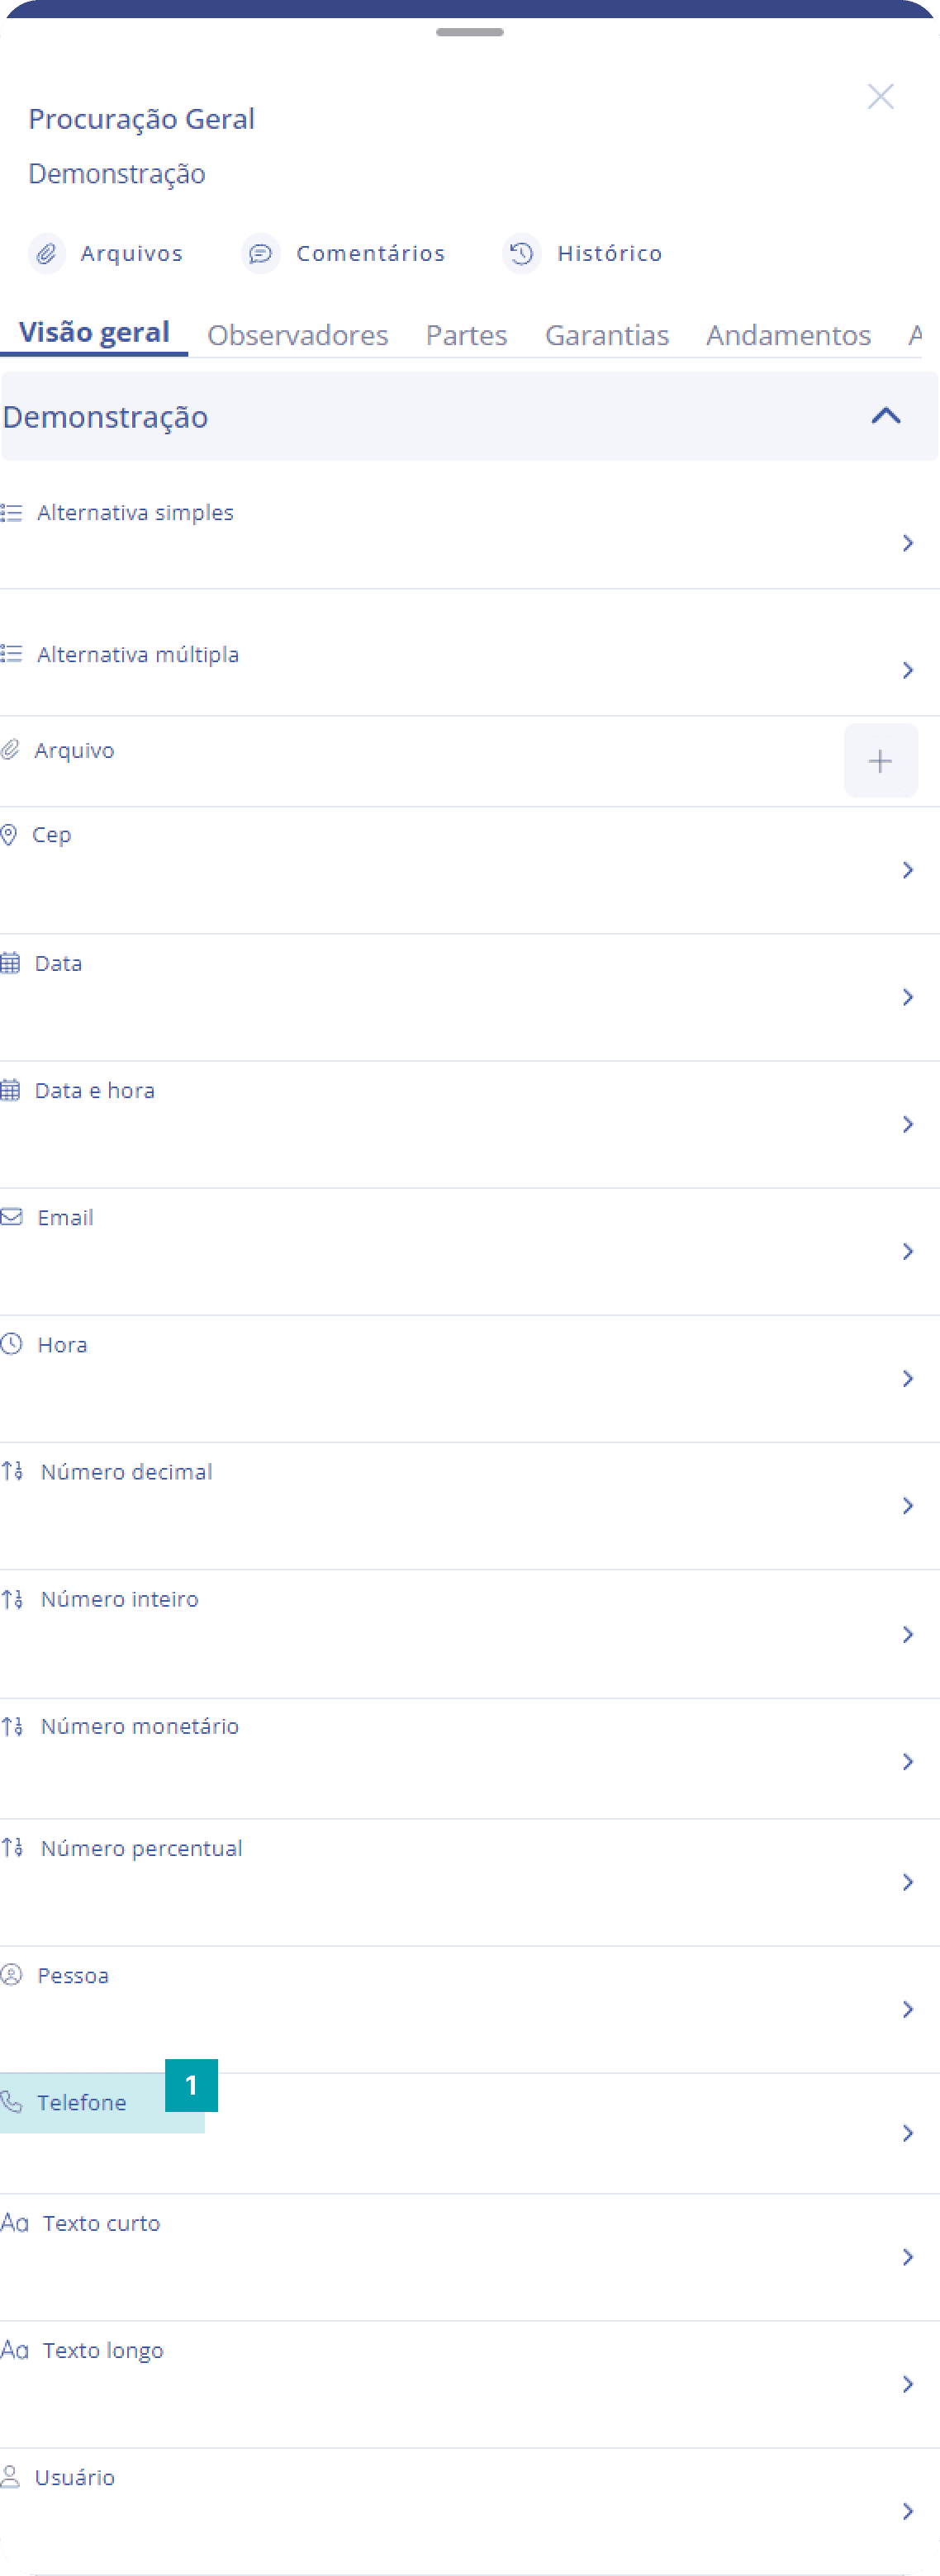
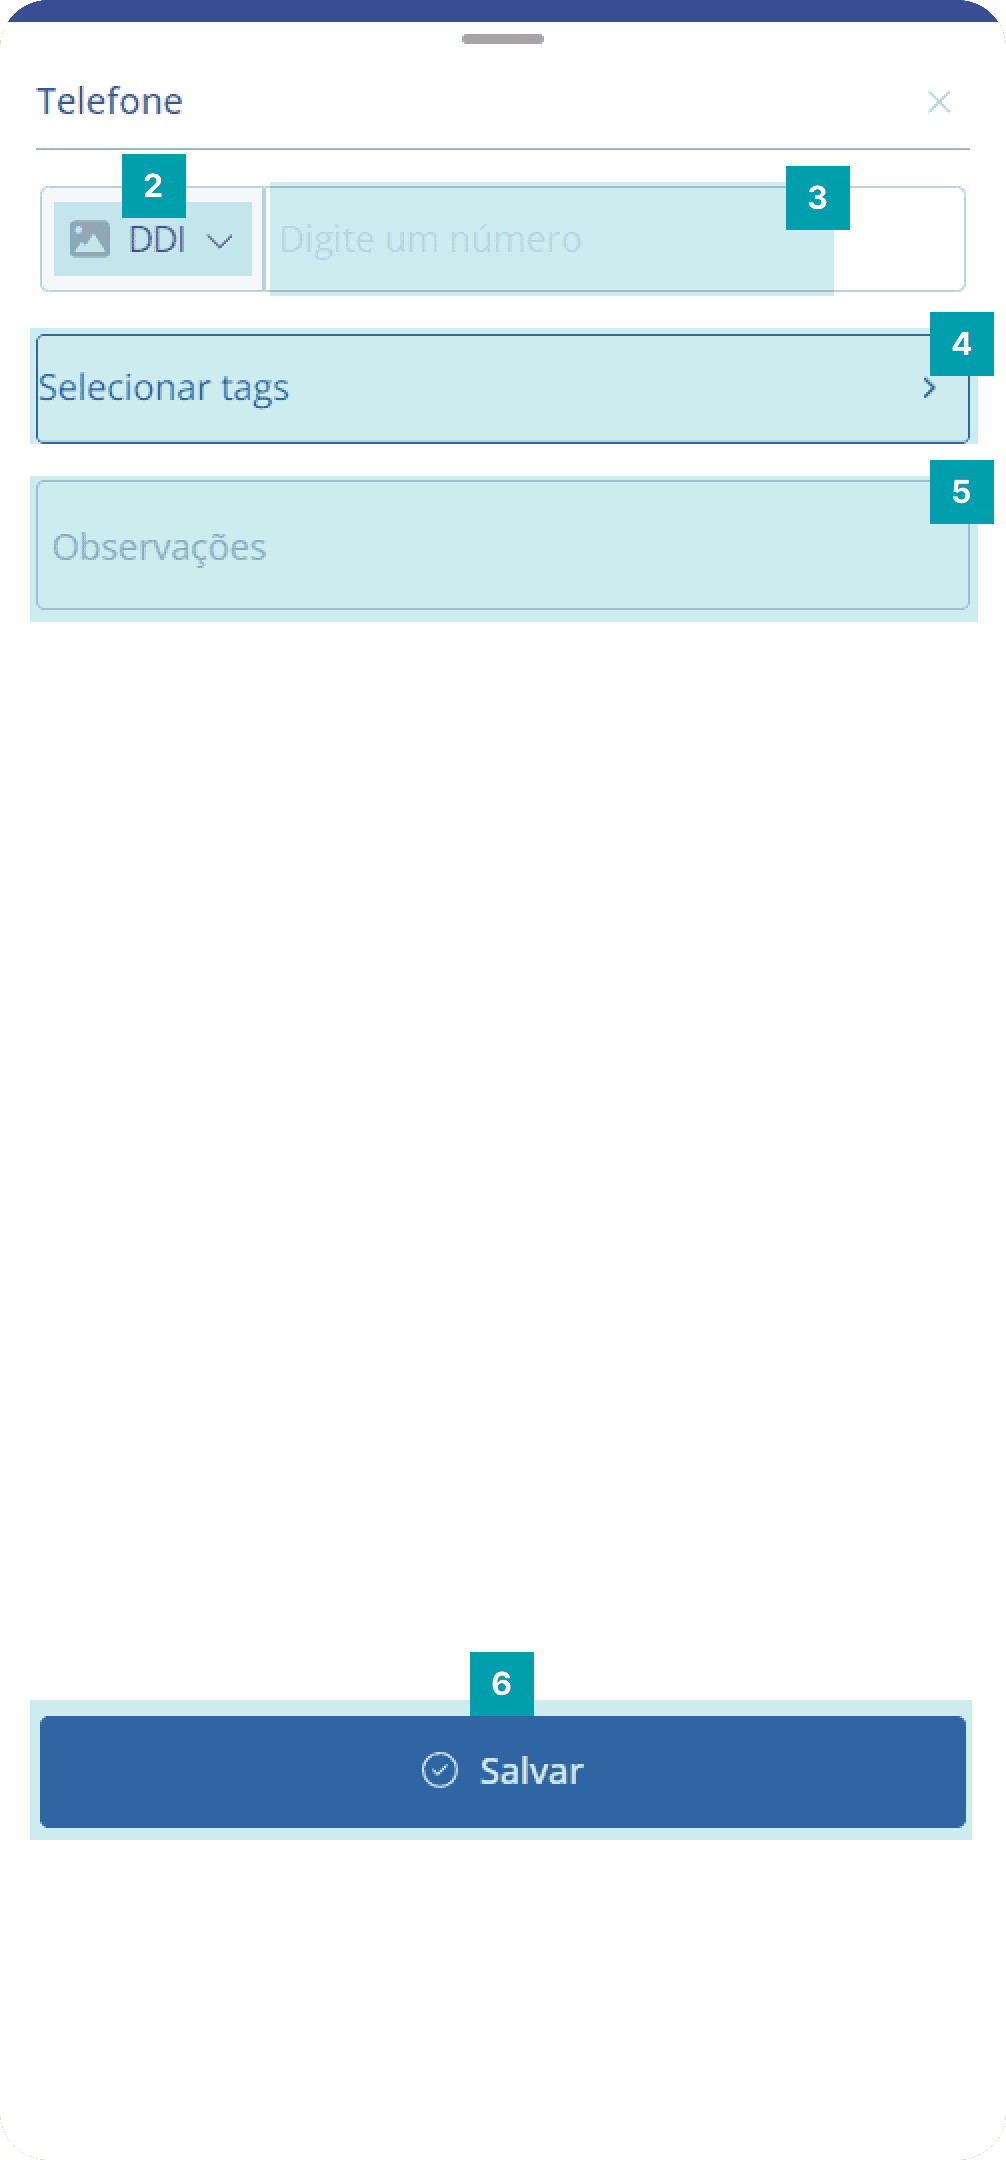
Dynamic field type: Phone
Specific field for recording and documenting phone numbers.
Click on the area of the dynamic field type Phone to open its editing screen.
Country – Click to select the phone's country
Type the desired phone number, always starting with the area code.
Tags – select one or more tags to associate with the phone
Notes – provide notes about the phone to make it easier for other users to understand.
Save – Click the Save button to finish your editing.
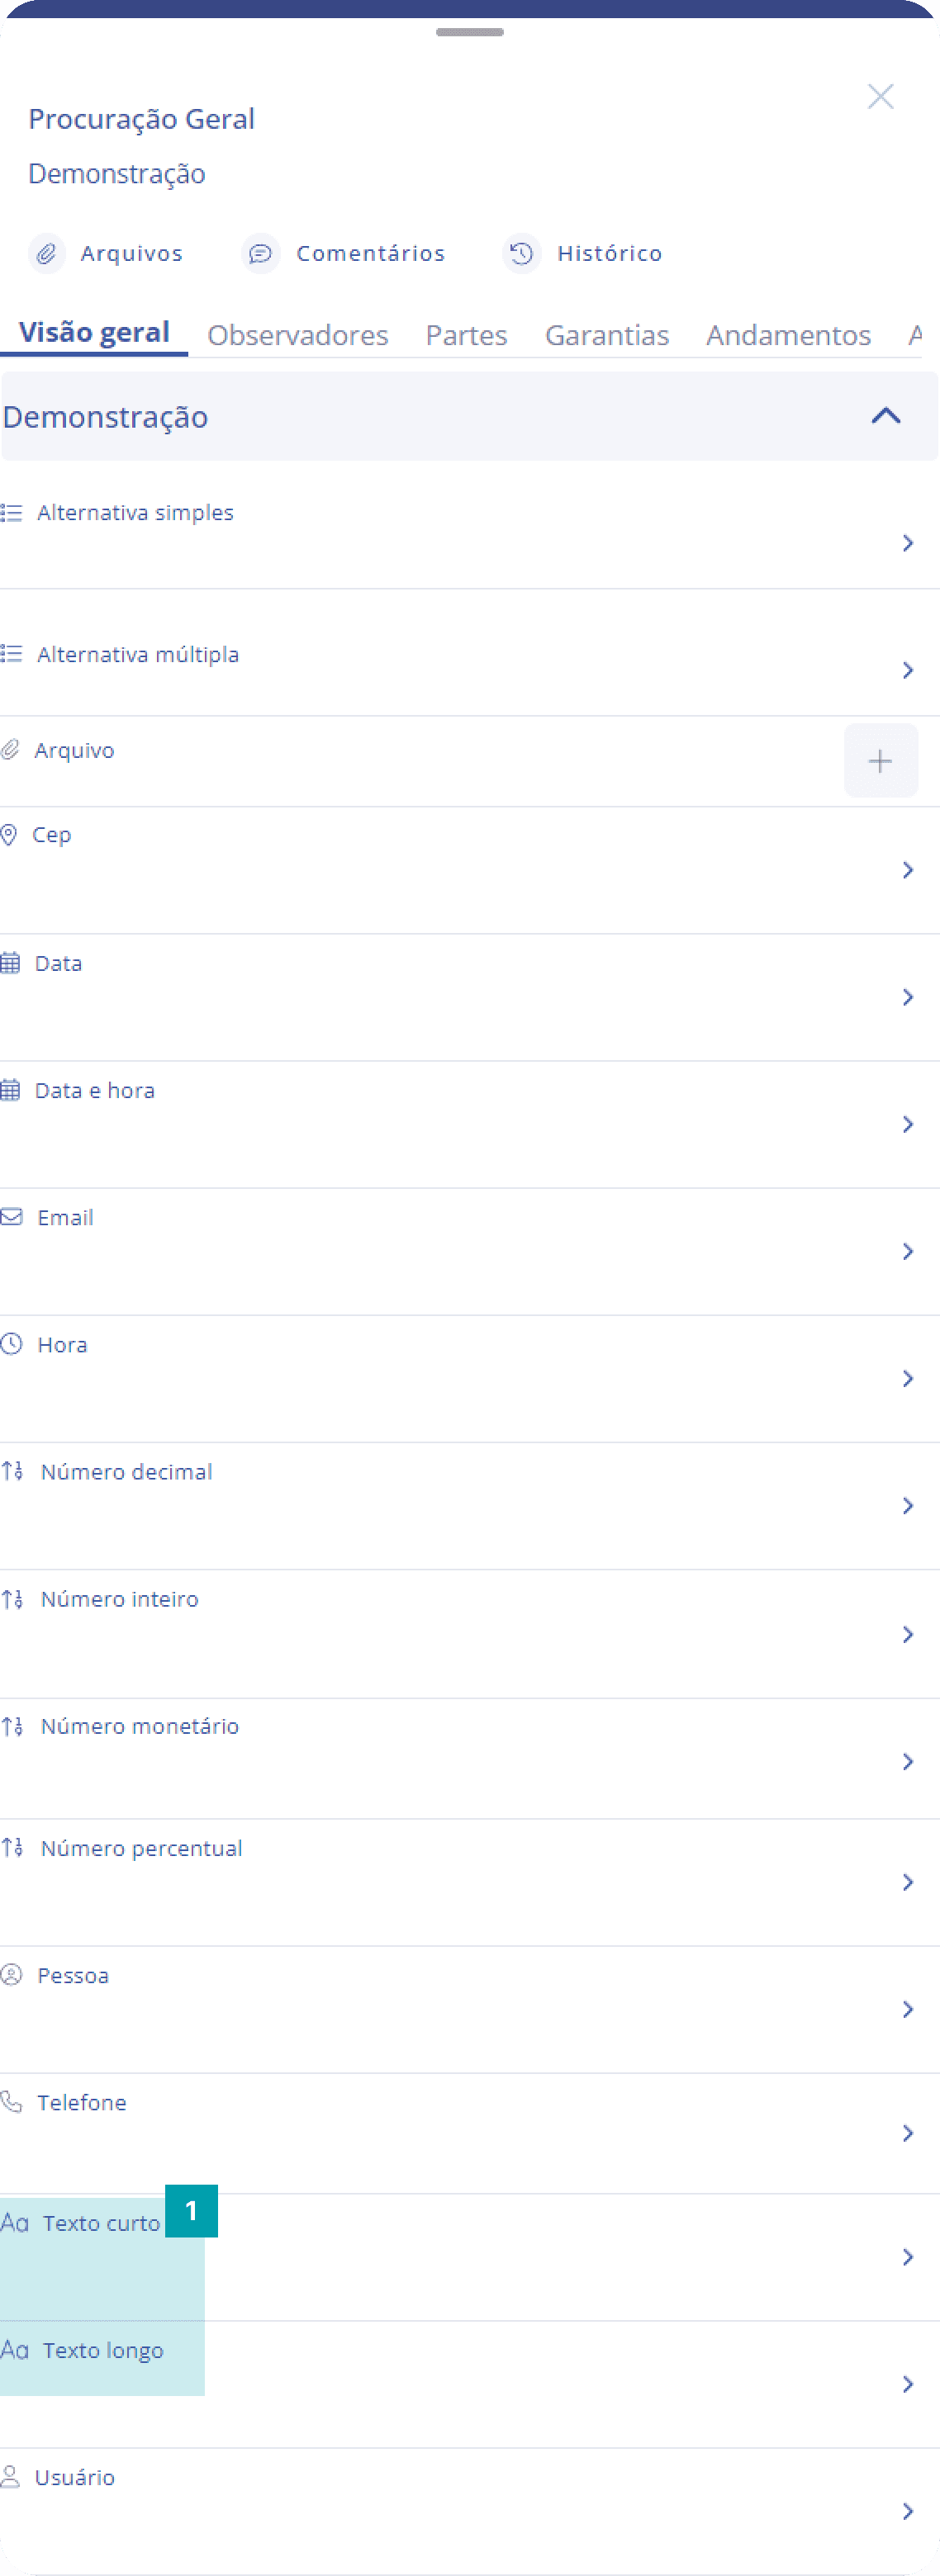
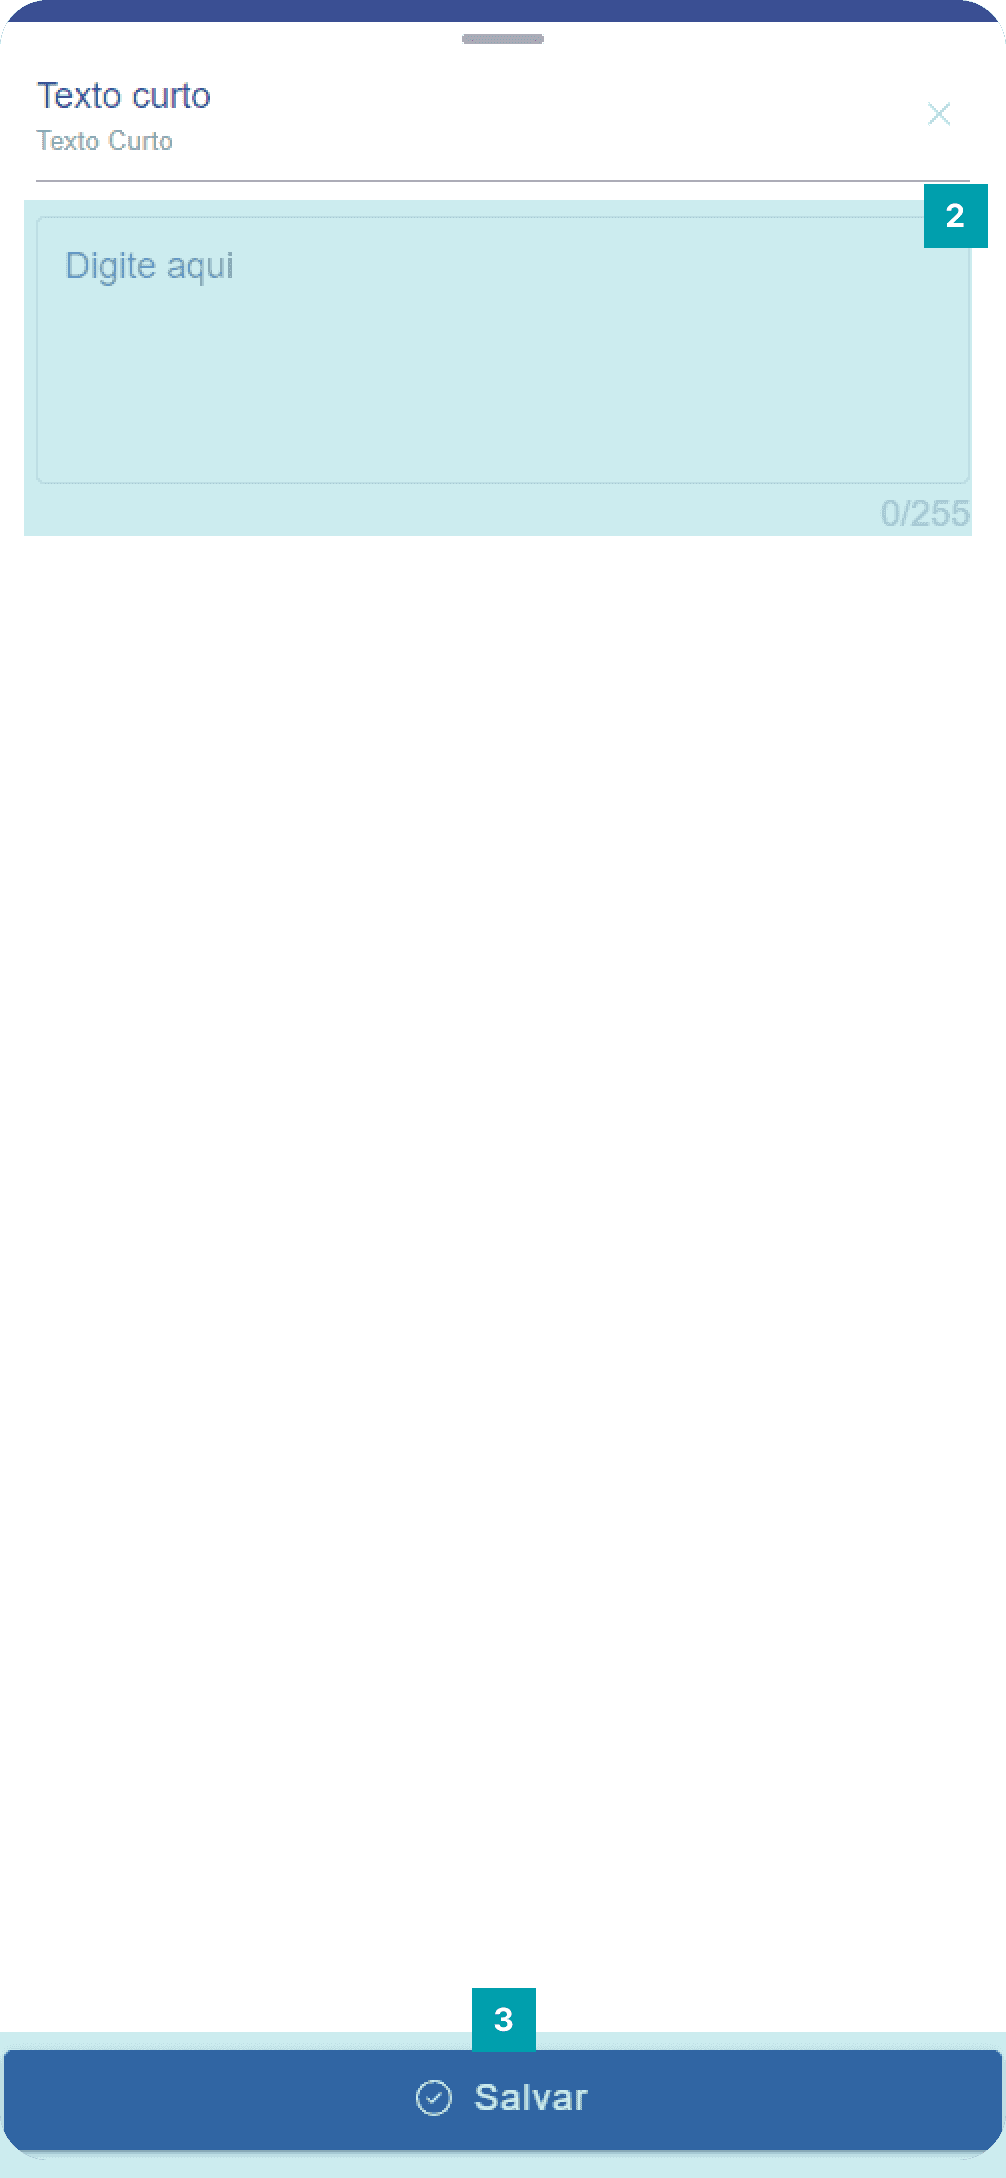
Dynamic fields of the type: Short text and Long text
Text fields are common in forms and allow free writing, with the long type providing a large number of characters that can be entered, while the short type has fewer available.
Click on the area of the dynamic field type Text to open its editing screen.
Type the desired text in the field's text area.
Save – Click the Save button to finish your editing.
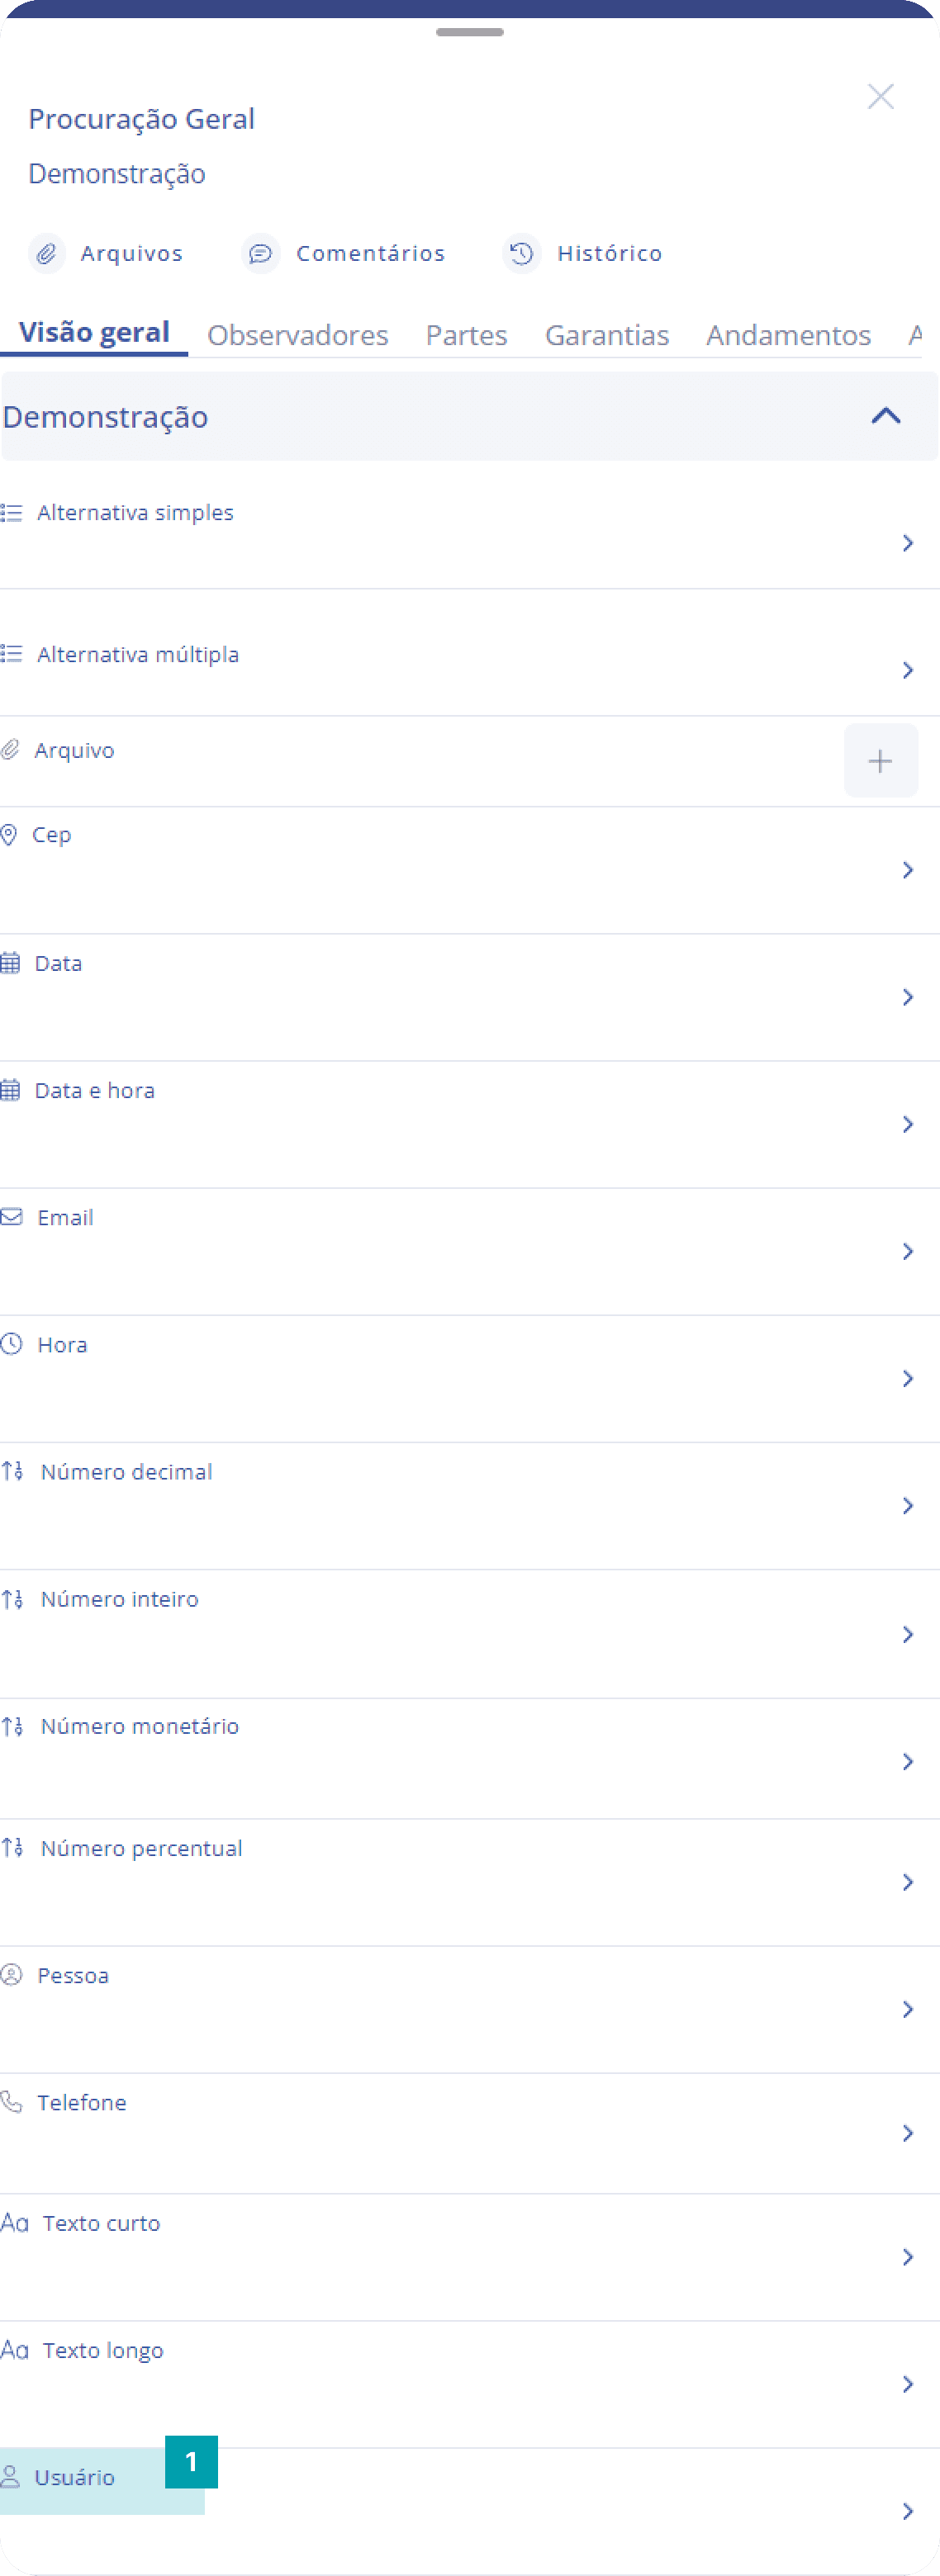
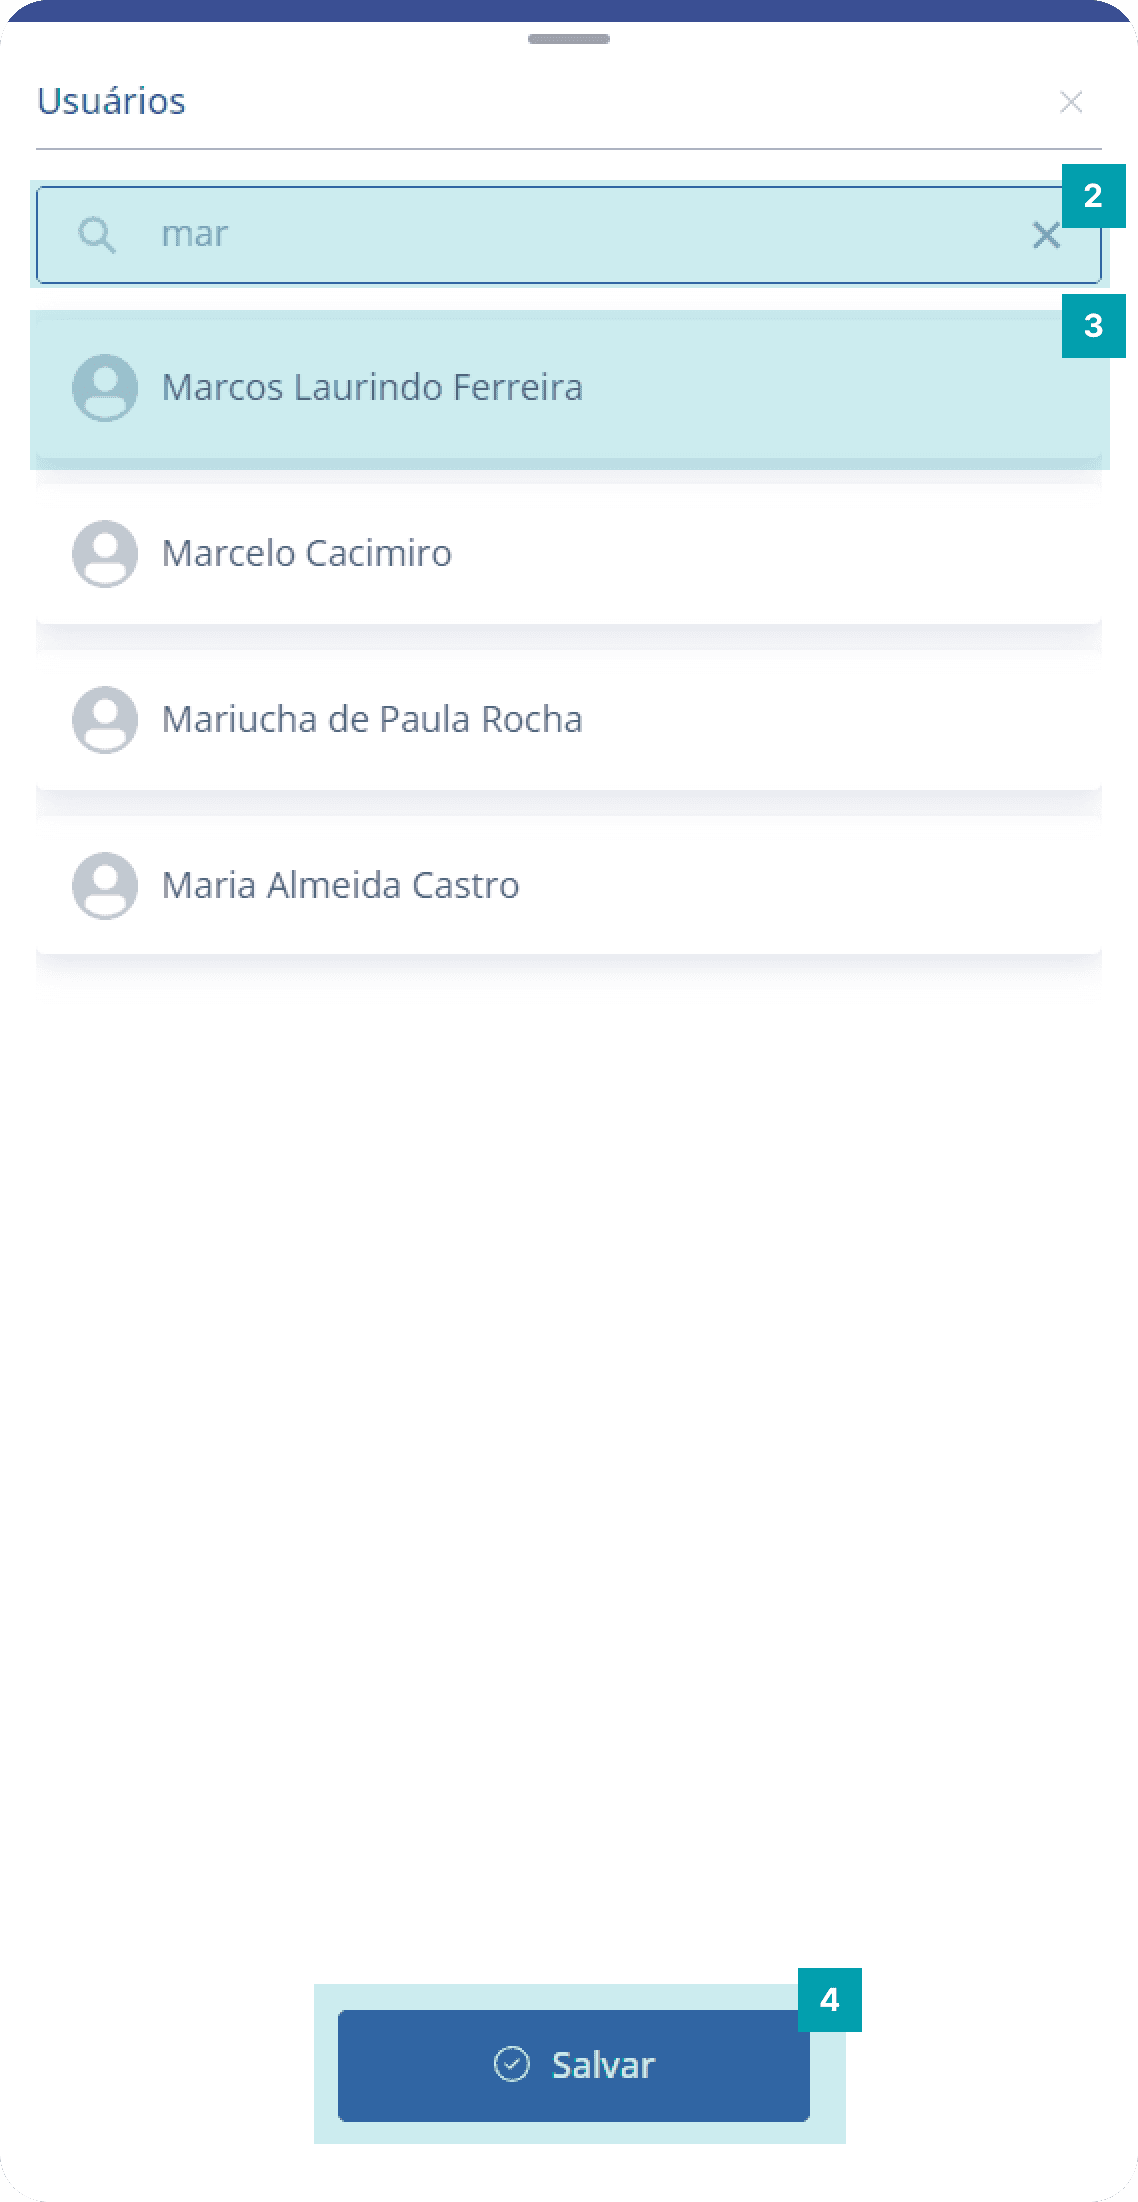
Dynamic field type: User
The field has a simple search and is intended to associate a system user with the unit.
Click on the area of the dynamic field type User to open its editing screen.
Search – Click the search field and type the name of the user you want.
Selection – Click on the area of the desired user to select it.
Save – Click the Save button to finish your editing.