
System fields and custom fields
Activity Fields is the screen where you configure all the fields that will appear in an activity's form. It gathers in a single place both System Fields — pre-defined by the platform — and Custom Fields — created and configured by your team.
Accessing Activity Fields
Open the main menu, select the Activities module, click on Settings, and then on Activity Types.
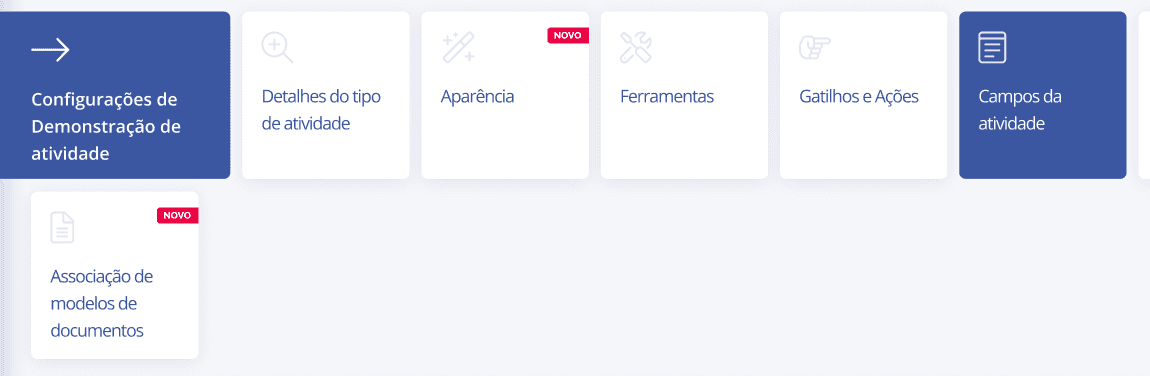
On the screen of the desired Activity Type, click on the Activity Fields card:
System Fields list
When accessing the screen, the first group displayed is System Fields. Each row presents: Field Name, Field Type, Mandatoriness, Behavior, and Notes:
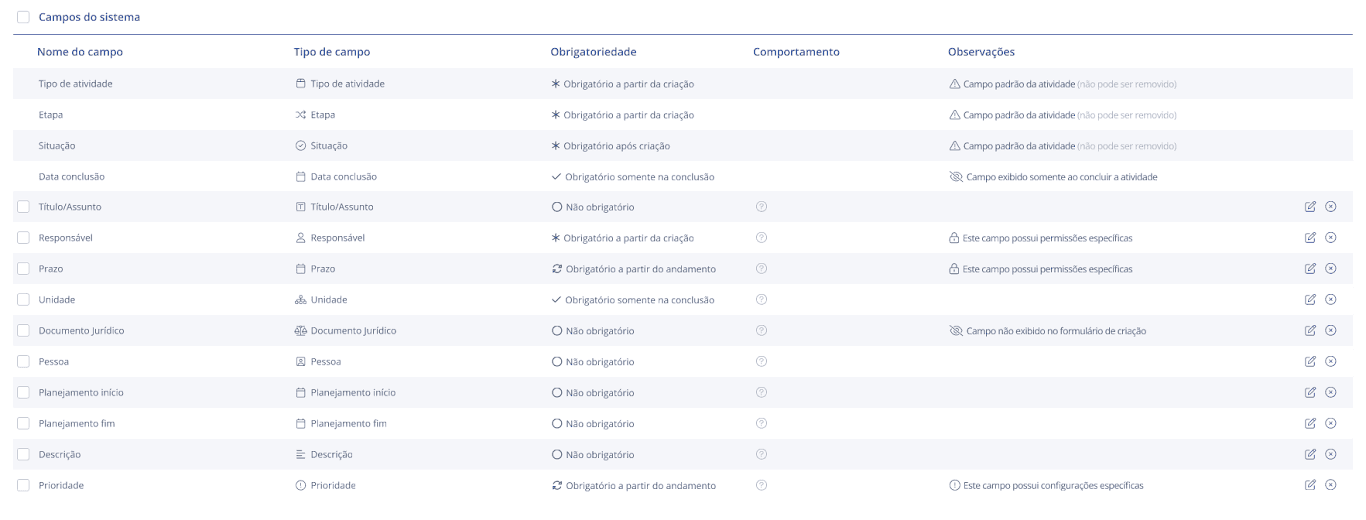
Field Name: name configured for the field.
Field Type: the data type (e.g., Title/Subject, Assignee, Due date).
Mandatoriness: when the field is required to be filled out — during creation, in progress, upon completion, or never.
Behavior: icons indicating active configurations: tooltip, hidden during creation, read-only, formula, and conditional by Stage.
Notes: extra information, such as the activity's default field (cannot be removed) or specific permissions.
Custom Fields list
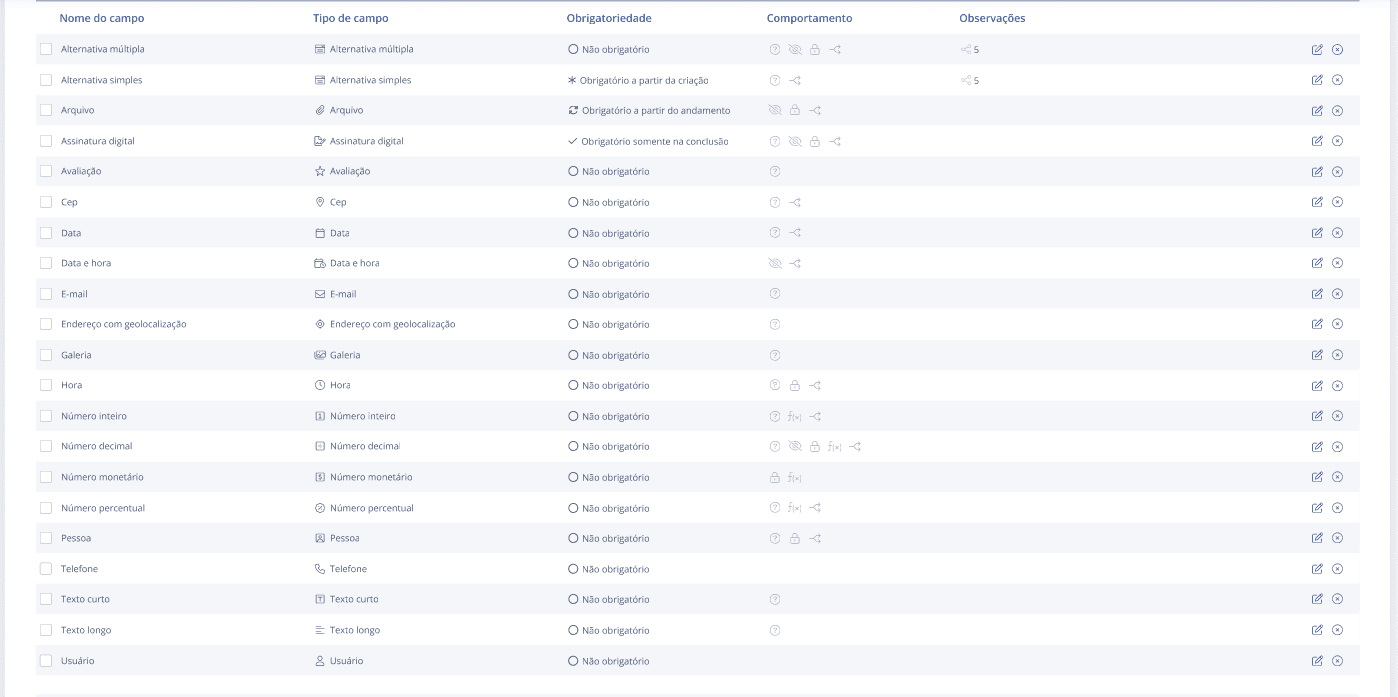
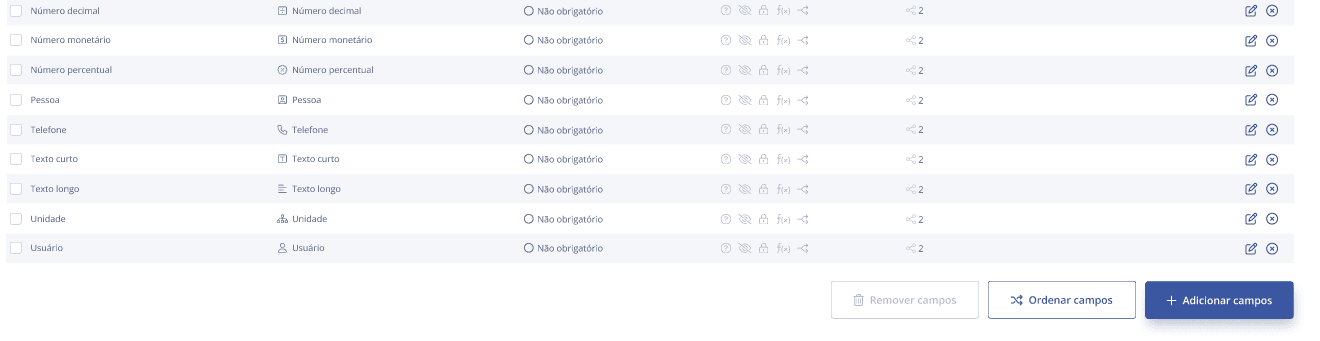
Below the System Fields, the Custom Fields appear organized into categories in alphabetical order. In the Notes column, a sharing icon is displayed when the field is used in more than one Activity Type:
Important: The fields Activity Type, Stage, Status, and Completion Date are mandatory and cannot be edited or removed.
Default system fields
When creating a new Activity Type, the following fields are automatically added:
Activity Type
Stage
Status
Completion Date
Title/Subject
Assignee
Due date
The remaining system fields (Unit, Legal Document, Contact, Priority, Planned Start, Planned End, and Description) can be added using the + Add fields button.
Ordering Custom Fields
The order of Custom Fields can be adjusted at any time. Click on the Order fields button at the bottom of the screen, drag the fields to the desired position, and click Save:
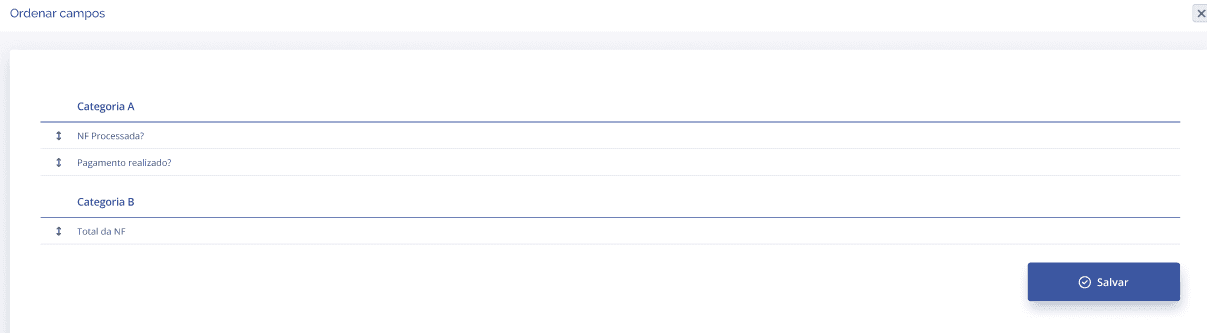
The order of the categories always remains alphabetical. Only the fields within each category can be reordered.
Fields shared between Activity Types
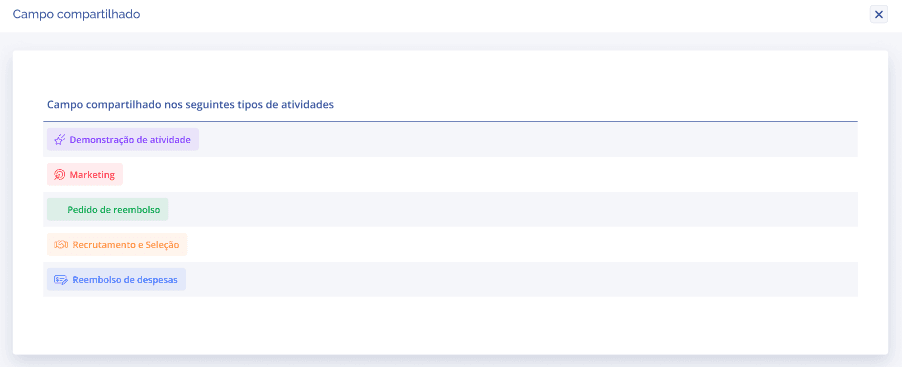
When a custom field is used in more than one Activity Type, click on the sharing icon in the Notes column to view all linked Activity Types:
Adding Fields
To add a field to the list, click on the + Add fields button in the lower right corner of the screen:
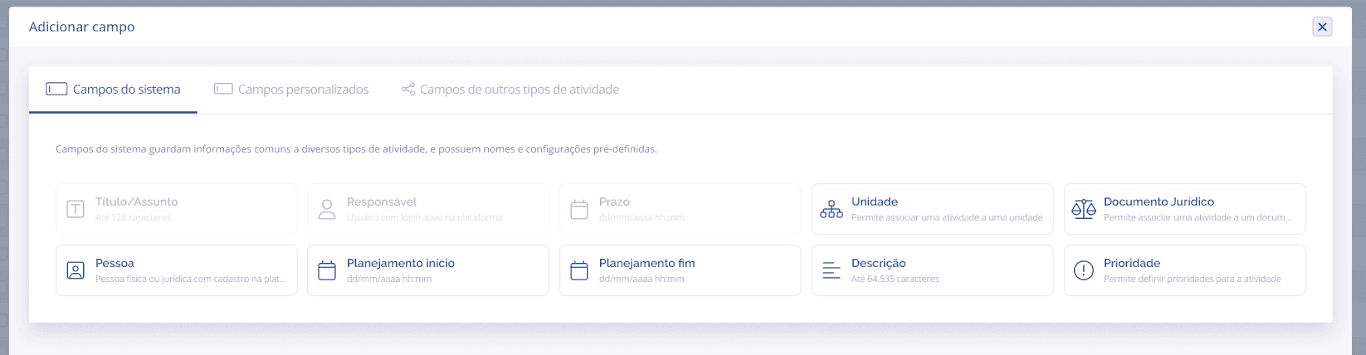
A window will open with three tabs: System Fields, Custom Fields, and Fields from other activity types.
System Fields tab
Displays all available system fields. Fields already present on the list are disabled — only those previously removed can be selected again:
Click on the desired field.
A configuration window will open:
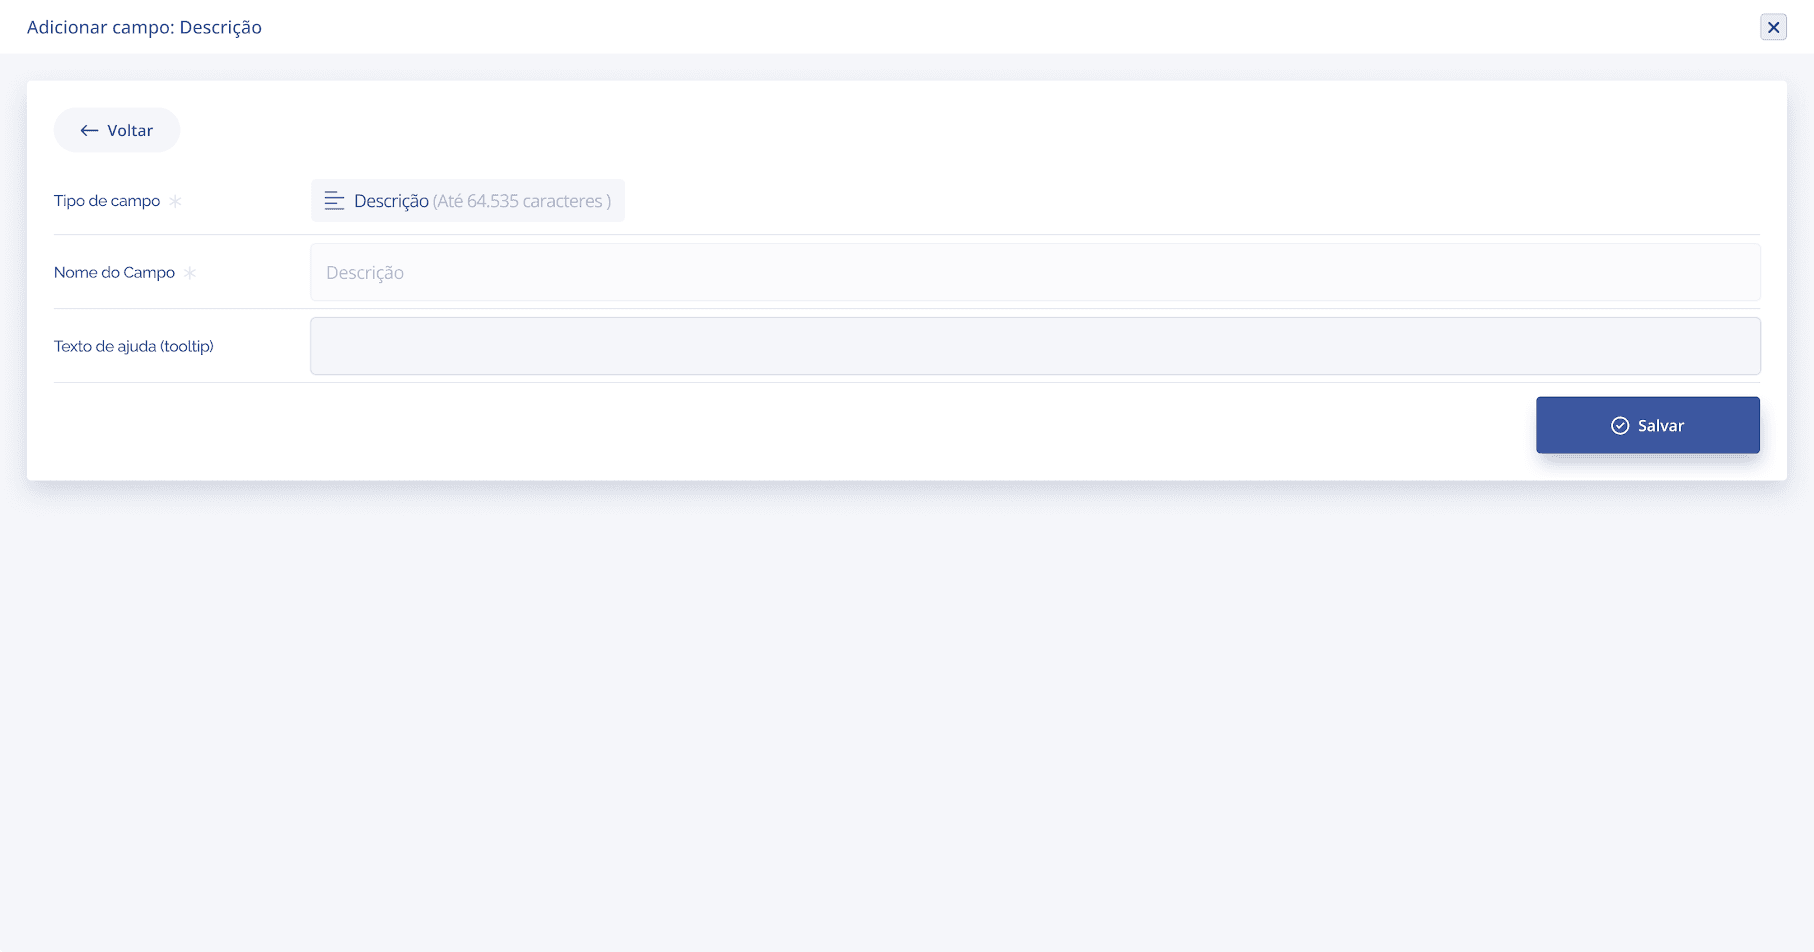
Field Type: displayed for informational purposes only, cannot be changed.
Field Name: pre-populated with the default name, cannot be changed.
Help text (tooltip): optional text displayed when hovering over the field within the activity.
Click Save. The field will be added to the list.
Custom Fields tab
Displays the types of fields available for creation. Fields of the same type can be added more than once to the same Activity Type:

Click on the desired type.
A configuration window will open:
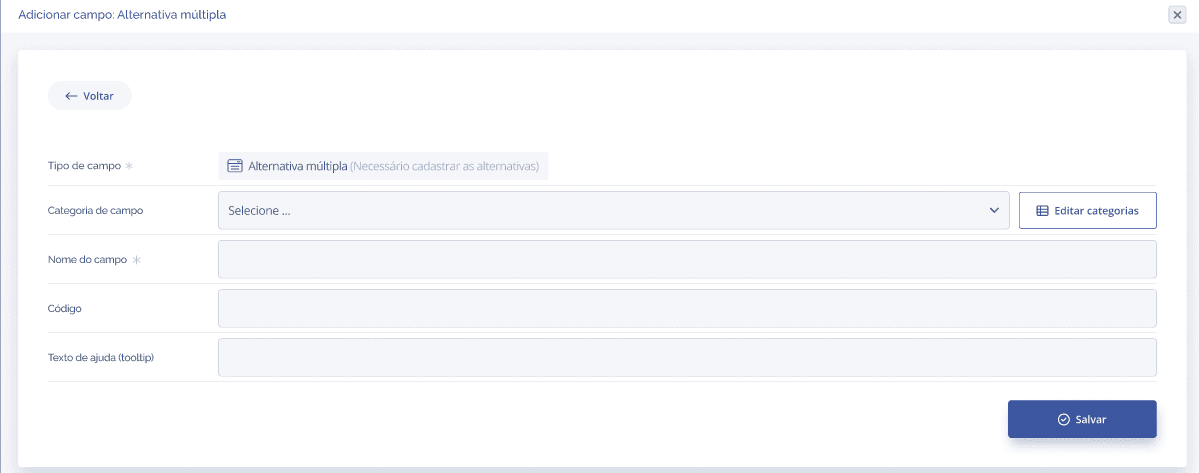
Field Type: displayed for informational purposes only.
Field Category: defines which group the field appears in within the list. Optional.
Field Name: visible name of the field in the activity. Required.
Code: identifier for use in integrations and formulas. Optional.
Help text (tooltip): guidance text when hovering over the field. Optional.
Click Save. The field will be created and will appear in the list under the selected category.
Check below all available custom field types:
Field Type | Description |
|---|---|
Multiple choice | Allows selecting more than one option. It is necessary to register the alternatives. |
Single choice | Allows selecting only one option. It is necessary to register the alternatives. |
File | Allows attaching a single file to the activity. |
Digital signature | Allows associating a digital signature with the activity. |
Rating | Rating from 1 to 5 stars. |
ZIP Code | Performs address search based on the provided ZIP code. |
Date | Date field in dd/mm/yyyy format. |
Date and time | Date and time field in dd/mm/yyyy hh:mm format. |
Allows adding one or more email addresses. | |
Address with geolocation | Allows adding an address with precise geographic location. |
Gallery | Allows adding multiple images to the activity. |
Time | Time field in hh:mm format. |
Decimal number | Number with up to 4 decimal places. |
Integer number | Integer number (1, 2, 3…). |
Currency number | Monetary value (e.g., 9.99). |
Percentage number | Percentage value (e.g., 10%). |
Contact | Links a natural or legal person registered on the platform. |
Phone | Allows adding phone numbers with country selection. |
Short text | Text up to 255 characters. |
Long text | Text up to 52,428 characters. |
User | Links a user with an active login on the platform. |
Fields from other activity types tab
Allows reusing custom fields already created in other Activity Types, sharing the field across different processes:
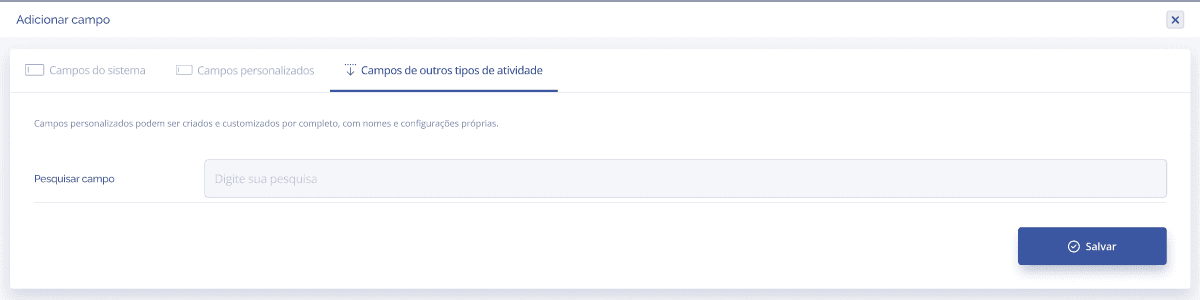
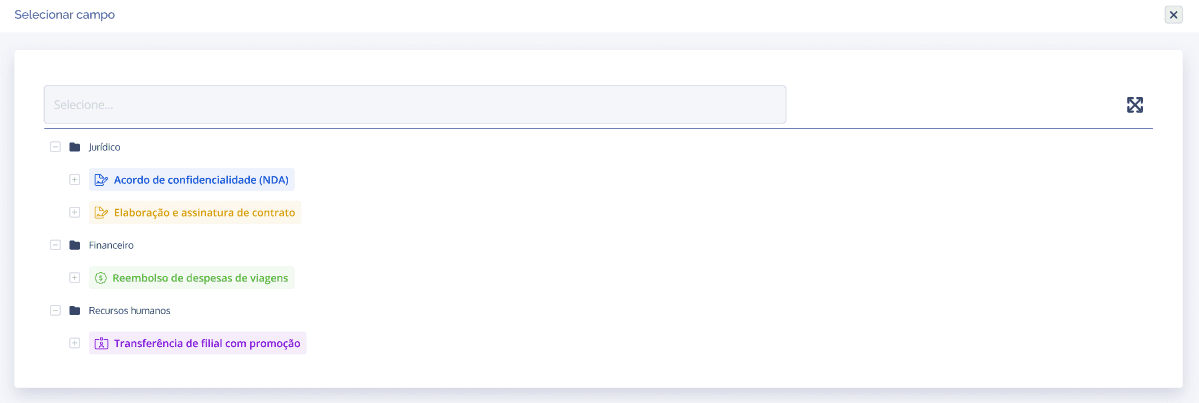
In the Search field box, click to open a navigable tree. Activity Types appear grouped by category:
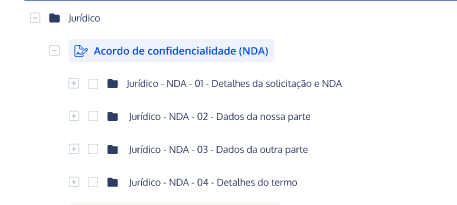
Click on the + to expand an Activity Type and view its categories and fields. Use the checkboxes to select the desired fields:
Click Save. The selected fields will be associated with the current Activity Type and will be marked as shared fields.
Attention: Shared fields have global properties (type, name, category, and code) that apply to all linked Activity Types. Changes to these properties affect all processes using the field.
Managing categories
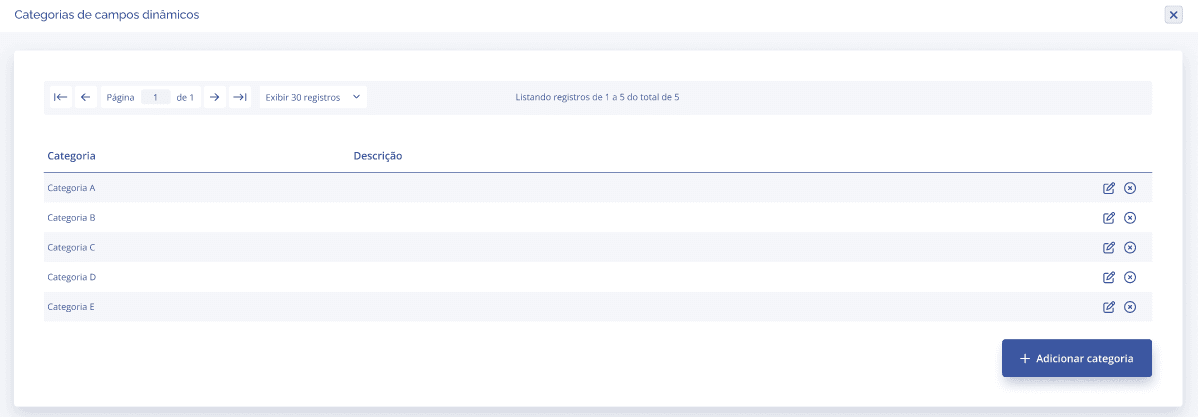
When configuring a custom field, click on Edit categories next to the Field Category field to manage the available categories:
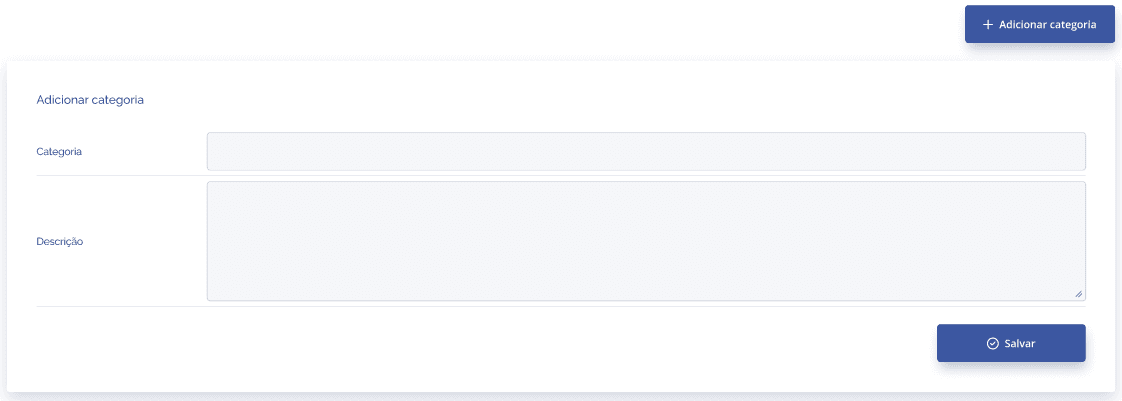
Click on + Add category. Fill in the name (required) and description (optional) and click Save:
In the category list, use the edit icon to rename and the delete icon to remove an existing category.
The created categories are available across all custom fields in the environment, regardless of the Activity Type.
Editing Fields
In the Activity Fields list, click on the edit icon (pencil) to the right of the desired field. A modal will open with the available configuration tabs for that field type.
Properties Tab — System Fields
For System Fields, the Properties tab displays the Field Type, the Field Name, and the Help text:
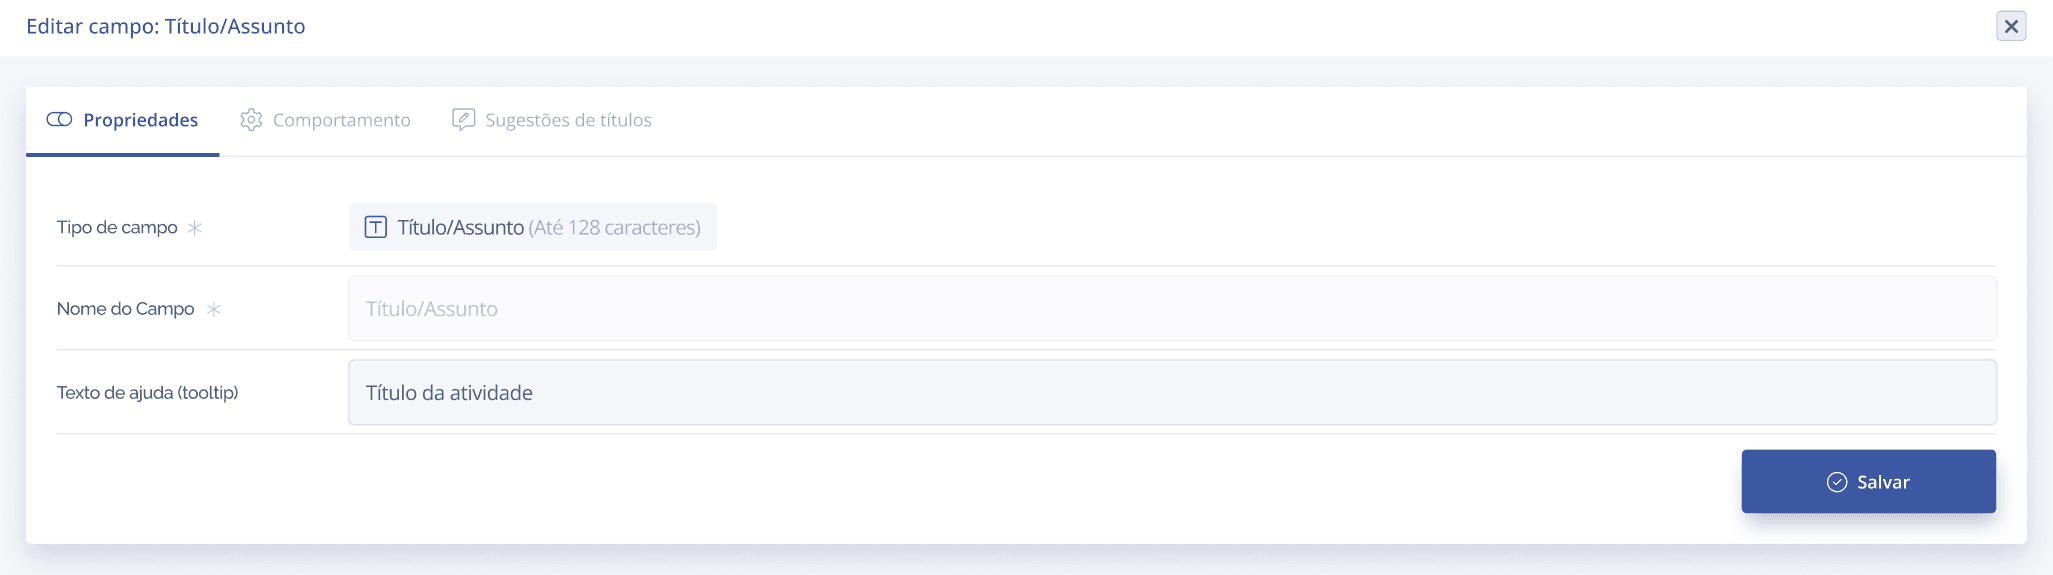
Field Type: displayed for informational purposes only. It cannot be changed.
Field Name: pre-populated and cannot be changed.
Help text (tooltip): optional text displayed when hovering over the field.
Behavior Tab — System Fields
The Behavior tab for System Fields allows configuring Mandatoriness. Click on the field to see the available options:
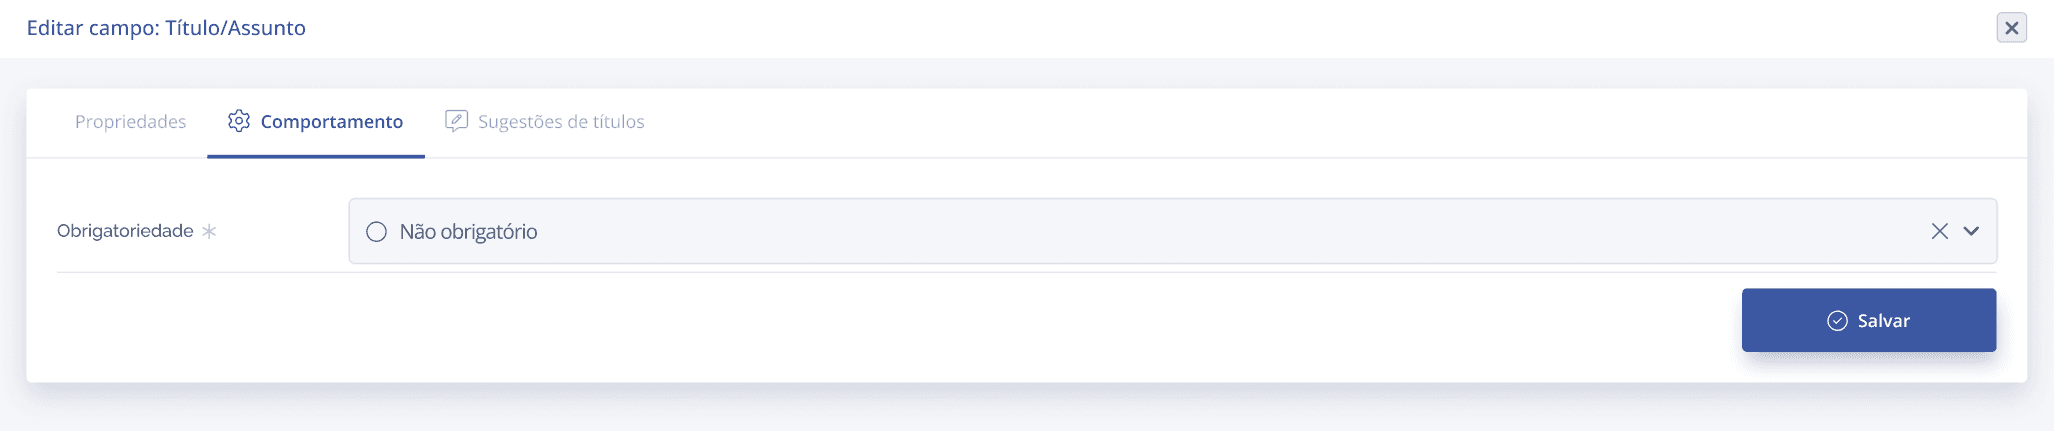
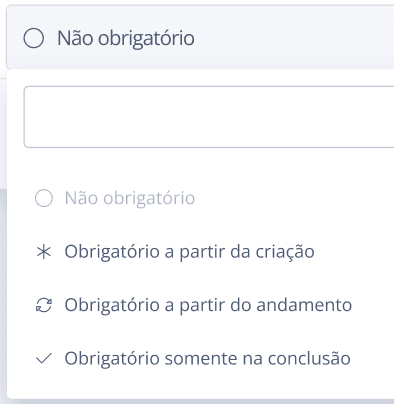
Not mandatory: the field can be left blank.
Mandatory from creation: must be filled in when creating the activity.
Mandatory from ongoing stage: must be filled in when setting the activity to in progress.
Mandatory only on completion: must be filled in when completing the activity.
Click Save to confirm.
Properties Tab — Custom Fields
For Custom Fields, the Properties tab aggregates the global configurations of the field — those that apply to all Activity Types using it:
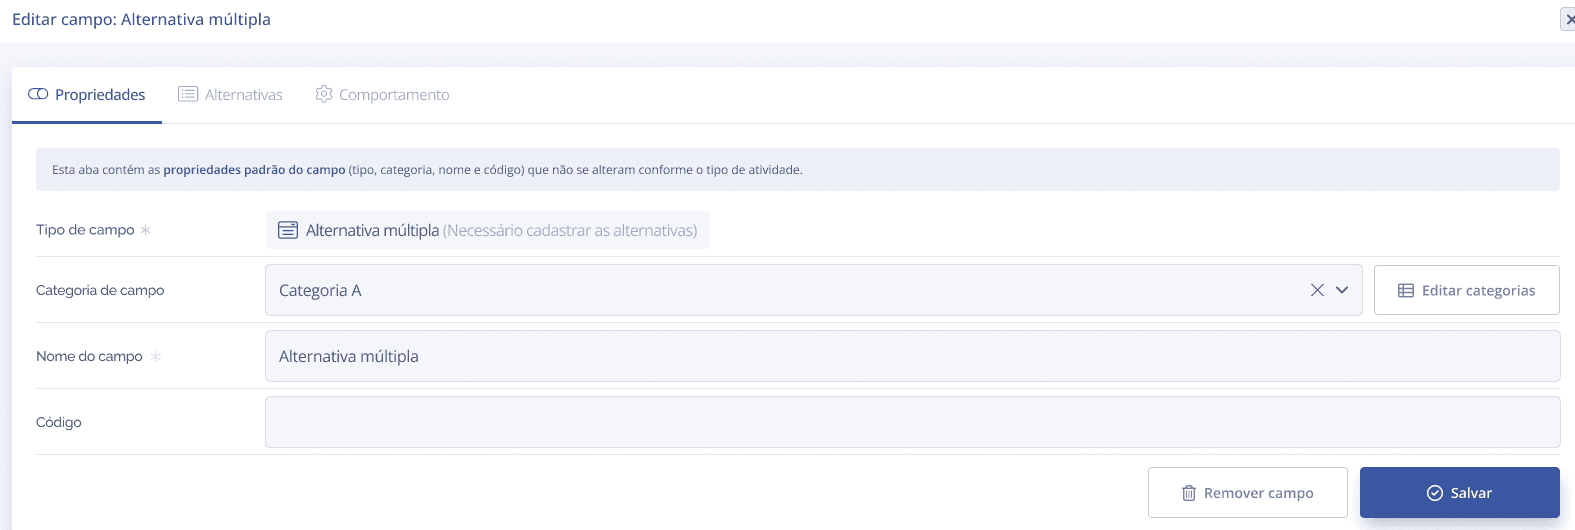
Field Type: displayed for informational purposes only. It cannot be changed.
Field Category: defines which group the field appears in within the list.
Field Name: visible name of the field in the activity. Required.
Code: field identifier for integrations and formulas.
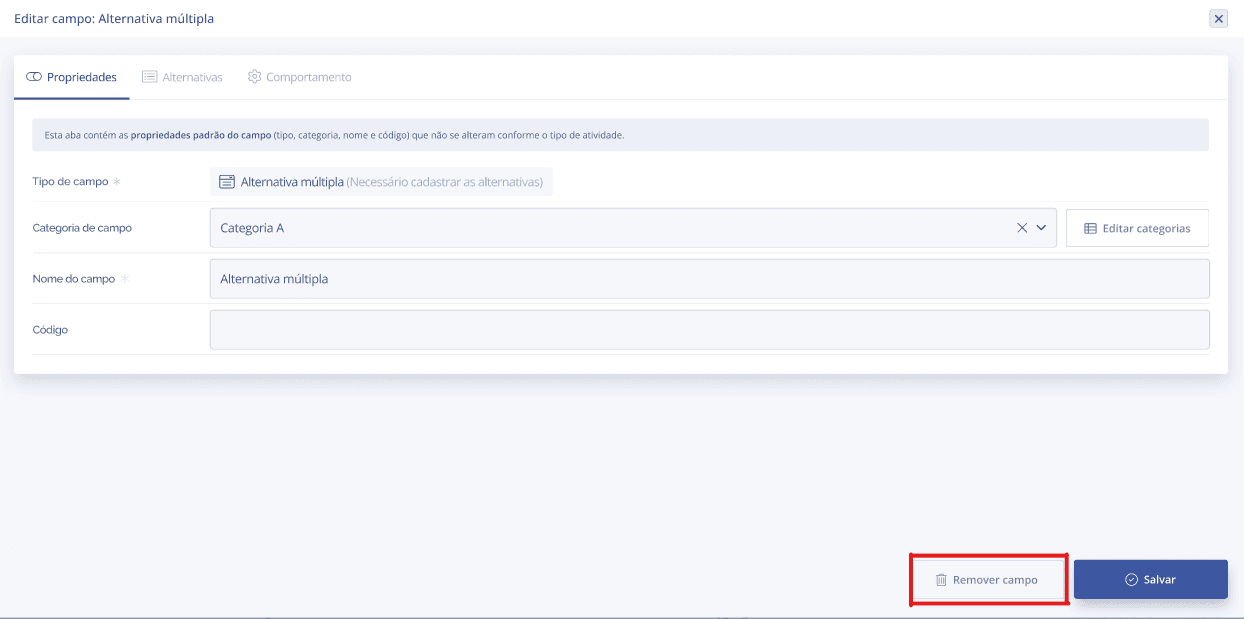
Tip: The Remove field and Save buttons are always visible at the bottom of the modal, with no need to scroll.
Behavior Tab — Custom Fields
The Behavior tab defines how the field behaves specifically in this Activity Type, without affecting other processes that share the field:

Mandatoriness: Not mandatory, Mandatory from creation, Mandatory from ongoing stage, or Mandatory only on completion.
Read-only field: when activated, the user cannot change the value after the initial entry.
Help text (tooltip): specific guidance text for this Activity Type.
Upon activity creation: allows defining a default value pre-filled automatically when creating the activity.
Conditionals by Stage: configures whether the field should be shown or hidden depending on the Stage the activity is currently in.
Click Save to confirm.
Alternatives Tab
The Alternatives tab is available exclusively for Single choice and Multiple choice field types. Here you manage the options that the user can select when filling out the field:
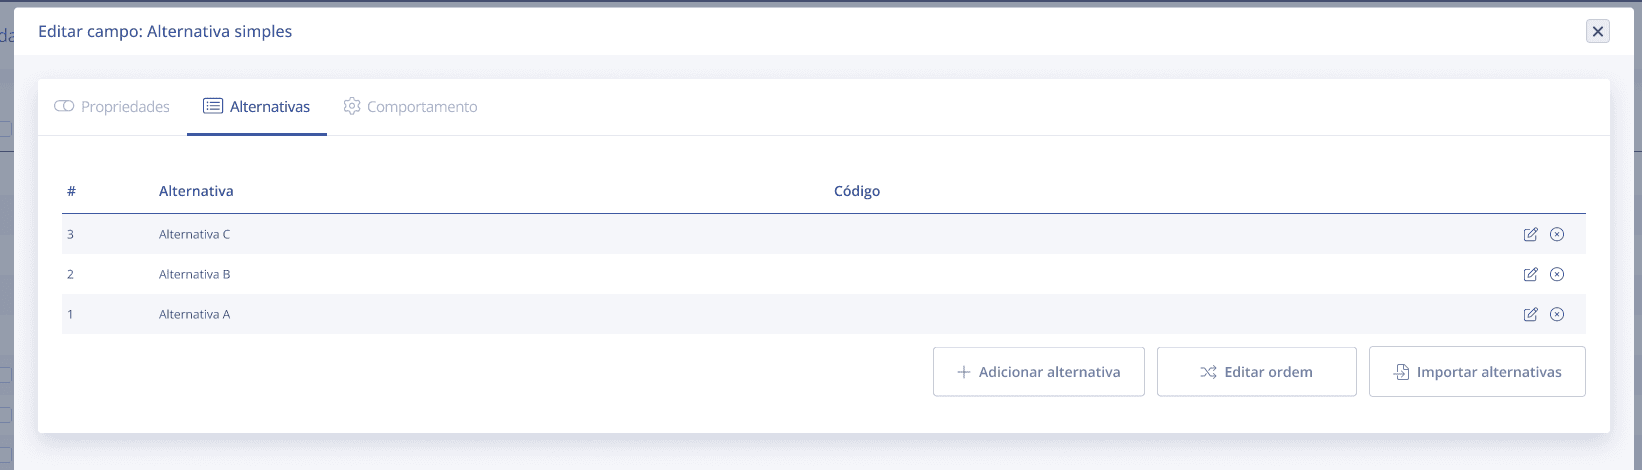
By clicking + Add alternative, a form will be displayed:
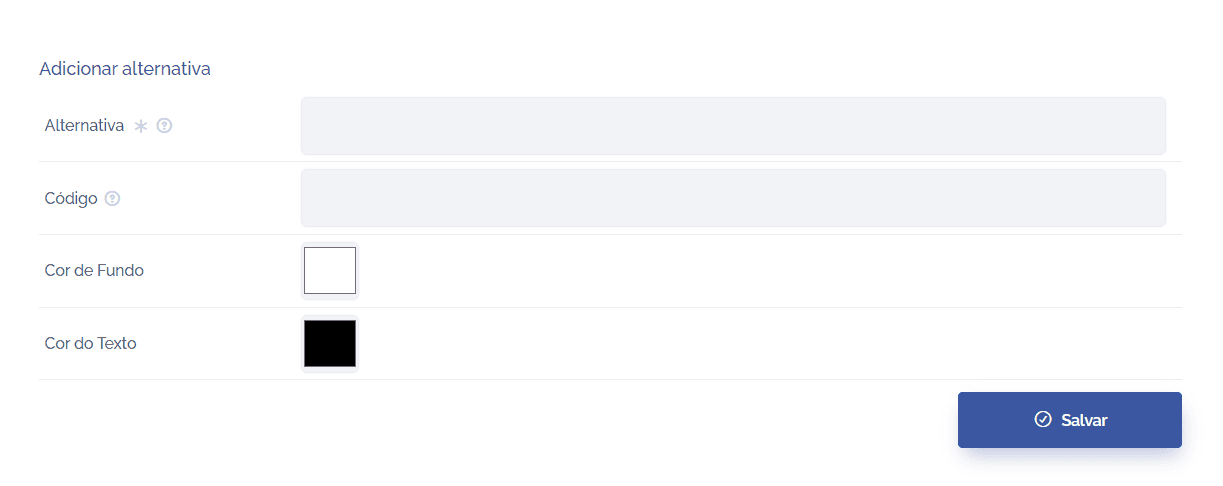
+ Add alternative: creates a new option. Fill in the name, code (optional), background color, and text color.
Edit order: opens the reordering screen. Drag the alternatives and click Save.
Import alternatives: copies alternatives from another dynamic field. Select the source field and click Save.
Edit alternative: click the edit icon next to the alternative to change its name, code, or colors.
Delete alternative: click the delete icon next to the alternative to remove it.
Removing Fields
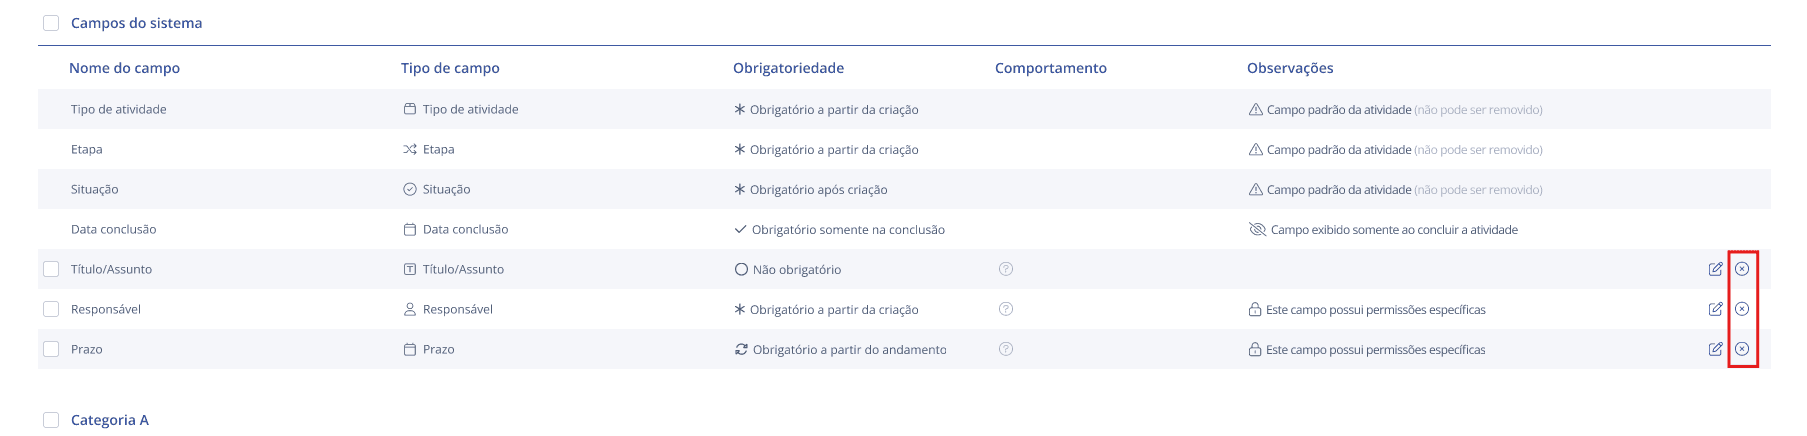
It is possible to remove fields from the list in three ways: using the × button on the field's row, using the Remove field button inside the edit modal, or in bulk using the checkboxes.
Using the × button on the list
Click on the × icon to the right of the field you want to remove. A confirmation message will be displayed:
A confirmation pop-up will be displayed:
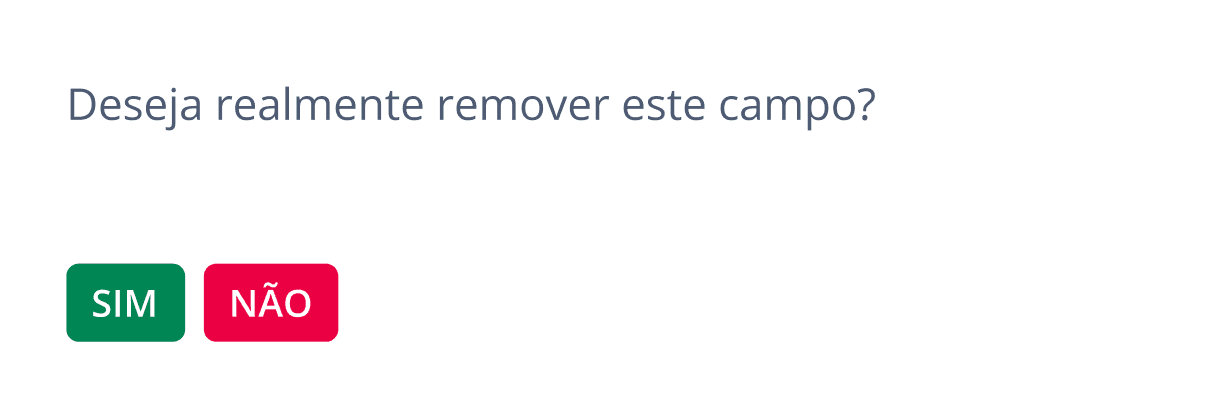
YES: the field is removed from the list.
NO: the action is canceled and the field is kept.
Using the Remove field button on edit modal
When editing a custom field, the Remove field button is available at the bottom left of the modal, next to the Save button:
Bulk removal via checkboxes
Check multiple fields using the checkboxes on the left of the list and click on the Remove fields button to delete them all at once:

Removal rules
The behavior when removing a field varies depending on its type:
Field Type | What happens upon removal | How to recover |
|---|---|---|
System Field | The field is removed from this Activity Type's list. | Can be re-added via the + Add fields button → System Fields tab. |
Exclusive Custom Field | The field undergoes soft deletion and no longer appears on the list. | It is necessary to create a new field. |
Shared Custom Field | The field is dissociated only from this Activity Type. Other processes are unaffected. | Can be linked again via the Fields from other activity types tab. |
Important: The fields Activity Type, Stage, Status, and Completion Date do not have a removal option. They are mandatory and will always be present in the list.
Identifying shared fields before removing
Shared custom fields display a sharing icon with the number of linked Activity Types. Click on the icon to view the list before removing the field.
Tip: Always check the linked Activity Types before removing a shared field. Dissociation affects only the current Activity Type, but edits to properties impact all processes.